
The Central Hub for DSM Community and Information

For 1990-1999 Mitsubishi Eclipse, Eagle Talon, Plymouth Laser, and Galant VR-4 Owners. This is where the DSM platform history is documented and archived. Log in to help us in our mission, and to remove most ads from the browsing experience.

518328147_10162920648317559_562763132815609470_n.jpg

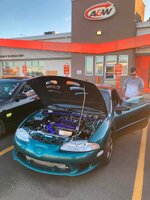
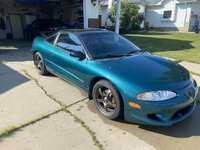
1998 Eagle Talon TSI AWD

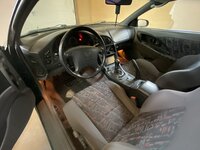
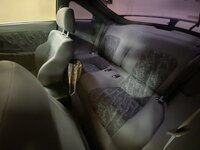
Rare 98 black and green talon with grey confetti interior, no sunroof.

This site may earn a commission from merchant affiliate links, including eBay, Amazon, and others.

The hood looks pretty sweet! The color works with the wheels IMO. Looking great.
Appreciate it. I’m gonna give it a few months, and if I decide to keep the copper look, then I may order a full lip kit and spoiler to tie it together. Then join the long wait list for Carbonetics parts.
 
Last edited:
No doubt, I'm patiently waiting on a Carbonetics spoiler. Looking forward to seeing what else you have in the works for the build.
 
August 2026 Update – More Heat Issues, Throttle Body Rebuild, and Window Switch Problems

To start the month off, after cruising around and doing a couple of pulls, my driver's-side 12" SPAL puller fan melted again.

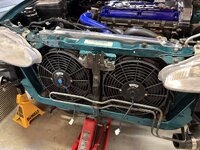
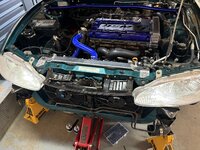
I thought I had previously solved this issue by installing a turbo blanket and exhaust wrap, and I figured adding the vented Carbonetics hood would further help reduce underhood temperatures. But sure enough, the fan melted once again. So, it was time to go back to the drawing board and come up with a different cooling setup. This time, I decided to run a combination of pusher fans and a puller fan. I ended up using two Performance World 8A reversible fans that I already had lying around, along with my last spare 12" SPAL puller fan. I reversed the polarity on the Performance World fans to change their direction of airflow, wired them together, and mounted them on the front side of the A/C condenser behind the FMIC. I then installed the SPAL puller on the passenger side of the radiator. The result is a setup with dual pushers on the front and a puller on the passenger side of the radiator. It's definitely a little louder with all three fans running, but the results have been worth it. Engine temperatures are now holding around 186°F.

IMG_6936.jpegIMG_6939.jpegIMG_6949.jpeg

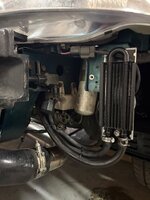
After reinstalling the FMIC, I had approximately 1/4" of clearance between the back of the intercooler and the pusher fan motors. That was enough room to make the fans work, but unfortunately not enough to retain the factory power steering cooling loop. So, I removed the factory hardline loop from the front of the car and installed a Derale 13210 power steering cooler beneath the driver's-side headlight, behind the front bumper duct where it can receive some airflow. While I was at it, I flushed the power steering system, refilled it with Red Line 30404 Power Steering Fluid, and bled the system. The power steering actually feels noticeably smoother now.

IMG_6993.jpegIMG_6999.jpeg

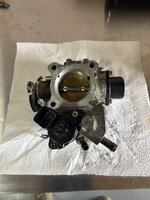
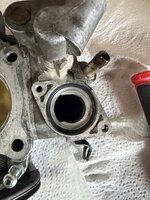
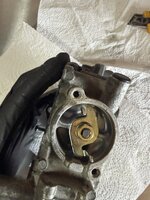
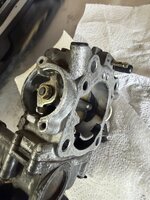
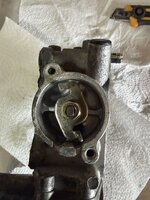
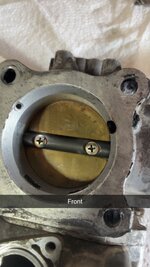
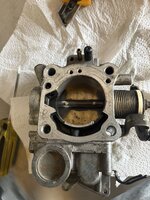
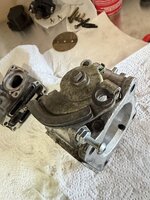
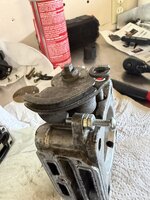
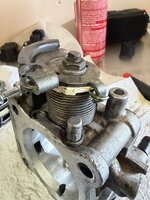
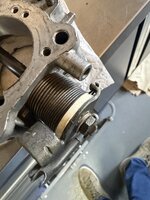
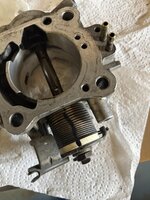
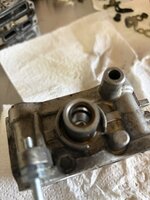
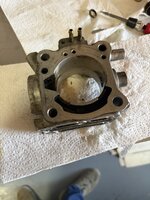
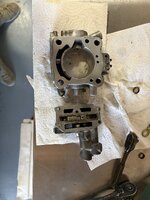
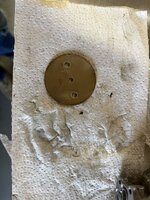
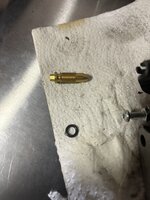
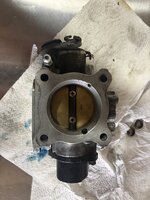
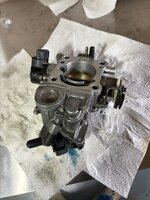
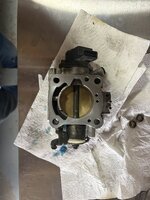
Since I had already drained the coolant to remove the radiator during the fan installation, I figured it was also a good time to rebuild my 2G throttle body and finally install my FIAV bypass plate. From previous vacuum testing, I knew my throttle body shaft seals were leaking, and I had also suspected the FIAV was causing my intermittent high-idle issues.

So, the throttle body came off for a rebuild.
IMG_6955.jpegIMG_6957.jpegIMG_6958.jpegIMG_6959.jpegIMG_6960.jpegIMG_6961.jpegIMG_6962.JPGIMG_6963.jpegIMG_6965.jpegIMG_6966.jpegIMG_6967.jpegIMG_6968.jpegIMG_6969.jpegIMG_6970.jpegIMG_6972.jpegIMG_6973.jpegIMG_6974.jpegIMG_6975.jpegIMG_6976.jpegIMG_6977.jpegIMG_6978.jpegIMG_6980.jpeg

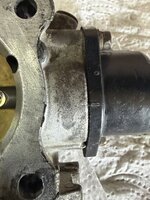
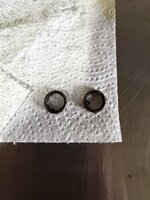
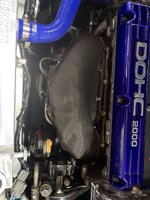
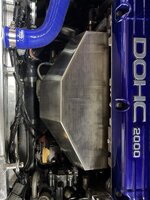
I installed new shaft seals, the FIAV bypass plate, and a new billet BISS screw from FOBA Motorsports. To make the TPS adjustment easier during reinstallation, I also scribed a small reference mark between the throttle body and TPS before removing it so I had a good starting point for the initial startup. While everything was apart, I also installed a Turbo Performance Products exhaust manifold heat blanket to further reduce under hood temperatures, then reinstalled the Extreme PSI heat shield over top.

IMG_7021.jpegIMG_7023.jpeg

Then it was finally time for a test drive.

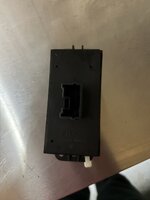
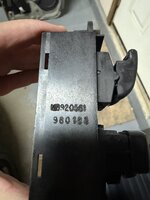
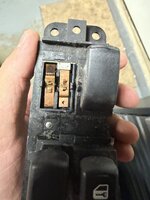
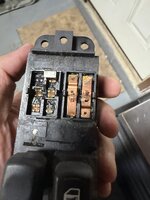
Unfortunately, the Talon had one more issue waiting for me. My driver's-side window switch decided to fail. The window would roll down, but not back up, which initially had me thinking either a wire had broken or the switch itself was dirty or failing. Thankfully, the fix was much simpler. I pulled the switch apart, cleaned out the accumulated gunk, and got it working properly again. And, of course, since I already had the door panel off, I figured it was the perfect opportunity to add some sound deadening to the door. I used some leftover Siless Max 120 mil CLD and 157 mil closed-cell foam. I applied the CLD to both the inner and outer door skins and added the closed-cell foam to the back of the interior door panel. Now I'll just have to do the same thing on the passenger side.

IMG_7039.jpegIMG_7040.jpegIMG_7041.jpegIMG_7042.jpeg

But that's it for now.

IMG_7035.JPG

I have about six weeks of decent weather left before the snow starts hitting us here in Fort McMurray, Alberta, so for now I'm going to continue driving and enjoying the Talon while I get everything ready for this winter's plans. The next major phase will include the fuel system and turbo upgrades.

Stay tuned for more.
 
August 2026 Update – More Heat Issues, Throttle Body Rebuild, and Window Switch Problems

To start the month off, after cruising around and doing a couple of pulls, my driver's-side 12" SPAL puller fan melted again.

I thought I had previously solved this issue by installing a turbo blanket and exhaust wrap, and I figured adding the vented Carbonetics hood would further help reduce underhood temperatures. But sure enough, the fan melted once again. So, it was time to go back to the drawing board and come up with a different cooling setup. This time, I decided to run a combination of pusher fans and a puller fan. I ended up using two Performance World 8A reversible fans that I already had lying around, along with my last spare 12" SPAL puller fan. I reversed the polarity on the Performance World fans to change their direction of airflow, wired them together, and mounted them on the front side of the A/C condenser behind the FMIC. I then installed the SPAL puller on the passenger side of the radiator. The result is a setup with dual pushers on the front and a puller on the passenger side of the radiator. It's definitely a little louder with all three fans running, but the results have been worth it. Engine temperatures are now holding around 186°F.

View attachment 799430View attachment 799431View attachment 799395

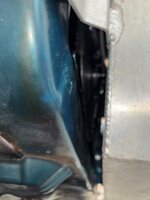
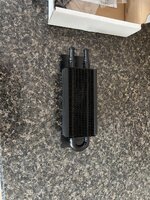
After reinstalling the FMIC, I had approximately 1/4" of clearance between the back of the intercooler and the pusher fan motors. That was enough room to make the fans work, but unfortunately not enough to retain the factory power steering cooling loop. So, I removed the factory hardline loop from the front of the car and installed a Derale 13210 power steering cooler beneath the driver's-side headlight, behind the front bumper duct where it can receive some airflow. While I was at it, I flushed the power steering system, refilled it with Red Line 30404 Power Steering Fluid, and bled the system. The power steering actually feels noticeably smoother now.

View attachment 799422View attachment 799423

Since I had already drained the coolant to remove the radiator during the fan installation, I figured it was also a good time to rebuild my 2G throttle body and finally install my FIAV bypass plate. From previous vacuum testing, I knew my throttle body shaft seals were leaking, and I had also suspected the FIAV was causing my intermittent high-idle issues.

So, the throttle body came off for a rebuild.
View attachment 799397View attachment 799399View attachment 799401View attachment 799403View attachment 799404View attachment 799405View attachment 799406View attachment 799407View attachment 799408View attachment 799409View attachment 799410View attachment 799411View attachment 799412View attachment 799413View attachment 799414View attachment 799415View attachment 799416View attachment 799417View attachment 799418View attachment 799419View attachment 799420View attachment 799421

I installed new shaft seals, the FIAV bypass plate, and a new billet BISS screw from FOBA Motorsports. To make the TPS adjustment easier during reinstallation, I also scribed a small reference mark between the throttle body and TPS before removing it so I had a good starting point for the initial startup. While everything was apart, I also installed a Turbo Performance Products exhaust manifold heat blanket to further reduce under hood temperatures, then reinstalled the Extreme PSI heat shield over top.

View attachment 799424View attachment 799425

Then it was finally time for a test drive.

Unfortunately, the Talon had one more issue waiting for me. My driver's-side window switch decided to fail. The window would roll down, but not back up, which initially had me thinking either a wire had broken or the switch itself was dirty or failing. Thankfully, the fix was much simpler. I pulled the switch apart, cleaned out the accumulated gunk, and got it working properly again. And, of course, since I already had the door panel off, I figured it was the perfect opportunity to add some sound deadening to the door. I used some leftover Siless Max 120 mil CLD and 157 mil closed-cell foam. I applied the CLD to both the inner and outer door skins and added the closed-cell foam to the back of the interior door panel. Now I'll just have to do the same thing on the passenger side.

View attachment 799426View attachment 799427View attachment 799428View attachment 799429

But that's it for now.

View attachment 799432

I have about six weeks of decent weather left before the snow starts hitting us here in Fort McMurray, Alberta, so for now I'm going to continue driving and enjoying the Talon while I get everything ready for this winter's plans. The next major phase will include the fuel system and turbo upgrades.

Stay tuned for more.
I would seal the inlet to the fmic in the bumper cover to disallow air from going around the sides. And then seal between the fmic and the radiator to ensure the air doesn’t escape between those two. Ducting plays a big part of the cooling process.
 
I would seal the inlet to the fmic in the bumper cover to disallow air from going around the sides. And then seal between the fmic and the radiator to ensure the air doesn’t escape between those two. Ducting plays a big part of the cooling process.
Agreed.

Planning to build some ducting during the off season this year. Gonna be a tight fit, but I think it’ll help a lot.
 
Add Value - Be Respectful - No Trolling - No Misinformation - Participate Often!
Support Vendors who Support the DSM Community

Build Thread Updates

Latest Classifieds

Back
Top