The Central Hub for DSM Community and Information

For 1990-1999 Mitsubishi Eclipse, Eagle Talon, Plymouth Laser, and Galant VR-4 Owners. This is where the DSM platform history is documented and archived. Log in to help us in our mission, and to remove most ads from the browsing experience.

DSC02679 - Copy.JPG

Long awaited decade long project

I have owned this car for almost a decade, and it has been running roughly for a year or two. My goal is to get it running now that I have finished school.

This site may earn a commission from merchant affiliate links, including eBay, Amazon, and others.

athlete3344

15+ Year Contributor
408
71
May 1, 2010
Tampa, Florida
athlete3344 submitted a new DSM Profile :

Long awaited decade long project


Read more about this vehicle here...[DOUBLEPOST=1408246820][/DOUBLEPOST]I figured I should start a build journal, because if I dont now then I never will. I also intend to link a lot of the sources of information I find when I decide to go down a certain path in my build. If just one person can get a little bit of use out of this, I will be happy. Words can not describe how valuable these forms are.

When I was 17, I purchased my first DSM. It ran for a couple of years, then the oil pump seized and its been sitting ever since. I have been transporting parts from apartment to apartment through school, finding homes for the shell, and constantly looking forward to the day I could begin working on this car again. That day has came. I have finished school and have become gainfully employeed as a process engineer.

Now to the build, sorry for the randomness, posting as I finish chunks of work.

Engine bay empty and dirty. Before.

DSC02648.JPG


After. I used a couple shaker cans of primer, rust inhibitor, and flat black. On my next project, I will remove all the lines prior to painting.
DSC02679 - Copy.JPG


This head was difficult to identify, but Im fairly certain is a 1g 6 bolt hyundai head, even though it has different sized exhaust studs. I watched Jafromobile's Cylinder Head 204 video and ported my head. . If you havnt watched any of his videos, stop what your doing and watch them all. He has an insane amount of knowledge, know how, and tutorial videos about the 4g63 engine.

Exhaust
exhaust port 2.jpg


Intake
intake port redone 1.jpg


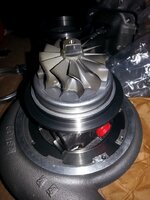
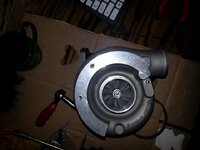
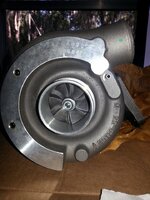
I will upload a few more pics of progress eventually. Since these I have finished oil port mods on the block, taken a few passes over the combustion chamber to clean it up a bit, and gotten a ton of parts in.[DOUBLEPOST=1408283080][/DOUBLEPOST]For the oiling system, I enlarged the tear drop on the head from 0.058" to about 0.110". The main feed in the block also had huge chunks of casting, so those were removed and cleaned up a bit. Video reference:


There are also numerous threads by BogusSVO where he shows you step by step what to look for and how to do these mods. I prefer the videos because Jafro will typically give you more OEM spec measurements then necessary, but useful down the road.

oil feed clean up.jpg


tear drop.jpg
 

Attachments

Last edited:
Wow been a while since an update, but Im finally back to working on this project. The head and block are at the shop. I need to drop off parts next week but it looks like everything is in good order except the crank (which i suspected). I finally have a house, property, and most importantly a shop. All the dsm pieces are finally in a single location! Pics to come.
 
Stopped working on the car back in 2014-ish - bought my first house, put the car project on hold, and ended up spending the next 6-8 years renovating everything. Sold and bought a new home at the end of 2022, divorced but got my doggos, put down one of my cats of 15 years, in a much healthier relationship, and decided 2024 was a great time finish up this project after waiting ~20 years.

Ive set an arbitrary target of about 6 months to get this thing back up and running, and completely restored to near stock conditions if possible. Pics to come, but heres about what Ive accomplished in the last 3-4 months:

Body/Chassis
  • Completely gutted, cleaned, and reinstalled interior twice due to rats making a nice home under the spare tire. 1st time this happened was in 2017-2018 and I didnt notice for a few weeks. 2nd time was this year and I was able to catch it and remedy the issue within a day or two of noticing signs of rats again. Luckily, only damage was a wire chewed that was meant to connect a CD changer to the stock Infinity amp.
  • Restored headliner, visors, and sunroof
    • Sun roof and track was rusted in corners and repaired. New OEM seal waiting to be installed
  • Relocated fuse box into glove box
    • This was a MESS! I made the mistake of starting this in 2014 and stopped. I did label all the wires on both ends after cutting, and the labels held up. One thing I didnt realize was I think the 2gb dash harness is different from the 2ga one. Theres a white connector that I think is supposed to plug into the interior fuse box and it seems like the connector is different. It isnt the connector for the convertible.
  • ABS delete in progress
    • Have a non-proportion valve but need to run new lines (old ones were rusted due to water intrusion) and remove all the wiring/computer, etc.
  • Completely gutted engine bay, did some minor shaving to get a feel for body work, and painted it back to the factory green color.
  • Removed front end suspension, subframe, rack and pinion, and replaced basically every rubber part, seal, gasket with OEM parts
    • Using energy suspension master bushing kit to replace bushings along the way
      • These have all been installed using a ball joint press and some blocks of wood to prevent the bushing from popping out one side. After a couple, I was press these in pretty fast.
    • POM front subframe bushings
      • Ball joint press is all thats needed for these
    • Every part was inspected, cleaned, greased, treated for rust as needed, and received a coat of primer and semi-gloss black for easy cleaning
    • Rebuilt rack and pinion
    • Replaced calipers with some Cardone calipers at cost (I think 11$ per caliper, cheaper than buying parts to rebuild what I have).
    • Every dust boot cover was replaced with an OEM boot - these were fun to find.
Engine
  • In the process of blue printing virgin 6-bolt block
    • Cylinders will likely need a hone and I need to remeasure with a larger micrometer to see if I can use 2g pistons/1g rods or if I need to go aftermarket. I do have a set of .020 over pistons (I think Wisecos) on 1g rods. My preference would be the 2g piston set up since Im likely only going to run a 20g on this car at most.
  • 6-bolt crank is perfect, dead center in every specification range
  • Need to check block mains, but im expecting them to be 100% fine as the crank is perfect and the bearings were in very good condition.
  • 7-bolt head was rebuilt 6-8 years ago. Had BC springs and valves installed.

Still a lot to do. Im in the process of putting the front end back together and I need to wrap up the block measurements to I can make a decision on rod/piston direction. The last thing I plan on doing to the chassis is basically repeating the work for the rear end and suspension - disassemble, inspect, restore, bushings, blah blah blah. Priority after that will be engine and getting the car running, with body work/paint to follow. Im sure im forgetting some stuff.

Im very excited to be working on this car again and Im very happy to see how far along the DSM community has come along! You guys and Jafro have been an amazing resource for these vehicles.
 
Door panel, door lock refurbishment, and those sweet sweet aluminum door handle installations. The door lock was sticking and not latching properly. Disassembly, cleaning, some light grease, and lubrication fixed it all. I might write up a tech article on it since I had to search for a few sources to get all the right info.


20251012_144637.jpg20251012_144702.jpg20251012_144708.jpg20251012_144713.jpg20251012_145046.jpg20251012_145049.jpg20251012_145502.jpg20251012_150415.jpg20251012_151914.jpg20251012_151917.jpg20251012_151921.jpg20251012_151930.jpg20251012_151946.jpg20251012_152946.jpg20251012_153001.jpg20251012_153320.jpg20251012_153328.jpg20251012_153539.jpg20251012_154209.jpg20251012_154402.jpg20251012_154408.jpg20251012_154413.jpg20251012_154512.jpg20251012_154618.jpg20251012_154640.jpg20251012_154642.jpg20251012_154658.jpg20251012_154704.jpg20251012_154726.jpg20251012_164321.jpg20251012_164323.jpg20251014_152929.jpg20251014_160306.jpg20251014_160309.jpg20251016_162351.jpg20251016_162405.jpg20251017_001756.jpg20251017_001811.jpg20251017_215020.jpg20251018_092718.jpg20251018_154250.jpg20251018_171539.jpg20251018_220024.jpg
 
Painted engine bay back to OEM colors. This was a test using Eastbay rattle cans in a very very poorly set up area. I didnt really care about overspray but when I get around to painting the body, Ill make a more acceptable DIY set up.

CBNQ0225.JPEGCKZM6887.JPEGEBZD2007.JPEGIMG_0671.JPGIMG_0806.JPGIMG_0819.JPGIMG_0820.JPGIMG_0825.JPGIMG_0828.JPGMRNI0107.JPEGNDPZ8663.JPEG
 
Everything suspension, brakes, and wheel wells. Replaced the things that needed to be replaced. Pressed in new polyurethane bushings. New brake components. Sprayed wheel wells with rubberized undercoating. Made a DIY sandblasting cabinet that Im likely going to repurpose/burn it down and buy one that works a bit better.

Also ran new brake lines for an ABS to non-ABS conversion (not shown). This was actually really fun. I used the old lines as a template.

DHBT7367.JPEGEHYF6529.JPEGIMG_0709.JPGIMG_0710.JPGIMG_0723.JPGIMG_0728.JPGIMG_0729.JPGIMG_0732.JPGIMG_0734.JPGIMG_0807.JPGIMG_0808.JPGIMG_0809.JPGIMG_0818.JPGIMG_0821.JPGIMG_0822.JPGIMG_0826.JPGIMG_0827.JPG
 
Some misc blueprinting of the crank. I ended up ordering new rods and block will see machine shop in December!! Huge milestone for me! I have a ton more pics on my phone to upload at some point as well.

Ordered a ultrastonic cleaner (50L) and it was well worth it. Dunked the head and cleaned out a bunch of goo, along with the crank, brackets, old pistons/rods, etc. It was well worth the $180 + cleaning solution compared to my time to get the same result. Checked a ton of stuff on the head as well and will post that later, along with making a tool to check vacuum.

20251023_220622.jpg20251023_223305.jpg20251023_223342.jpg20251023_223418.jpg20251023_223422.jpg20251023_223430.jpg20251023_223450.jpg20251023_223500.jpg20251023_223508.jpg20251023_223520.jpg20251023_223530.jpg20251023_223538.jpg20251023_223557.jpg20251023_223601.jpg20251023_223609.jpg20251023_223622.jpg20251023_223629.jpg
 
Various blueprint maths:

Valve guide clearances:
1764514956671.png


Cylinders:
1764515043004.png


Main oil clearances. Im not happy with the procedure I used. Now that the crank and mains are spotless, Im going to redo the measurements again. With the condition of the crank being dead on stock specification ranges, Im not expecting this much wear/unevenness. Theres a lot of error I introduced while learning to use a mic.

1764515202405.png
 
Got busy again with too many side projects but made some progression this weekend and a bit here and there over the last few months.

Ordered in a ton of OEM parts for the rebuild - gaskets, bolts, seals, plugs, dowels, MLS headgasket, timing kit
Ordered in a ton of aftermarket parts as well - front case, helical cut gears from RSB Racing, fluidampr pulley, treated myself to an Icon digital torque wrench.
I may have a couple odd ball things to get, but I think I have like, 90% of what I need to finish.

Machine shop did a fantastic job overall with the block. I need to do my final clean and double checking of clearances before final assembly.

Throttle body:
Taken apart, cleaned well but messed up installing the metal shaft seals. I tried FIBA's guide with the threaded rod and washers, but after reviewing what I had, my washers were a bit too big and also had some play when sitting flush. Ill be getting smaller washers (both ID and OD) and tossing the new seals in the freezer before installing. Also, will be ordering a tool from snowboarder to help get them started flush. As a backup, I ordered the rubber seals as well.

Head:
Ended up using the ultrasonic again - I missed cleaning out the small holes/shafts for each lifter. Figured a 2nd round couldnt hurt and the water was definitely a bit dirty. Also probably had some left over valve grinding compound in it from earlier this year. Valves now hold full vacuum easily - Ill post before/after vacuum results later.

For the good news - installed my first part in this super clean head - a Kiggly pressure regulator. Definitely got the motivation up seeing this in its final home and Im looking forward to getting this thing rebuilt again! Ill likely just get oil plugs in this weekend. Once valve stem seals show up, Ill be able to put this thing together completely.

20260530_214149.jpg20260530_213316.jpg
 
Add Value - Be Respectful - No Trolling - No Misinformation - Participate Often!
Support Vendors who Support the DSM Community

Build Thread Updates

Latest Classifieds

  • Wanted Looking for T25 replacement
    2G, preferably a t28 or t25
    • Mando Vee
    • Updated:
    • Expires
  • For sale 2g 2G Manual Shifter Cables
    2G Manual Shifter Cables $85 + shipping and paypal feesYou must be registered to see element.
    • jersygsx
    • Updated:
    • Expires
  • Wanted 2g Factory radio brackets
    Looking for some factory radio brackets.
    • jesse12345
    • Updated:
    • Expires
  • For sale 1G DSM COMPLETE A/C UNIT
    Came off a bone stock 1G, won’t be using. Good for anyone that’s looking to go back to a/c or...
    • The_Partout_Spot
    • Updated:
    • Expires
  • For sale 2g 2G AWD OEM Grey Hatch Carpet
    2G AWD OEM Grey Hatch Carpet $40 + shipping and paypal fees* Great condition with backing...
    • jersygsx
    • Updated:
    • Expires
Back
Top