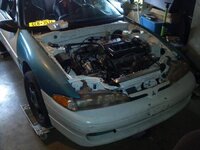
When i was looking to do this swap there was not much info out there on what needed to be done to make the 1gb lights fit. in that thread there were only a few fuzzy pics and a finished picture.
here is what you will need for the swap
1gb fenders
1gb turn signals
1gb headlights
1gb hood
1gb bumper
optional for best support a jmf bumper support or a stock heavy front bumper
im not going to go into the wiring as i swapped to a 1gb harness for my 90 to replace the tired harness so all my lights are plug and play. there is a easy to follow write up for the wiring from 1ga to 1gb lights already on here.
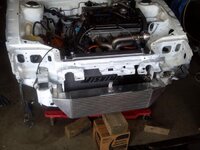
here is the stock headlight bucket for a 1ga
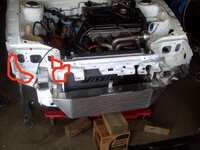
here is where you will have to trim
the red dot on the back of the headlight bucket will be a hole you drill for the bolt to hold the light in place
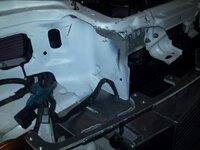
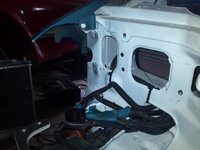
some pics after it is trimmed
when i cut this i used an air saw and then rolled the metal back under the radiator support to leave it some strength.
the old light cup i cut with a hack saw as i reused the hole in the inside to secure the headlight to once the new light was installed.
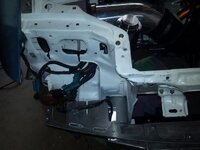
showing how far back on the fender side you will need to trim to get the turns and headlights to sit flush. i basically removed the entire piece that was there.
top view to show how the cleaned up bucket will look
once the headlights and bumper fir drill the hole for the headlight bracket and you should be all done with the fenders and the front bumper. the hood will just be a direct swap on the hinges and then adjust it for alignment.
here is what you will need for the swap
1gb fenders
1gb turn signals
1gb headlights
1gb hood
1gb bumper
optional for best support a jmf bumper support or a stock heavy front bumper
im not going to go into the wiring as i swapped to a 1gb harness for my 90 to replace the tired harness so all my lights are plug and play. there is a easy to follow write up for the wiring from 1ga to 1gb lights already on here.
here is the stock headlight bucket for a 1ga
You must be logged in to view this image or video.
here is where you will have to trim
You must be logged in to view this image or video.
the red dot on the back of the headlight bucket will be a hole you drill for the bolt to hold the light in place
some pics after it is trimmed
You must be logged in to view this image or video.
when i cut this i used an air saw and then rolled the metal back under the radiator support to leave it some strength.
the old light cup i cut with a hack saw as i reused the hole in the inside to secure the headlight to once the new light was installed.
You must be logged in to view this image or video.
showing how far back on the fender side you will need to trim to get the turns and headlights to sit flush. i basically removed the entire piece that was there.
You must be logged in to view this image or video.
top view to show how the cleaned up bucket will look
once the headlights and bumper fir drill the hole for the headlight bracket and you should be all done with the fenders and the front bumper. the hood will just be a direct swap on the hinges and then adjust it for alignment.
You must be logged in to view this image or video.
Attachments
-
 2012-05-28_18-00-13_11.jpg50 KB · Views: 1,548
 -
 e9674cda-5da8-480b-b029-d075650da4a6_zpse67fd854.jpg50.9 KB · Views: 1,381
 -
 2013-03-18_14-13-34_332_zpsa9a16c45.jpg36.9 KB · Views: 1,398
 -
 2013-03-18_14-13-27_779_zpsb783d908.jpg36.1 KB · Views: 1,370
 -
 2013-03-18_14-13-21_85_zpsbea6c00e.jpg37.9 KB · Views: 1,359
 -
 2013-03-19_13-12-09_340_zpsf8a253c1.jpg47.8 KB · Views: 1,581


