I recently redid my headliner and sun visors, and I found that my car had an aftermarket sunroof put in, so I figured Id make a detailed write up to help anyone that might have an OEM sunroof or an aftermarket sunroof.
Tools Required:
-Screwdrivers (Flathead and Phillips of varying sizes.)
-Box cutter or Razor Knife
-Wire Brush
-Binder Clips (Bought a 30 pack of Med. Sized clips for $5 at Office Depot)
-Scissors or Pinking Shears
-Marker of some sort (Preferably one you can see on your material, but dark enough to be hidden if necessary)
-Torx bits (My application required it, yours may not.)
Materials Required:
-3M Adhesive Spray (Found at any craft or automotive store)
-Material of choice (I picked up two yards of charcoal felt material for $4.99 at JoAnns. Also, this material is thick but had enough give to wrap around complex curves.)
Part I: Removing and Cleaning the Headliner
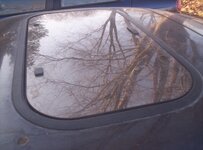
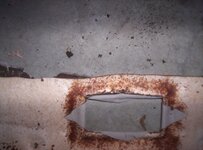
Here are a couple of shots of my sun roof. Doesnt quite look like a stock one does it?
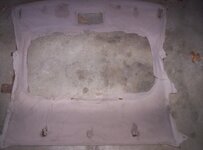
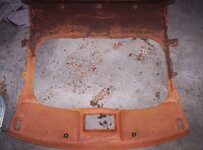
First things first. Remove your headliner. Its pretty straight forward; remove the interior panels that are necessary to get to any bolts or fasteners. Once its out, it might look like this.
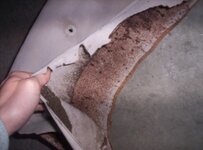
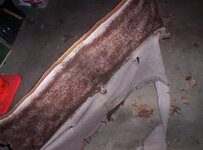
Now, I didnt have any idea my sunroof was aftermarket, but I started to figure it out when I had to cut my headliner from the sunroof frame. Another clue was the extra layer of material present OVER my stock headliner material.
Another clue was the hasty and very uneven cuts in the original headliner.
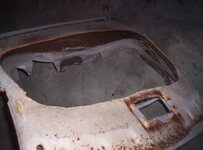
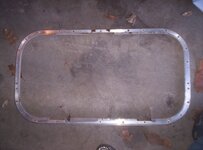
This frame was bolted to the sunroof, but the headliner material COVERED the bolt holes. Im assuming they dropped the whole unit in from over the car. I had to use my Torx bits to get these bolts out.
Back to the headliner. Peel off the existing material from the headliner board. This should be relatively easy, as the foam has long since deteriorated.
Once the material is removed, youll have a foamy substance left on the board which youll need to remove with the wire brush. If you dont have one, I would suggest getting one, because I used everything from a toothbrush to a putty knife, but I ended up buying a tire brush that worked much more efficiently.
Here is the headliner board halfway cleaned off.
All done!
After cleaning the board, I vacuumed it to remove any leftover dust. If Im going through all of the trouble to remove this thing and reline it, Im making sure I NEVER have to do it again.
Now throw away the source of all of your pains.
Tools Required:
-Screwdrivers (Flathead and Phillips of varying sizes.)
-Box cutter or Razor Knife
-Wire Brush
-Binder Clips (Bought a 30 pack of Med. Sized clips for $5 at Office Depot)
-Scissors or Pinking Shears
-Marker of some sort (Preferably one you can see on your material, but dark enough to be hidden if necessary)
-Torx bits (My application required it, yours may not.)
Materials Required:
-3M Adhesive Spray (Found at any craft or automotive store)
-Material of choice (I picked up two yards of charcoal felt material for $4.99 at JoAnns. Also, this material is thick but had enough give to wrap around complex curves.)
Part I: Removing and Cleaning the Headliner
Here are a couple of shots of my sun roof. Doesnt quite look like a stock one does it?
You must be logged in to view this image or video.
You must be logged in to view this image or video.
First things first. Remove your headliner. Its pretty straight forward; remove the interior panels that are necessary to get to any bolts or fasteners. Once its out, it might look like this.
You must be logged in to view this image or video.
Now, I didnt have any idea my sunroof was aftermarket, but I started to figure it out when I had to cut my headliner from the sunroof frame. Another clue was the extra layer of material present OVER my stock headliner material.
You must be logged in to view this image or video.
You must be logged in to view this image or video.
You must be logged in to view this image or video.
Another clue was the hasty and very uneven cuts in the original headliner.
You must be logged in to view this image or video.
You must be logged in to view this image or video.
This frame was bolted to the sunroof, but the headliner material COVERED the bolt holes. Im assuming they dropped the whole unit in from over the car. I had to use my Torx bits to get these bolts out.
You must be logged in to view this image or video.
Back to the headliner. Peel off the existing material from the headliner board. This should be relatively easy, as the foam has long since deteriorated.
You must be logged in to view this image or video.
Once the material is removed, youll have a foamy substance left on the board which youll need to remove with the wire brush. If you dont have one, I would suggest getting one, because I used everything from a toothbrush to a putty knife, but I ended up buying a tire brush that worked much more efficiently.
You must be logged in to view this image or video.
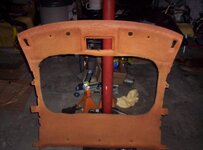
Here is the headliner board halfway cleaned off.
You must be logged in to view this image or video.
All done!
You must be logged in to view this image or video.
After cleaning the board, I vacuumed it to remove any leftover dust. If Im going through all of the trouble to remove this thing and reline it, Im making sure I NEVER have to do it again.
Now throw away the source of all of your pains.
You must be logged in to view this image or video.
Attachments
-
 102_2839.jpg24.5 KB · Views: 4,805
 -
 102_2842.jpg32.5 KB · Views: 4,777
 -
 102_2848.jpg38.8 KB · Views: 4,853
 -
 102_2850.jpg53.4 KB · Views: 4,855
 -
 102_2845.jpg33.9 KB · Views: 4,786
 -
 102_2846.jpg38.1 KB · Views: 4,725
 -
 102_2847.jpg30.7 KB · Views: 4,676
 -
 102_2852.jpg42 KB · Views: 4,640
 -
 102_2854.jpg38.3 KB · Views: 4,664
 -
 102_2856.jpg34.4 KB · Views: 4,612


