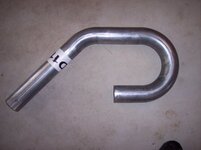
Well I am very big on doing things myself so I decided to come up with a way to make a hard UICP for my car. I did not like the thought of paying $150-$200+ for something I could do for way less then that. It is a very simple process so no need to sweat it.
Please keep in mind this is for a 1g w/out ABS, if you have ABS, you could probably get away with just extending some of the lengths.
Things you will need:
1. 45* 2.5" bend-JC Whitney Item# ZX812930Y $9.99
2. 90* 2.5" bend-JC Whitney Item# ZX812953P $10.99
3. 1g BOV Flange- RRE $10.00(or flange to match your BOV)
4. 1g BOV Gasket- RRE $4.00(or gasket to match your BOV)
5. 2" piece of 1.5" pipe-RRE, came with the flange(for BOV)
6. Silicone Couplers or a High Pressure Hose(Your choice)
7. Dremel w/ a Cut-off Wheel for Metal(fiberglass reinforced is the best)
1st Step: Remove your stock pipe. Take one end of the 90* bend and put a coupler on it. Then take the 45* and attach it to the coupler(obviously in the shape that the UICP should be). Place it in the place of the stock pipe and see if you need to cut anything. Most likely you will, I just dont remember how much or in which places but it is pretty noticable where you need to cut. Just make sure the pipe will be level with your TB elbow and you should be good to go.
2nd Step: Take the 45* bend to someone who can weld and have them cut a hole in the pipe and weld in the 1.5" piece of pipe and the flange on. I took mine to an exhaust shop and they did it for $20.
3rd Step: Now you can paint it or have it powder coated.
Final Step: Put the pipe together and install and enjoy the looks of your new engine bay and most importantly, what you will gain from it.
Hope this helps someone whos on a budget or who just likes to do things on your own.


