The Top DSM Community on the Web

For 1990-1999 Mitsubishi Eclipse, Eagle Talon, Plymouth Laser, and Galant VR-4 Owners. Log in to remove most ads.

Please Support Rix Racing
Please Support ExtremePSI

1g turbo FWD Clutch/flywheel install(or swap)

This site may earn a commission from merchant
affiliate links, including eBay, Amazon, and others.

This site may earn a commission from merchant affiliate links, including eBay, Amazon, and others.

Note: This is my first attempt at a tech article. So I apologize if I am confusing or it sucks. ALSO MAKE SURE YOU READ THROUGH THE ENTIRE TECH ARTICLE BEFORE YOU START!!!!!!

Car info: My wife drives a 1993 Eclipse GS (1990-4G63 turbo swap). Her Clutch was slipping all the way through 2nd gear (3rd-5th as well) so I took pictures of everything I did to swap the clutch out. This took me about 5 hours, but I stopped to exlplain to my racing club everything and took pictures along the way, so it took my longer than usual.

You will need quite a bit of tools for this job, so make sure you have a full Rachet Set (to inlcude 32mm Socket), Screw Drivers, Pry Bar, hammer, Wrench set, pliers, needle-nose pliers, Also get some friends to help you. Its always good because somtimes you miss something that they get.

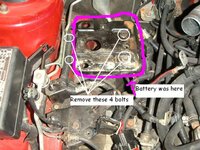
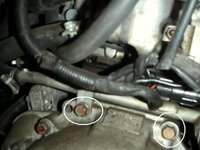
Lets start at the top of the car. You will need to clear out a lot of things, First you will need to remove the battery. Disconnect the Negative Terminal, next remove the postive terminal. Remove the Batter Tie down rod. Move all wires out of the way and remove the battery. Next remove the Battery Stand, it does not need to come out but it makes things SOO much easier. There are 4 bolts holding it down. I circled them in white, the two left ones are under that thick black wire and are moderately difficult to get to.
 

Attachments

  • step 1.jpg
    step 1.jpg
    79.8 KB · Views: 6,401
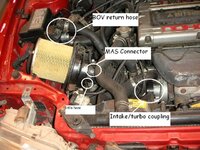
Next remove the Intake system. My car does not have the Air box on it, if yours does, then unfasten the Air box. There are 3-4 bolts/nuts holding it down. Next, I unfastening the intake coupling at the Turbo inlet, then I unclipped the fastner from the BOV. There are 2 hoses going into the intake pipe, just pull those out. There is a hose and a electrical connector on the MAS housing that needs to be removed before extracting the intake. After that the entire intake comes out as one peice.
 

Attachments

  • step 2.jpg
    step 2.jpg
    68.7 KB · Views: 6,350
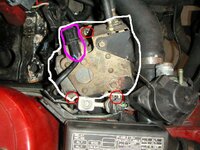
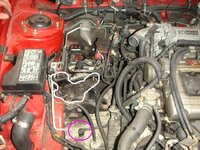
If you have a 1990(or a 90 engine like I do), you will need to remove the Cruise contril box and set it aside. I just site mine on the Valve Cover. In the picture the Cruise Control unit is circled in white, the red circles are the location of the nuts that hold it down and the purple circle is the electrical connector thats attatched with it. Remove the nuts, unplug the connector and move the Cruise Control unit. It is also very easy and convinent to remove the bracket that holds the Cruise Control Unit. So pull that out while you are at it.
 

Attachments

  • step 3.jpg
    step 3.jpg
    64.2 KB · Views: 6,299
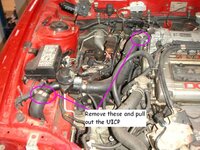
Next remove the Upper Intercooler Piping (UICP). Just undo the fasteners at the BOV and the Throttle Body Elbow and it comes right out. You can also see where I move the Cruise Control Unit in this picture in the lower right.
 

Attachments

  • step 4.jpg
    step 4.jpg
    71.9 KB · Views: 6,254
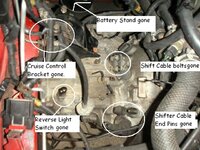
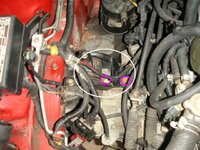
This is what you got so far, (I forgot to remove the battery stand, which I did later) The intake, battery and UICP are gone and Cruise Control is out of the way. The white circle is the cruise control bracket, I left it on for this picture so you could see what I was talking about. Next I remove the Reverse Light Switch, which is circled in pink.
 

Attachments

  • step 5.jpg
    step 5.jpg
    71.9 KB · Views: 6,256
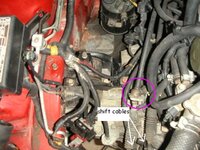
Next I remove the Shift Cables, these come out REAL easy. Take some needle-nose pliers and remove the cotter pin. Then slide theme off the pins. Make sure you catch the washers that are with them. Next un bolt the shift cables from the transmission. And move the Shifter Cables out of the way.
 

Attachments

  • step 6.jpg
    step 6.jpg
    59.8 KB · Views: 6,201
Next remove the Speedometer Cable from the Tranny. This Cable is located very close to the Cabin of the car. about center from side-to-side. Its pretty hard to find, but do not over look it. I did that before.... No more speedometer.....
 

Attachments

  • pict0035.jpg
    pict0035.jpg
    35 KB · Views: 6,126
Ok next we got. Take out the 2 Start bolts, And pull the start away from the Transmission. I just left mine lodged somewhere on the engine, but you could use a coat hanger to hold it up.
 
Ok, you have cleared everything you need to to remove the Transmission. The only thing left is, the Transmission mount and the bolts holding the Transmission to the engine. I suggest leaving those in until you are ready to pull the Transmission out. For now you are done with the top of the transmission. Block the Rear Tires, pull up the E-brake. Break all lugs nuts lose for the front tires. Raise the Vehicle and Support it on Jack Stands.

Remove the Tires.
 

Attachments

  • pict0031.jpg
    pict0031.jpg
    42.4 KB · Views: 6,884
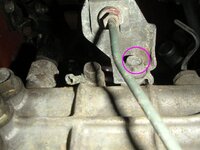
Remove the bolt attacthing the clutch line to the Transmission. If you look at it from the bottom this is what you see, it is facing the front of the vehicle.
 

Attachments

  • step 10.jpg
    step 10.jpg
    47 KB · Views: 6,021
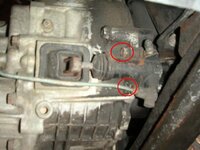
Now remove the Clutch actuator from the Tranny, once you remove these two bolts set the line out of the way. DO NOT REMOVE THE BANJO BOLT! Take the WHOLE actuator off the transmission. The two bolts are located in red, one of them is already out in the picture.
 

Attachments

  • step 11.jpg
    step 11.jpg
    37.4 KB · Views: 5,985
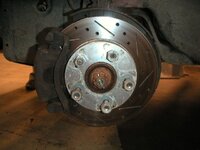
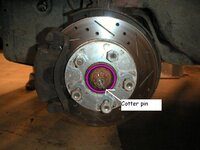
You're next job is to remove the axles, so go to the hubs. And remove the cotter pin in the center. This is where you will need to use the 32mm Socket. The nut is circled in pink, the cotter pin is pointed out. You will need to do this on both sides.
 

Attachments

  • step 12.jpg
    step 12.jpg
    39.4 KB · Views: 5,879
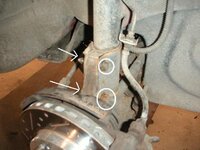
Now you need to move the strut from the hub, this will allow the hub to move around so you can get the axles out. You will need a wrench and a rachet to get it off. Place the wrench on the nuts located where the arrows point, then use the rachet where I have it circled to losen and remove the nut/bolts. NOTE: I was told that you could just loosen a bolt below the hub to do this, but I don't know how to and this is the way I did it.
 

Attachments

  • step 13.jpg
    step 13.jpg
    42.6 KB · Views: 5,786
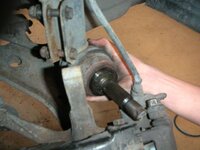
Next use a prybar to pull the axle out of the transmission. And remove the axle. You will need to remove both axles in order to remove the transmission.
 

Attachments

  • pict0045.jpg
    pict0045.jpg
    67.7 KB · Views: 5,704
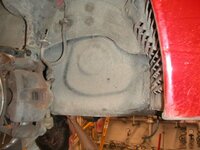
Here is the passenger side dirt sheild under the wheel well, its helps to remove this, because when remove the tranny, it seems to get caught on everything in the engine bay.
 

Attachments

  • pict0048.jpg
    pict0048.jpg
    48.3 KB · Views: 5,705
NOW IT IS IMPORTANT TO BRACE THE TRANSMISSION (FOR SAFTEY REASONS)

The odds of the tranny just falling out is not high, but its possible and not worth the risk of having a 75-100 lbs metal block fall on you. So brace it.
 
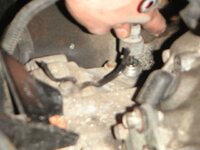
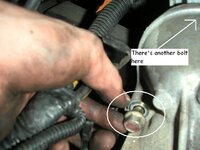
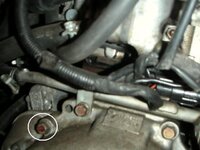
All thats left to do now is dismount the transmission from the engine and pull it out. So take out the bottom bolts first. You're gonna have to use common since and look around the tranny for the bolts that attach it to the engine. There are two and the bottom, one is in the front the other is in the rear. They are hard to find, and even harder to picture, but here is the one in the rear.
 

Attachments

  • pict0049.jpg
    pict0049.jpg
    57.3 KB · Views: 5,711
The two top ones, and there is another one hidden in the fron half way down, its attaches the heat sheild to the tranny, its almost impossible to get to. I did not picture that bolt so look for it.
 

Attachments

  • step 14.jpg
    step 14.jpg
    35.6 KB · Views: 5,531
Now remove the top mount bracket for the transmission. The two nuts that hold the transmission is place are in pink, the bracket is circled in white, its not necessary to remove the bracket, but its a good idea.
 

Attachments

  • step 15.jpg
    step 15.jpg
    59.7 KB · Views: 5,584
Support Vendors who Support the DSM Community
Boosted Fabrication ECM Tuning ExtremePSI Fuel Injector Clinic Innovation Products Jacks Transmissions JNZ Tuning Kiggly Racing Morrison Fabrications MyMitsubishiStore.com RixRacing RockAuto RTM Racing STM Tuned

Latest posts

Build Thread Updates

Vendor Updates

Latest Classifieds

Back
Top