


Ludachris
Founder & Zookeeper
- 8,836
- 4,650
- Nov 12, 2001
-
Newcastle,
California
Edit - this isn't the complete build, but it's the thread with the most info on the build
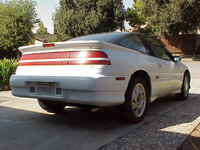
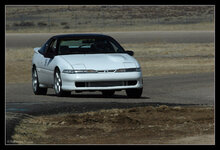
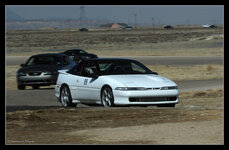
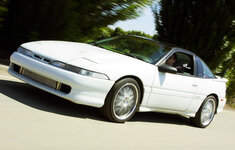
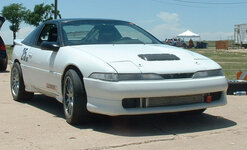
So after last season I decided to get the car ready to compete in Time Trials and some autocross starting this season. That meant I needed to make some decisions on the build-up. Up to this point the only planning involved in the setup of the car was the idea that it would be a streetable track monster. Many of the choices that were made a couple years ago ended up being wrong for this type of setup. The turbo that was chosen ended up being too big for road racing and autocross. The Ground Control kit that was purchased should have been ordered with stiffer spring rates, etc. So now the process begins... start setting the car up right.
First order of business - cooling:
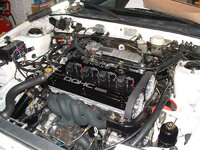
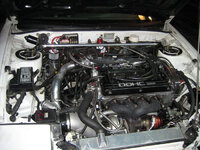
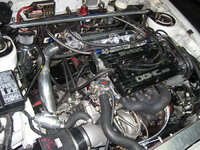
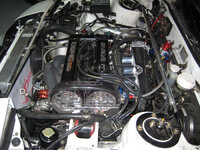
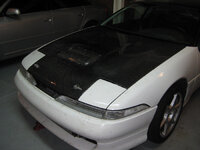
I actually started this process last season after I realized it was tough keeping coolant temps low out on the race track. It's especially difficult up at 5,000 ft above sea level with the air being so thin. I got in touch with PWR and had them send me a thicker radiator and picked up a hood vent from CarbonTrix. I also removed the hood latch mechanism and installed hood pins to help open up more airflow through the small radiator opening.

I still need to cut a hole in the hood for the vent. I'm just waiting to see if I can't somehow pickup a fiberglass hood first so that I only have to do the work once. I'll be using rivets to attach the vent, and found a cheap rivet gun at HarborFreight that should do the job just fine.
Next - setup changes:
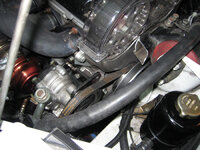
The car is good in terms of the engine, brakes, and much of the suspension. We just recently upgraded to a 4-piston Wilwood caliper TCE Performance Products brake kit with 13x1.10" vented rotors. I'll be adding some cooling ducts to help keep the brakes from burning up the pads so much. And we have poly bushings throughout most of the suspension, a rear toe eliminator kit, reinforced rear control arms, and a Koni/Ground Control setup to work with.

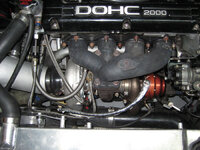
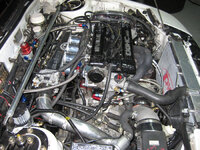
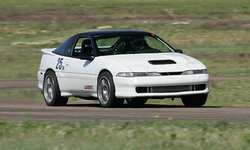
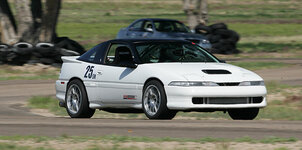
The two biggest areas that need to be addressed are the turbo setup and springs. The car currently has an internally gated PTE SCM6152E turbo (a journal bearing 56-trim with Mitsu housing). It's a good turbo but is too laggy for road racing and completely useless on the autocross courses. This will be replaced with a Forced Performance 3150, which is essentially a 50-trim dual ball bearing turbo which uses the FP30 turbine housing. That means I'll also be going external wastegate (44mm Tial coming from ExtremePSI). This should dramatically improve throttle response and spool coming out of the turns.
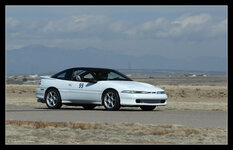
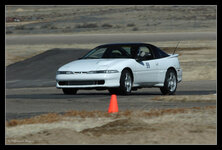
In terms of suspension, I'm keeping the Koni/Ground Control setup but will be playing with different spring rates. I'll also need to get some front camber plates to manage camber adjustments between the street and the track since I'll be driving the car to many of the events. The Toyo RA-1 (255/40/17) tires that I'll be buying need a lot of negative camber to work and wear well. I'll be putting those on my new Team Dynamics 17x9 (27mm offset) wheels that were purchased late last summer. They might require the use of flares, but I'm hoping I can just get away with stiff spring rates for now to prevent rubbing on the fenders. We'll see.

We'll also be looking to get a 4-point roll bar installed for safety.
Also - weight reduction:
I had already done a good deal of weight reduction - pulling the A/C components under the hood, cruise control, ABS, carpet padding, rear seats, spare tire (obviously), and some interior panels. I left the carpet in because this is still going to be a street car (at least in appearance) that I want to be able to drive around a little bit.
I will be pulling out most of the interior panels, the heating system, parts of the dash, possibly swapping the power windows for manual components, etc. Once more money becomes available or we get more sponsors, I'll be swapping the driveshaft out for a 2-piece aluminum replacement, getting a fiberglass hood and rear hatch, and swapping out the rear hatch glass and rear quarter windows with molded lexan.

That's it for now. I'll have more info soon.
So after last season I decided to get the car ready to compete in Time Trials and some autocross starting this season. That meant I needed to make some decisions on the build-up. Up to this point the only planning involved in the setup of the car was the idea that it would be a streetable track monster. Many of the choices that were made a couple years ago ended up being wrong for this type of setup. The turbo that was chosen ended up being too big for road racing and autocross. The Ground Control kit that was purchased should have been ordered with stiffer spring rates, etc. So now the process begins... start setting the car up right.
First order of business - cooling:
I actually started this process last season after I realized it was tough keeping coolant temps low out on the race track. It's especially difficult up at 5,000 ft above sea level with the air being so thin. I got in touch with PWR and had them send me a thicker radiator and picked up a hood vent from CarbonTrix. I also removed the hood latch mechanism and installed hood pins to help open up more airflow through the small radiator opening.
I still need to cut a hole in the hood for the vent. I'm just waiting to see if I can't somehow pickup a fiberglass hood first so that I only have to do the work once. I'll be using rivets to attach the vent, and found a cheap rivet gun at HarborFreight that should do the job just fine.
Next - setup changes:
The car is good in terms of the engine, brakes, and much of the suspension. We just recently upgraded to a 4-piston Wilwood caliper TCE Performance Products brake kit with 13x1.10" vented rotors. I'll be adding some cooling ducts to help keep the brakes from burning up the pads so much. And we have poly bushings throughout most of the suspension, a rear toe eliminator kit, reinforced rear control arms, and a Koni/Ground Control setup to work with.
The two biggest areas that need to be addressed are the turbo setup and springs. The car currently has an internally gated PTE SCM6152E turbo (a journal bearing 56-trim with Mitsu housing). It's a good turbo but is too laggy for road racing and completely useless on the autocross courses. This will be replaced with a Forced Performance 3150, which is essentially a 50-trim dual ball bearing turbo which uses the FP30 turbine housing. That means I'll also be going external wastegate (44mm Tial coming from ExtremePSI). This should dramatically improve throttle response and spool coming out of the turns.
In terms of suspension, I'm keeping the Koni/Ground Control setup but will be playing with different spring rates. I'll also need to get some front camber plates to manage camber adjustments between the street and the track since I'll be driving the car to many of the events. The Toyo RA-1 (255/40/17) tires that I'll be buying need a lot of negative camber to work and wear well. I'll be putting those on my new Team Dynamics 17x9 (27mm offset) wheels that were purchased late last summer. They might require the use of flares, but I'm hoping I can just get away with stiff spring rates for now to prevent rubbing on the fenders. We'll see.
We'll also be looking to get a 4-point roll bar installed for safety.
Also - weight reduction:
I had already done a good deal of weight reduction - pulling the A/C components under the hood, cruise control, ABS, carpet padding, rear seats, spare tire (obviously), and some interior panels. I left the carpet in because this is still going to be a street car (at least in appearance) that I want to be able to drive around a little bit.
I will be pulling out most of the interior panels, the heating system, parts of the dash, possibly swapping the power windows for manual components, etc. Once more money becomes available or we get more sponsors, I'll be swapping the driveshaft out for a 2-piece aluminum replacement, getting a fiberglass hood and rear hatch, and swapping out the rear hatch glass and rear quarter windows with molded lexan.
That's it for now. I'll have more info soon.
Last edited:


")


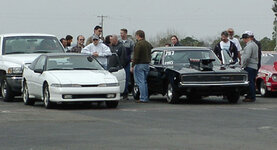
 As soon as I can figure how the hell to transfer the video I converted I will upload a session from TH and the aftermath.
")

