explicitgst
15+ Year Contributor
- 55
- 43
- Apr 3, 2007
-
Barrie,
ON, Canada
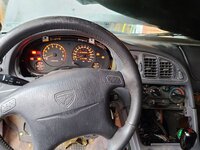
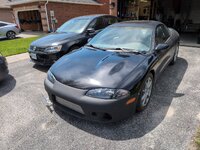
This is the Build Thread for Eagle Talon TSI - FWD. Reply below.
Follow along with the video below to see how to install our site as a web app on your home screen.
Note: This feature may not be available in some browsers.
For 1990-1999 Mitsubishi Eclipse, Eagle Talon, Plymouth Laser, and Galant VR-4 Owners. This is where the DSM platform history is documented and archived. Log in to help us in our mission, and to remove most ads from the browsing experience.

This site may earn a commission from merchant affiliate links, including eBay, Amazon, and others.
 ..) Loved wrenching on the car and it hurt to let it go about 10 years back. Ended up parting it out, invested the profits, and bought a house a few years later with the profits. So... not all bad. . im just kidding hes a good guy, him and i hang out a couple times a week

What was the paint type you used? Can it withstand heat and prolonged oil contact? It's a beaut colour
I’d re do the headliner, mine was sagging in my 1g and I found plenty of helpful videos on YouTube and found it wasn’t too difficult, and a new headliner looks waay better than a bare roof in my opinion

 I go to start the car and I hear the starter try to engage...but nothing. Well fk.
 "If you squint...it's mint!"
 1st gear was shot in the one I got from the junkyard.
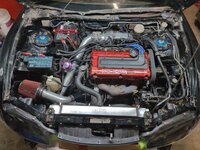
I'm sure you already know this, but the 2g head will need to have its stud holes drilled out an extra mm to compensate for the 6 bolt head studs.That's a nice build! Just confirming your build is with a stock bottom end, minus the bearings? Unfortunately for me, I won't be able to keep a stock bottom end.
I don't plan on beating on my car either. Well the once or twice down the track yearly against some buddies, but mostly 99% street driven, highway driven to see friends, hang out and talk cars.
I forgot to mention, but I wanted to use the 2g head from my 7 bolt. Is there anything I need to worry about when buying pistons and rods and using the 2g head?
I did add the Kiggly girdle and ARP main studs that are required after having it line honed. You should do the sameThat's a nice build! Just confirming your build is with a stock bottom end, minus the bearings? Unfortunately for me, I won't be able to keep a stock bottom end
Yeah for sure, was planning on the ARP main studs. L19 is overkill no?I'm sure you already know this, but the 2g head will need to have its stud holes drilled out an extra mm to compensate for the 6 bolt head studs.
Yeah, I was certain on both those items. I just seem confused/stuck on a good piston rod combo.I did add the Kiggly girdle and ARP main studs that are required after having it line honed. You should do the same

