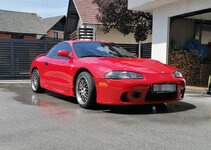
The Central Hub for DSM Community and Information

For 1990-1999 Mitsubishi Eclipse, Eagle Talon, Plymouth Laser, and Galant VR-4 Owners. This is where the DSM platform history is documented and archived. Log in to help us in our mission, and to remove most ads from the browsing experience.

crtzmedia-cbul-eclipse-6.jpg

Street Build Dihtung Glava's Eclipse

A 6 bolt swapped 2G with all the problems, slowly becoming whole again.

This site may earn a commission from merchant affiliate links, including eBay, Amazon, and others.

I did not check against the OEM simple clevis, but the dampened one versus the aftermarket simple version was significant.

IMG_5089.jpeg


IMG_5088.jpeg


I should probably also check the rod lengths before jumping to too many conclusions, though.
 
There must be a lenght difference in the rods or something, because I have my (dampened) clevice all the way undone off the rod and the clutch is still not exactly where I would like it to be. If you gave me the same exact cylinder and a 2 cm shorter clevice, I don't think it would even disengage. I would have to move the pedal down more.
 
At least in my case, it looks like the rods are about the same but the bodies are different. What a headache! ROFL

The length of the body on the interior side of the firewall is longer on the aftermarket master cylinder, hence the use of the shorter clevis. Mounting flange to tip of the rod here measures about 102mm. Sorry for the grainy picture.
IMG_5102.jpeg


IMG_5101.jpeg


You can see the OEM master cylinder body is shorter and needs the dampened clevis to get about the same extension into the interior. Mounting flange to tip of the rod here measures about 83mm.
IMG_5095.jpeg


So, approximately the same difference here (19mm) as the clevises.
 
That makes sense, thanks for following through. We should probably post this as a tech article or FAQ or something, in case anyone else needs it.

Btw, where are you getting 3D files of Mitsubishi clutch cylinders what the hell😂
 
OK, this is going to be an update on my recent clutch line job as well as hopefully the last post regarding these different clevises.

Since update #59 my clutch pedal was fine for a while, but it recently started going again. I noticed my left shoe had a bunch of brake fluid on it, so I checked under the dash to find the clutch master cylinder leaking pretty badly. I took it out and found that back when the clevise (or "hinge" as I called it in that update) failed, and the piston rod was bending up instead of into the body of the cylinder, it left a pretty substantial dent in the cylinder's retaining ring:
1749314255037.jpeg

This allowed brake fluid to squeeze past the piston and into the cabin whenever I pressed on the clutch. I took an afternoon to take the master cylinder off of my parts car and replace this one with it. To add to the master cylinder debate above; these cylinders were both off of European model N/A 4G63 Eclipses, the bodies were completely identical and they both had the dampened clevise.
1749314740924.jpeg


Everything was good for a couple weeks, until I took a rather spirited drive up a mountain pass with some friends and found the new clutch cylinder started leaking, again. The leak wasn't as bad, since I didn't break the clevise like last time, but it did make me wonder if it's possible that my clutch is just too strong for these. I wrote back in update #50 that I was never actually able to set up my clutch like Jacks Transmissions, to where I could push the clutch fork by hand, so I figured I could have too much pressure in the cylinder. I didn't want to risk another leak by rebuilding the cylinder, since they are kind of a pain to get in and out, so I ordered a brand new one from RockAuto, and I made sure it was the un-dampened version this time.
1749315446830.jpeg
1749316166950.jpeg

You can see from the picture that the bodies of the undampened-clevise-style cylinder (left) and the dampened-clevise-style (right) are exactly the same. The 19.21 mm difference in clevise lenght @19Eclipse90 measured in post #76 is offset by the undampened-clevise-style cylinder's longer piston rod. Apparently that's a difference between 1Gs and 2Gs; 1Gs used a longer cylinder body for the undampened-clevise-style cylinders, whereas the 2Gs used the same body but with a longer piston rod.

Along with the master, I also decided to get a new slave cylinder (since the old one was already rebuilt once) and I also got a brand new braided stainless steel clutch line made (I've had one fail a while back).
1749316589334.jpeg

I made a gromet for the line from a motorcycle gas tank bushing my neighbour gave me, so that I could reuse the factory bracket on the transmission:
1749316863448.jpeg
1749317267475.jpeg

You'll also notice in that first picture, brass bushings on the shifter cables - those were part of an order from Dudes Custom Parts that came in around the same time I was doing this. I ordered the full set for the interior as well.
1749317077391.jpeg

The clutch felt amazing with everything replaced. I can also sleep easy knowing that my heavy duty pressure plate is likely not a problem, as I was actually able to set the clutch pedal travel properly with the new cylinder. I'm assuming the dampened master cylinders have a slightly different travel due to the shorter piston rod and therefore can't be adjusted for maximum pressure and maximum travel, while also keeping the bleeder port to the clutch fluid reservoir open.

The clutch pedal is about as heavy as it was before, only now I CAN push the clutch fork by hand. The shifter also feels a lot sturdier and more direct, thanks to the new bushings. Very, very happy with these upgrades.

Thanks for reading!
 
Last edited:
Some more bling for the engine bay

I was on a roll with the shiny new intake and heat shield, so I just kept going. I got a brand new blow-off valve and silicone charge piping to clean up the engine bay even further. I got two 90° elbows and one 45° completely on a whim, and it seemed like they would fit just perfect.
1750584371022.jpeg

I went with 45 mm (1.77 inch) piping which is kind off small, but I didn't really have a choice, as I am still using the factory intercooler and throttle body elbow. This made it impossible to find a pipe with a GReddy-style flange for the blow-off valve, as the common size for those seems to be 2.5 inch (63.5 mm). I found a 50 mm (2 inch) one in China and had a local hydraulics shop squeeze it down to 48 mm (1.89 inch) so that I was able to get the 45 mm piping around it.

I also needed PVC tube of some kind to link the separete pieces of hose together. Another impossible task as it turns out, since standard plastic plumbing comes in either 40 mm (1.6 inch) or 50 mm (2 inch) diameters. No 45 mm, again. I had to improvise, again - I found an old plastic funnel in my uncle's trash pile that was around 50 mm, and I turned it to 45 mm on the lathe. 😅
1750592319528.jpeg
1750592342915.jpeg

These pipes came out pretty f*ckin' good if you ask me. They are a little soft, since I took 5 mm (0.2 inch) off the walls, but that doesn't really matter, because the hose clamps that go around them clamp down pretty evenly, so they probably won't buckle. The lathe also inadvertently left small radial cuts on their outside surfaces, so the silicone pipes have something to grip to, rather than just a smooth tube.

When I put everything together, it turned out I did not in fact, get so lucky with my complete guess of a silicone hoses purchase:
1750845389719.jpeg

The piping was too short to reach the throttle body elbow and the blow-off valve placement was directly in the way of the MAF sensor plug. Who would have thought?

I cheated a little bit by putting the factory 1G 90° hose back in and then extending the whole thing with part of the new hose.
1750845756575.jpeg

It's not the best look, I'll admit, and it does require a little bending to come together, but it beats waiting for a new shipment of hoses. (That's coming anyway, I'm just filling up my cart some more before I make another order)

1750846378706.jpeg

I don't remember why I did this, other than to make it look nice, since the plan is still to get a front mount intercooler and proper aluminum/stainless charge piping in time. Also the new blow-off valve is too strong, even on the softest setting, so now I get SUTUTUTU sounds when I lift off the throttle. I'm genuinely only making more work for myself at this point.

Thanks for reading!

EDIT: Boost leak tested the new setup, it holds 2 bars (29 psi)!
 
Last edited:
A couple of small jobs I finished recently

I like my Outlander brakes, but I wanted to see if I could get just a little bit more out of them, so I got some stainless steel brake lines.
1752411382655.jpeg
1752411452287.jpeg
1752411473704.jpeg

These were actually a pretty easy install, I barely lost any brake fluid. All but one came off without any problems:
1752411522476.jpeg

But even that one couldn't resist once I turned it into a liquid 😇
1752411607604.jpeg
1752411632205.jpeg


While doing this, I found basically the only downside to the car's current stance:
1752411867639.jpeg

I really hope smaller tires will be enough to avoid this rubbing if I ever get some, becasue the next step after that might just be tubbing the front wheel wells and I really don't want to do that.
In other news, I removed a couple veins from the interior wiring harness, to properly delete my immobiliser unit.
1752412246213.png
1752412460698.jpeg

I de-pinned all the connectors that were affected by this piece of crap like the OBDII port, and routed the wires according to the USDM electrical manual. No more redneck connector jumping for me.😁
1752412416609.png

I also made a new line to connect the rear O2 sensor heater to the ECU, as the EU wiring harnesses have that wire going to a chassis ground for some reason.
When that was done, I was going to replace the entire front chassis wiring harness as well, so that I could finally use a 2G alternator (I've had a 1G this whole time), but I had to stop once I realised that my donor car and my main car have different ABS modules. The declipse ('98 donor car) has the ABS computer in the passenger footwell, while the eclipse ('99 main car) has the whole thing packed in the driver side fender. Since simply swapping the harnesses was no longer an option, I decided to keep my '99 harness. I cut off the 1G alternator plug the previous owners put in and crimped the '98 2G plug in its place. I don't know why they even swapped it in in the first place but it doesn't matter, It's gone now.
1752413199018.jpeg

With this, I managed to delete the P0141 (O2 sensor heater circuit malfunction) and P1500 (Generator FR terminal circuit fault) trouble codes the car was throwing. All that was left now were these three (that are all for sensors/solenoids I don't have anyways) -
1752413374249.jpeg

- and the occasional P0300 (Random cylinder missfire) I get above 6k RPM (still working on that). The 2G alternator swap was probably the most noticeable out of all of these, as I can now use my wipers, adjust my mirrors and mess with the lights, all without dropping a single RPM, whereas before, any electrical functions would nearly stall the engine.

Completely unrelated; here's a (basically brand new) 1G alternator with 2000 km (1.2 k miles) on it for sale:
1752414356954.jpeg
1752414374926.jpeg


That's kind of it for this update, but before I wrap up, I just want to mention that after 3 years I finally managed to take the car to its first car meet! It was a really cool "youngtimer" car meet where it got some attention, but couldn't compete with a widebody Opel Calibra and TWO Lancia Delta HF's. (what could 😅)
1752414607956.jpeg


So yeah, for next year, I'm thinking something along these lines...
1752414802488.jpeg

...maybe

Thanks for reading!
 
Last edited:
Big W today!

I don't know if I mentioned it yet, but my clutch has been rattling for the past month or so and my dad suggested the springs in the used friction disc I put in there were coming loose. I figured, since I would be pulling the transmission again, I would order some new engine mounts as well. I last replaced them when I was swapping the engine, with 4 brand new ones off of RockAuto. It turns out I would have been better off just keeping the original, 20 year old mounts, as these new ones were really shitty.
1754685895237.jpeg
1754685926029.jpeg

This front roll stopper is literally 1 year old and it's trashed already.

I ordered a full kit of polyurethane inserts from Prothane and they are awesome:
1754686154227.jpeg
1754686178020.jpeg

The engine and transmission mounts are full replacements, which means the original rubber bushing has to be removed from the aluminium mount and the poly insert takes its place. This can be done with a press, but you do risk cracking the mount if you are not careful...
1754686433415.jpeg

I had this one just a *tiny* bit crooked under the press and it was enough for the steel collar to catch in the mount and cause it to crack. I prefer the method of inserting a hacksaw blade through one of the spaces in the bushing and cutting through the steel collar to relieve some of the pressure on the mount, before hammering it out with a punch. It's much more controlled.
1754687400683.jpeg

Luckily I still had my original mounts lying around, so I got a free do-over. And it's a good thing I kept ALL of them, as a problem presented itself when it came time to do the front and rear mounts. Those ones are not full replacements, only inserts that fill the voids in the factory bushing.
The mounts I got from RockAuto (that were trash anyway) were just barely different enough from the original design that the poly inserts wouldn't fit them.
1754687800334.jpeg

So I had to reuse the original front and rear mounts to accommodate the inserts. I didn't mind, as they are much healthier anyway.
1754687662941.jpeg

I replaced the clutch disc (I just put a slightly-less-used one in, so hopefully it lasts a bit longer than the other... used one... I can see another transmission removal in my future... 🧙‍♂️) and installed the new mounts. It's much harder to maneuver the engine and transmission into their place with these because they fit very tightly into the brackets on the chassis, so the next transmission removal WILL NOT be fun.

I wanted to give these the best chance I could at keeping the engine firmly connected to the chassis, so I decided to eliminate the only remaining rubber bushings in the engine bay, the ones where the front crossmember connects to the radiator support. I measured the original bushings and re-made them from polyethylene on a lathe.
1754689823013.jpeg
1754689849013.jpeg
1754689875549.jpeg

I honestly would have done the same for the 4 engine mounts, but it turns out raw polyurethane is actually more expensive than a set of already produced mounts. Go figure. These cost me about 10€ ($11.65) in polyethylene and I still have enough to make like 10 more sets so if you want some feel free to DM me. I'll charge you 10€ and shipping.

I also listened to @chrysler kid's advice from like - a year ago -
i dont think you mentioned it, but you need to get a boost gauge installed on the car to see if you are actually losing boost, or over boosting and causing fuel cut.
- and finally got a boost gauge. It's a cheap Chinese knockoff yes, but I just wanted a quick way to check where my boost levels were at. I tapped into the fuel pressure regulator vacuum line and routed the gauge into the cabin through the driver side window. I didn't bother connecting power to it, so I just squint my eyes a little to see through the tinted lens.
1754749450568.jpeg
1754749807252.jpeg

And wouldn't you know it, the thing was showing less than 5 psi (0.34 bar) at 6k RPM and wide open throttle. I traced the problem to the wastegate actuator. When I got the car, it was crushed all the way flat and it wasn't opening at all, so me and my dad carefully "uncrushed" it when I was rebuilding the engine. This is absolutely ridiculous, but it tracks with the car's previous state - the engine was loosing compression, so the previous owners made it so that the turbo just never stopped spooling and you couldn't really tell the compression was hurting.

The wastegate actuator was beyond saving though, as it opens way too soon now that it's been uncrushed. I temporarily fixed this by connecting a bleed valve between the turbo and the wastegate actuator that, when set to its' most restrictive setting, prevents the wastegate from opening until around 9.5 - 10 psi (0.68 bar). I couldn't believe it, but this did the trick, the car actually stopped missfiring at 6k RPM+. The P0300 (Random cylinder missfire) code is gone and the car pulls like crazy. Combined with the polyurethane engine mounts and the brass shifter bushings, it feels so responsive and direct. Even the sound it makes is more pure than before. I love it.

I still ordered a new wastegate actuator, to see if I can maybe push 15 psi (1 bar) with this 14b turbo. I might have to re-do the valve cover gasket before I do that though, because it absolutely did not hold at these new boost levels.
1754751598513.jpeg

I torqued it to spec (30 inch-lbs) and apparently that was not enough. It spat so much oil out onto my exhaust manifold that I was legitimately scared it would catch on fire. I let it cool down and I babied the car home, where I tightened the bolts down with a screwdriver as much as I could by just using my wrist. The cover still leaks a bit and the gasket is already squeezing out at some edges so I'm not really sure what else I can do. The PCV system is working fine. Maybe I have a warped valve cover?

Anyway, it's a small setback compared to everything I've managed to fix this week. I can't believe I actually got the car to boost through the enitre rev range. And I can't believe it had so much more to give. And still has! It's so fun to drive. I can't wait for the new wastegate actuator to arrive.

Thanks for reading!

EDIT: Installed new wastegate actuator and made 8 psi (0.55 bar) without boost controller and ~16.5 psi (1.13 bar) with boost controller. Really woke up the car. I could push it just a little bit further, but I need to deal with the valve cover first.
1755980830282.jpeg
 
Last edited:
PCV (Positive crankcase ventilation), catch can, valve cover work

With my valve cover leaking oil everywhere, despite the fact I re-did the gasket just a week prior, I figured the only possible cause could be excess pressure in the crank case. I figured the PCV valve was letting manifold pressure in through the valve cover as they are notoriously bad at being 1-way valves.

I decided to implement a small catch can into the build, with a vaccum source, to relieve the extra pressure as well as to stop spreading oil around my intake system. I found a nice one from Epman Sport Italy that had 2 inlets and 1 outlet, just like I wanted. It came with a flimsy little mounting bracket and 2 self-tappers, which I was most definitely not going to use, so I got a bracket laser cut out of 2 mm stainles steel.
1759011949864.jpeg
1759011972790.jpeg

I went with 2 mm because the car experiences a lot more vibrations with the new poly engine mounts, so things need to be pretty sturdy. I designed it so that it matched 2 unoccupied bolt holes in the passenger chassis rail. I don't know what was supposed to be mounted there but it's the catch can now.
1759012058330.jpeg

The fittings on this thing are 12 mm in diameter and the ports on the valve cover are 8 mm, so I had to get creative with the piping. My first plan was to simply replace the fittings on the catch can with smaller ones but I quickly abandoned that idea, as the threads are NPT or something and I couldn't find such fittings anywhere.

I decided to just run both sizes of hose and connect them with 8 mm to 12 mm reducer & joiners.
1759012082507.jpeg

I did find a barb fitting that was the same thread as the PCV valve though, so I decided to get it, as I wouldn't be needing the PCV valve anymore. It's actually the exact same diameter as the valve, so minus the ball and spring - I hope it improves flow a bit.
1759012117048.jpeg
1759012143375.jpeg


I also found a nice plug for the hole in the intake manifold that wouldn't lead to the valve cover anymore after this upgrade -
1759012193357.jpeg
1759012236931.jpeg

This could have just as easily been a rubber plug and a zip-tie over the factory nipple, but it's a tiny bit cleaner this way.

This is how I routed the lines for the catch can; it's about as efficient as I could get them with the inlet ports on the catch can being 135° apart and all:
1759012334255.jpeg
1759012354211.jpeg

I hooked up the outlet (middle port) on the catch can to the biggest port on the Injen intake, which happens to be 12 mm, so no reducers were necessary there.

While doing this, I also changed out the last factory 90° charge pipe (like I promised I would in update #83) as well as the plastic couplers I used back then. The same store I bought the silicone hoses at also carries aluminium couplers of the same diameter. Turns out the ones I made actually were too soft and they did in fact buckle under the hose clamps. My bad.
1759012439165.jpeg
1759012458799.jpeg


The PCV system was now better than ever, but despite all of this - the valve cover was still leaking. I figured there was nothing more I could do but the gasket again so I got down to it. And while everything was apart, my dad (bless this man and his "broken clock" moments) pointed out the large bolt holes on my valve cover. A little context here - I have a supposed Hyundai valve cover and the bolt holes on it are 10 mm, as opposed to Mitsubishi covers where they are just little over 7 mm. Since the bolts are M6 (6 mm) on both, they have much more room in the 10 mm holes, so the cover could have easily shifted a bit when I installed it.
1759012550487.jpeg
1759012562231.jpeg


Dad suggested I make some 10 mm collars to help the bolts center the valve cover. I looked into this and found that Hyundais actually had special bolts, only for the valve cover, that had a thicker body and would center the valve cover!
1759012752058.jpeg

Having learned this, I was going to cut some collars on a lathe, but then I found that M6 tube nuts have an outside diameter of almost exactly 10 mm! (It's a little less, but that's perfect for heat expansion and stuff.) I bought a bunch of them, cut them in half and cleaned them up with a file. And pretty soon I had my own set of custom Hyundai valve cover bolts.
1759012841881.jpeg
1759012854223.jpeg

I also got some wider washers for them, I was an idiot before and got smaller ones because they looked better, and didn't realise they were just barely bigger than the bolt holes, so they were just barely clamping down on the edge of each hole. And wouldn't you know it - the valve cover seals now. Thanks dad!

Unsurprisingly, that's not the end of oil leaks on this car. But I won't mention how the turbo is bleeding from the compressor housing and the oil feed in this update though, thats for another time.

Thanks for reading!
 
Last edited:
At long last - gauges!

I recently recieved a triple gauge pod A-pillar for the car. It's made by GlowShift and for the most part it's pretty nice. It looks clean in both black and gray and fitment is no issue.
1766581969758.jpeg

The only part I don't really like is that it's ment to fit OVER the factory A-pillar and attach with screws. I am very much against mounting it like that; I would prefer a full replacement piece, so that I get too keep my factory A-pillar intact. Since I still have my Mitsubishi declipse (parts car), I took the A-pillars out of that and cut the plastic tabs off of them. They were already very broken, each pillar only had 1 out of 3 tabs left so I considered them garbage anyway. I glued the 2 salvaged tabs into the GlowShift pillar with silicone glue to make what is now essentially a full replacement A-pillar with gauge pods.
1766582372766.jpeg

I spent a lot of time evaluating my options on mounting gauges before I landed on the A-pillar. I didn't go for the steering column mounts because they look weird in my opinion and I didn't want to mount anything under the radio, because it'd be too far out of view when driving. The next best option was mounting either in the center console vents or in dedicated pods right on the dash, but that would require either breaking a set of vents or drilling/gluing pods onto the dash and as you can probably tell by now, I try to avoid permanent damage when it comes to the interior. That basically left me with the A-pillar. The only concern I had here was that I could be losing some visibility, but having installed it, I don't think it's a problem at all.
1766583417085.jpeg

This picture was taken at eye-level with a 0.5 zoom lens and the camera right where my face would be. I didn't mind the pillar to begin with and after a couple of drives, I didn't even notice it anymore. So to anyone who's like me and likes to keep their interor mods somewhat reversible - this is probably the best option. If I find myself needing more gauges in the future, I'll probably go for the gauge cluster bezel with 2 extra gauge pods next, but I don't think that'll be necessary anytime soon.

For the actual gagues, I went with an AEM X-Series AFR gauge (30-4110) with the included UEGO wideband sensor. I like the 30-4110 series better than the 30-0300, simply because of the bezel. I get that the latter is newer and slightly advanced, but I like the conical, chamfered look better than the circumcised, rounded 30-0300. 🤷‍♂️
1766584731836.jpeg

I kept my Chinese boost gauge.😅 I know I said it was temporary, but it's simple and mechanical and I wanted the instant gratification of having more than 1 gauge in my new A-pillar, so I kept it. I'm still looking to replace it - now with an AEM classic, if I can find it, as I really like the look.

1766585595706.jpeg

This is how I did the wiring. At first I was keeping everything together and organised and going into a single connector that would power the whole pillar from one spot, but then I realised the AFR gauge needs to have key-on power to work at all, while the boost gauge only needs lights-on power, because it oNLy PoWeRs ThE bAcKLigHt AnD tHe AEM hAs ExTrA WirEs GoiNG tO tHe ECU aS WeLL aS tWo GoiNg dOwN tO tHe O2 SeNsOr AnD i'm OnLy UsInG oNe Of ThEm, So It MaKeS nO sEnSe To BuSt My AsS aNd RoUtE tHeM bOtH tHrOuGh ThE cOrNeR oF tHe DaSh AnD nOw I nEeDeD a SeCoNd CoNnEcToR aS WeLL aS a SpOt To TaP iNtO fOr KeY-oN 12 VoLtS and it all just went to hell.

I managed to re-purpose one of the wires that used to go to the immobiliser I deleted for key-on 12 V and I kept just the boost gauge backlight wired to the headligh switch.
1766586361875.jpeg
1766586383285.jpeg

I'm using these crimp connectors and heat-shrink to connect wires where I need to, but mostly I'm just adding entire branches to the harness or re-using ones that have no current purpose. If you've been following for a while you'll know I already had to fix a wiring job so hacked that I would not wish it upon my worst enemy to get this car to where it is, so you'll understand why I am very much against splicing wires and connectors if one can avoid it. Most, if not everything, I've done in regards to wiring on this car can be reversed with 0 damage to the factory harness.

As for the wideband O2 sensor, I'm kind of lucky to have what was once a European GS model eclipse, because they came with a rear O2 sensor, so it already has a convenient O2 bung in the exhaust, right under the driver seat. Thus, I can keep the factory upstream O2 (in the turbo's O2 housing) as well as add a wideband O2 in a factory location, far enough downstream to hopefuly survive the heat OK.
1766587166769.jpeg
1766587190653.jpeg

I extracted the rubber grommet from an old O2 sensor and wired the AEM gauge's wires through, so that the connector for the wideband O2 sensor is on the outside of the car. This left me with quite a bit of extra cable under the car that had to be tucked away, so I'll be sure to get the short cable O2 sensor next time. But routing it like this will make replacing that sensor a 15 minute job, instead of an afternoon of cursing.

It's a little sad that the rear O2 heater wiring I fixed just 2 updates ago won't be getting any use, now that the rear O2 was replaced with the wideband, but I'm still happy I fixed it, as it gave me a chance to learn and - it's still there, tucked away inside the center console, on the off chance I ever revert the car back to stock.

That's it for this one, thanks for reading!

EDIT: Forgot to ask, what gauge do you guys think I should put in the third pod? I'm leaning towards oil pressure.
 
Last edited:
Turbo rebuild on a budget

Everytime I go to wash this car I get annoyed anew, by the amount of oil that accumulates on the rear bumper. It's an indication that the engine is leaking oil, as droplets are swept up by the airflow under the car and disintegrated on the surface of the rear bumper. I knew for a fact that one of these leaks was my turbocharger's compressor housing. Rebuilding it kind of seemed like a waste, but since neither me or the car are ready to upgrade just yet, I decided to do it. But to avoid reckless spending; with a strict budget of just 100€ (120 USD).
1772314807744.jpeg

I figured I'd be spending 50€ for a kit of gaskets, bearings and seals and 50€ to have the rotating assembly balanced once I'm done. Easy.

While taking the turbo apart, I found my first problem. The main clamshell clamp was barely tightened down. This explains the large amount of carbon deposits I could see on the side of the engine – the exhaust was leaking out between the two sides of the turbo. I also noticed some damage on the turbine blades. Some debris must have gone through here at some point…
1772314870440.jpeg

…and once I got the turbine housing off of the exhaust manifold and out of the car as well, it became pretty apparent what that was.
1772315153199.jpeg


The turbine housing was wrecked beyond anything I would have ever expected.
1772315234621.jpeg
1772315261501.jpeg
1772315283674.jpeg

The casting was so fatigued from 30 years of heat cycles and poor ownership that chips were breaking off and chewing up the turbine blades, so I decided to call time of death on it. There was just no way to safely run it again.

I ordered an OEM replacement shaft & turbine for 50€ (60 USD) as well as a Chinese 16G turbine housing for 127€ (150 USD). I wanted to keep everything 14B but since they are impossible to find, this was the next best thing. While waiting for everything to arrive, I chucked the compressor housing (at least this one was still usable, thank god) on the lathe and I cut a 30° to 60° transition into the inlet, which I then rounded out with sandpaper to make an overall smoother inlet for the air.
1772315356059.jpeg
1772315433845.jpeg

I also polished the compressor housing just a bit to make it look nicer. I had time to kill.
1772315517005.jpeg

The rotating assembly was easy enough to assemble, I put everything together with reference to the instructions and sent it off to get balanced.
When the new turbine housing arrived some time later, a couple of things were apparent. The inlet was way to big – I was going to have to port out the exhaust manifold, AND the outlet was way to big as well – I wasn't going to be able to run the OEM O2 housing.

I fired up the die grinder and added more than 10 mm to the exhaust manifold outlet diameter, which as it turns out, is also showing its' age through a few little cracks, though I was absolutely not going to deal with that as well.
1772315611501.jpeg
1772315631974.jpeg


As for the O2 housing – I ordered a bigger one on eBay.
1772315690446.jpeg

I couldn't help myself; I ordered one with a wastegate dump. I must have hit my head or something, I don't know why I didn't just get a recirculated one. But anyways, that's an extra 130€ (150 USD) and tax down the drain.

I didn't bother to check its' outlet flange size though, so the inlet matched the new 16G turbine housing great, but the outlet was bigger than my 2,16 inch (factory?) downpipe. I probably could have bolted the existing exhaust up to it anyway, but I figured, with the ported exhaust manifold AND the wastegate dump, I might as well let the 16G turbine housing breathe as much as possible.

So I got a TIG welder (459€) (541 USD) and some stainless steel tubing and made a nice little 3 inch dump pipe.
1772315966615.jpeg


Another thing I did while waiting for parts to arrive was port the wastegate. I got carried away and cut under the flapper though, which is a cardinal sin. If you cut basically any material away from under the flapper, it will catch on that edge and sometimes refuse to close.
1772316029756.jpeg
1772316059493.jpeg
1772316083919.jpeg

I mitigated this by smoothing out the edge of the hole, which thankfully worked, but this really is a last resort. You're better off just never cutting under the flapper and avoiding this entirely.

While we're on the topic of wastegates – I needed a new actuator. My old (brand new one actually, see update #87) 14B actuator is not adjustable and the 16G housing requires an adjustable actuator arm to function properly. I might have been able to cut and weld the arm on the old one but I just ordered a real one instead. That was 70€ (80 USD).
1772316452866.jpeg

I had to bend its' bracket and the flapper arm a little bit to get the arm to clear the turbine and compressor housings, but it worked out great; nothing broke and the actuator functions as intended. I'm a little worried the wastegate flapper will catch on its' port hole again, but so far, it's been good.
1772316531728.jpeg


And that's about it - that's how you rebuild an entire 14B turbocharger for only 100€. Simple job, really.

(+/- 836€)

Oh yeah, and the car still doesn't run right as there isn't enough back pressure in the dump pipe for the exhaust gases to favor the wastegate exit, so now I'm just always boosting to 20 psi and fuel cutting as if I were hitting the brakes in the middle of a pull.

And I can't tune around it, becasue I can't use my wideband O2 anymore, because there's nowhere to plug it into on the dump pipe.

And I have to drive with ear buds now, so I don't risk hearing loss. I'm basically sitting right behind the dump pipe exit + the poly engine mounts transfer so much sound into the cabin, it's like you're sitting in a subwoofer.

I might have fixed the last oil leak, but I made the car so much worse, I'm literally buying pipe to make a full exhaust as I type this. I'm getting a cat as well. Anything to quiet this dumb car down.

I have tech inspection in a couple of months, why did I even do this lmao
 
Last edited:
Fire extinguisher mount

Couple of small projects, while I'm still honing my TIG welding skills and working my way up to welding the full exhaust; I've had a 2 liter fire extinguisher rolling around behind the passenger seat for years now and I figured it was time I mount that thing properly so that it doesn't become a neck-breaking projectile in the event of a crash.

I started with a piece of flat steel that I bent with a press to match the ridges of the passenger seat rails. This was essentially just trial and error, and many many walks to the press and back.
1772370601463.jpeg

I then used my eyeballs to measure where I wanted the fire extinguisher to sit; this felt about right. (The quick-release clamps came with the fire extinguisher)
1772370693071.jpeg

I did a tiny bit of engineering, when I actually measured what I had made so far and re-drew it in Solidworks...
1772370838063.jpeg

...but then again, maybe I shouldn't be bragging about that, since it was solely for the purpose of visualising where I could put some "weight reduction" holes. I welded the tabs, drilled the holes and gave the thing a coat of primer and black paint and that was about it.
1772371007415.jpeg
1772371053359.jpeg

My main goal (other than mounting the fire extinguisher) was retaining all of the functions of the passenger seat; I wanted the seat to be able to come all the way forward as intended, even with the fire extinguisher under it, and that goal was achieved.
1772371285266.jpeg
1772371315985.jpeg

The seat clears the fire extinguisher by milimeters, but that's really all it needs and I'm happy with that.
And this is what it looks like for a passenger getting into the car:
1772371426541.jpeg

It doesn't get in the way at all and it doesn't catch on anything, you're able to step into the cabin like it's not even there. It did add about 4 kg (9 lbs) to the car, but I don't mind; I'd rather have it weighing me down a bit than need it and not have it.

In other news, I got a Mishimoto radiator + fan/shroud combo:
1772376134156.jpeg
1772376141871.jpeg
1772376149609.jpeg

I didn't really need this for cooling; the car hasn't even come close to overheating since the engine rebuild, but I did start to see some cracks forming in the 30 year old OEM plastic radiator and I wasn't going to wait for one to give. This was on my wishlist for a while, so I just pulled the trigger on it now, while I had space to work, with the turbo getting rebuilt and all.

I also bought another fake Chinese boost gauge; they cost 5€, I can't help myself. I got one in black so it would match the AEM wideband above it a little better. And this one's in bars, though I was getting kind of used to psi.🤷‍♂️
1772377225401.jpeg


That's it for today, thanks for reading!

EDIT 1: spelling
EDIT 2: Check the wiring on your Mishimoto fans before you plug them in! Follow up post here.
 
Last edited:
How good are those fans for you? I've had issues with that fan set and shroud. My car kept overheating and then one day the fan just melted. I put the stock fans in and have no issues anymore.
 
How good are those fans for you? I've had issues with that fan set and shroud. My car kept overheating and then one day the fan just melted. I put the stock fans in and have no issues anymore.
I'm sorry to hear that. Did you try to contact Mishimoto at all? They talk big game about warranties and such online, I would hope they would cover something like that.

I haven't had a chance to really run mine hard, with the car not running right and all. I've taken a couple of 20 minute test drives maybe, no problems yet. I'll keep an eye out though. I would hate to go back to stock fans, just because of their size. I like the space this kit opened up under the hood.
 
How good are those fans for you? I've had issues with that fan set and shroud. My car kept overheating and then one day the fan just melted. I put the stock fans in and have no issues anymore.
Just had the car (almost) overheat on me for the first time in 2 years; I caught it just in time.

Thanks to this comment, my first suspect was the Mishimoto fans and so I quickly found both the 20 A fuse and 30 A fusible link, for the "AC condenser" and "radiator fan", blown. Since the fans weren't turning on, the car was about to overheat from standing still. Upon further inspection I realised the actual wiring to the fans was wrong. Huge oversight on Mishimoto's part.
1778526443193.jpeg

This is the plug for the radiator fan (passenger side). The wires going into that connector are 90° out from how they should be; where you are seeing a pair of black wires (grounds) in the foreground and a pair of blue wires (power) in the back, should be a pair of blacks on the right side and a pair of blues on the left. Shown in the picture, is a future short circuit. This seems to be the cause behind our cars overheating and melting fans when utilising Mishimoto fan shrouds.

For those interested - this thread has most of the information one needs to fix this, this post especially so. It goes over which wire does what, so you don't even need a wiring diagram. The connectors are some of the easiest to re-pin out there.
1778529211196.jpeg

You just need to pull this orange divider out with a pair of pliers, then use a small flat head screwdrier, or a thick sewing needle to lift the tabs that hold the terminals inside the connector. You pull on them from the back while you do this and they slide right out.

This is what the driver side fan wiring should look like once it's been re-pinned:
1778527729500.jpeg

Notice both white wires on the car's harness (pictured right) going into blue wires on the fan's connector (left). Those are power wires. The blue/green and black (right) are grounds, and they are going into the blacks (left), which are grounds. From what I can tell, it makes no difference which ground and which power wire goes where, since the Mishimoto fans are single-speed, only that they aren't going power-to-ground and vice versa.

Just make sure you don't get them 180° out by accident (both grounds to powers and both powers to grounds) as the fans will spin backwards which is just next to useless for cooling. I have a picture of this from when I got it wrong:
1778528442445.jpeg

Here, I had the whites (power) going into grounds (black) on the fans. DON'T DO THIS. This is 180° out from how it should be.

So yeah, thanks again @GIB for commenting when you did, saved me a weekend of troubleshooting and replaced it with 45 minutes instead. I wrote an email to Mishimoto as well, hopefully they start checking the wiring on their kits more thoroughly, so that we don't have any more fans melt. Go get your refund btw.
 
Last edited:
Just had the car (almost) overheat on me for the first time in 2 years; I caught it just in time.

Thanks to this comment, my first suspect was the Mishimoto fans and so I quickly found both the 20 A fuse and 30 A fusible link, for the "AC condenser" and "radiator fan", blown. Since the fans weren't turning on, the car was about to overheat from standing still. Upon further inspection I realised the actual wiring to the fans was wrong. Huge oversight on Mishimoto's part.
View attachment 791186
This is the plug for the radiator fan (passenger side). Before I took this picture, those wires were going into that connector 90° out from how they should be; where you are seeing a pair of black wires (grounds) in the foreground and a pair of blue wires (power) in the back, were miss-matched pairs of blacks and blues, which basically means the fans are wired in a short circuit. This seems to be the cause behind our cars overheating and melting fans when utilising Mishimoto fan shrouds.

For those intersted - this thread has most of the information one needs to fix this, this post especially so. It goes over which wire does what, so you don't even need a wiring diagram. The connectors are some of the easiest to re-pin out there.
View attachment 791191
You just need to pull this orange divider out with a pair of pliers, then use a small flat head screwdrier, or a thick sewing needle to lift the tabs that hold the terminals inside the connector. You pull on them from the back while you do this and they slide right out.

This is what the AC condenser fan (driver side) wiring should look like once it's been re-pinned:
View attachment 791189
Notice both blue wires on the car's harness (pictured right) going into blue wires on the fan's connector (left). Those are power wires. The two whites (right) are ground, and they are going into the blacks, which are grounds. From what I can tell, it makes no difference which ground and which power wire goes where, just that the aren't going power-to-ground and vice versa, since the Mishimoto fans are single-speed.

Just make sure you don't get them 180° out by accident (both grounds to powers and both powers to grounds) as the fans will spin backwards which is just next to useless for cooling. I have a picture of this from the driver's side where I got it wrong:
View attachment 791190
Here, the whites on the right are power from the car and I had them going into grounds (black) on the fans. DON'T DO THIS. This is 180° out from how it should be.

So yeah, thanks again @GIB for commenting when you did, saved me a weekend of troubleshooting and replaced it with 45 minutes instead. I wrote an email to Mishimoto as well, hopefully they start checking the wiring on their kits more thoroughly, so that we don't have any more fans melt. Go get your refund btw.
Thanks. I had them wired to an external relay connected to a separate coolant temp gauge,
Just had the car (almost) overheat on me for the first time in 2 years; I caught it just in time.

Thanks to this comment, my first suspect was the Mishimoto fans and so I quickly found both the 20 A fuse and 30 A fusible link, for the "AC condenser" and "radiator fan", blown. Since the fans weren't turning on, the car was about to overheat from standing still. Upon further inspection I realised the actual wiring to the fans was wrong. Huge oversight on Mishimoto's part.
View attachment 791186
This is the plug for the radiator fan (passenger side). The wires going into that connector are 90° out from how they should be; where you are seeing a pair of black wires (grounds) in the foreground and a pair of blue wires (power) in the back, should be a pair of blacks on the right side and a pair of blues on the left. Shown in the picture, is a future short circuit. This seems to be the cause behind our cars overheating and melting fans when utilising Mishimoto fan shrouds.

For those interested - this thread has most of the information one needs to fix this, this post especially so. It goes over which wire does what, so you don't even need a wiring diagram. The connectors are some of the easiest to re-pin out there.
View attachment 791191
You just need to pull this orange divider out with a pair of pliers, then use a small flat head screwdrier, or a thick sewing needle to lift the tabs that hold the terminals inside the connector. You pull on them from the back while you do this and they slide right out.

This is what the driver side fan wiring should look like once it's been re-pinned:
View attachment 791189
Notice both white wires on the car's harness (pictured right) going into blue wires on the fan's connector (left). Those are power wires. The blue/green and black (right) are grounds, and they are going into the blacks (left), which are grounds. From what I can tell, it makes no difference which ground and which power wire goes where, since the Mishimoto fans are single-speed, only that they aren't going power-to-ground and vice versa.

Just make sure you don't get them 180° out by accident (both grounds to powers and both powers to grounds) as the fans will spin backwards which is just next to useless for cooling. I have a picture of this from when I got it wrong:
View attachment 791190
Here, I had the whites (power) going into grounds (black) on the fans. DON'T DO THIS. This is 180° out from how it should be.

So yeah, thanks again @GIB for commenting when you did, saved me a weekend of troubleshooting and replaced it with 45 minutes instead. I wrote an email to Mishimoto as well, hopefully they start checking the wiring on their kits more thoroughly, so that we don't have any more fans melt. Go get your refund btw.
Thanks for the mention! I talked to the shop that put my fan in and what they did with mine is completely change out the wiring in the fans and connect it to a separate relay and coolant sensor. The fans still died and didn't cool the car well. I put the stock fans back in and no issues since. I really don't recommend these fans for the DSM. ( I will contact Mishimoto, thanks)
 
Add Value - Be Respectful - No Trolling - No Misinformation - Participate Often!
Support Vendors who Support the DSM Community

Build Thread Updates

Latest Classifieds

Back
Top