The Central Hub for DSM Community and Information

For 1990-1999 Mitsubishi Eclipse, Eagle Talon, Plymouth Laser, and Galant VR-4 Owners. This is where the DSM platform history is documented and archived. Log in to help us in our mission, and to remove most ads from the browsing experience.

IMG_5270.jpeg

1987 Mitsubishi Mighty Max 6-Bolt Swap

This site may earn a commission from merchant affiliate links, including eBay, Amazon, and others.

Good morning!
I thought I’d start logging my build process and what I’ve had to go through and when I run into hiccups or roadblocks, since this is a relatively common swap, but at the same time I’ve had issues finding answers to some of the things I’ve run into, so hopefully this will be able to help address future swappers if they run into the same issues!

Keep in mind, I’m by no means a professional, and this is absolutely the largest hobby project I’ve ever undertaken, so the other purpose of this log is to document where I may have cut corners and the potential consequences of my actions so others can learn from my mistakes.

With all that being said, I’ll try my best to start from the beginning and not forget anything LOL
 
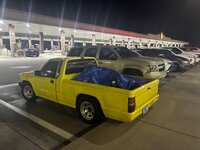
I first bought this truck back in July with plenty of oil leaks and a whole lot of neglect for quite cheap, so I wasn’t concerned as the plan has always been to swap the motor.

I initially owned a ‘92 2.4 (the white one) that I was planning to DOHC swap, but then this 2.0 truck popped up on the market and the whole engine swap seemed easier than a head and internals swap, so I sold the white one to a friend in order to fund the yellow one.

Drove this one for a month or so without any real issues outside of the oil leaks/burning.

IMG_5246.jpeg


IMG_5251.jpeg
 
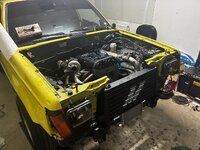
While preparing for the swap, I ended up purchasing two motors for it, one coming out of a swapped ‘76 Corolla that was RWD that had jumped timing, and the other being a “fresh” rebuild out of a ‘90 GSX…

RWD motor prepped for shipping:
25b3821bc56dbee3b294e112b7cbd576.jpeg


GSX motor on the way home:
IMG_5302.jpeg


I got a good deal on both motors, so the idea of having plenty of spares and also being able to use the RWD motor’s intake and exhaust manifolds without having to fab anything myself was super appealing for me, as I don’t have access to a welder, nor a whole ton of space.

Unfortunately I soon found out that the allegedly fresh motor was not exactly put together with much care and attention, and some of you may have even seen my first post on these forums asking about how concerned I should be about some of the red flags I saw.

I bought an inspection cam and fed it into the cylinders to have a look and found what appeared to be evidence of valve contact on the pistons, which meant I was not comfortable leaving the head on and hoping for the best.
IMG_5319.jpeg

IMG_5317.jpeg
 
After pulling the head (the first time I’ve taken any car’s head completely off mind you), I was met with mixed feelings, since a ludicrous amount of copper spray coated everything in sight: pistons, rings, valves, gasket, oil journals etc. but I was happy I decided to pull the head to be safe.

IMG_5395.jpeg

IMG_5397.jpeg


I ended up sending the head off to a shop to be cleaned and checked for spec, and then completely disassembling the whole bottom end myself to clean and reassemble. An incredibly intimidating task for an amateur hobbyist by the way, but the Haynes manual and the overhaul manual from this website made it doable for a first timer.

IMG_5428.jpeg


After cleaning and getting the head back, putting a new headgasket on and reassembling the motor it was time to get the rest of the accessories ready for the swap, new timing belt, thermostat housing and water outlet. This is also the point where I initially ordered the water pipe that runs from the water pump alongside the block and runs to the lower radiator hose and heater core. The turbo I am using is a small 16G from the RWD motor, and it had it’s coolant passage blocked so I am just running it the same way, and as a result ordered the non-turbo water pipe for a cleaner install.

Unfortunately USPS lost my package, and still hasn’t recovered it so I’m still waiting on a water pipe til this day.

If anyone has a spare, hit me up, I just want to get this thing running LOL

I used the water outlet from the 1.8 eclipse, since it points the radiator hose out away from the firewall so I didn’t have to do as much hammering in order to get clearance
IMG_5563.jpeg
 
It was at this point at the end of August that I went back home to visit family in Australia for a couple weeks, so I left the truck with a local performance/fab shop near me in Florida for him to make some brackets to mount the intercooler and oil cooler, I think they ended up looking pretty good
3df4c79d-ae59-452d-ab89-313ab1d84e5a.jpeg


i’ll be running a “drift” style tube steel front bash bar, the same shop will be making the intercooler piping, bar and exhaust from the downpipe back, I’ll post updates when that finally gets done later down the road.
 
Upon returning from my trip, I had a few extra days of leave before having to return to work, so I dove headfirst into pulling this motor in a friend’s garage as I don’t have a garage of my own, and I wanted to get as far as possible before being limited to outside working hours.

Being the first time I’ve ever fully pulled a motor, it was surprisingly easy to take out!
Tons of room in that engine bay though, so that made it easier of course, but a friend and I had the motor out in just 3 hours
IMG_5506.jpeg

IMG_5511.jpeg
IMG_5513.jpeg


Foolishly I thought that I would be able to have the mechanical side of this engine swap done in just a few days (oh how wrong I was, considering the motor came out on the 10th of September, and the truck’s still not mechanically 100% as I’m writing this on the 14th of October LOL), but the first major hiccup I ran into was accommodating the pilot bearing for the KM132 transmission input shaft with the new flywheel.

The old flywheel has a pressfit pilot bearing in the flywheel itself, and the new, FWD flywheel that you have to use to get starter engagement on this engine/transmission setup does not. In fact it almost looks like the center hole of the new flywheel wouldn’t even fit the input shaft.
Old flywheel/bearing
IMG_5517.jpeg


New flywheel
IMG_5518.jpeg


Now I don’t really have access to a lot of facilities so I was initially going to just stick the old clutch and flywheel setup from the truck onto the new motor, since I had read that others doing the same swap have been able to do that, but I didn’t see anyone else run into what I did with the crankshaft compatibility. The new motor’s crankshaft has this little locator pin on it’s face that the old one did not, so I wasn’t able to use the old truck flywheel even if I wanted to.

By a stroke of luck, I was able to overhear some coworkers chatting about metal fab and machining, and so I mentioned I was in need of someone with those capabilities, and they were super happy to offer their lathe services in exchange for a couple beverages!

So one trip to the store and a few minutes later and I had a newly machined flywheel for my pilot bearing (I had bought a new bearing with the new clutch so I already had it), although the fit was more of a loose press fit than a snug one, so I decided to get a little redneck for my own peace of mind and use a hammer and punch to stake the back of the flywheel so the bearing can’t fall into the crankshaft. I also used bearing specific Loctite, I can’t remember the number off the top of my head but it’s green and I had to special order it.

IMG_5561.jpeg


I am pretty proud of the way my diy staking turned out, but time will tell if physics feels the same way LOL
IMG_5560.jpeg
 
While the motor was still out, I cut out the old exhaust, tore out the old engine harness and ecu from the truck, replaced the old stamped transmission pan with a thick, billet aluminum pan from DFab designs in order to limit as much of the “case flex” that I hear these transmissions are prone to, and also start mocking out the fuel system.

New pretty transmission pan on a very not new transmission
IMG_5533.jpeg


For the fuel system, the old motor used a mechanical fuel pump mounted on the intake manifold that fed a carby, so low pressure and relatively low flow. Obviously 5psi isn’t exactly gonna cut it for the new motor, so after some more research I decided to go with a surge tank setup.

I had never gotten into fuel systems at all before, so running entirely new lines, pumps and filters from the tank was obviously uncharted territory.

Very crude system layout planning in the bed just so I could visualize and count how many fittings I needed to buy :hellyeah:
The brake cleaner represented the fuel rail and the cardboard box the main tank LOL
IMG_5532.jpeg


I spent hours trying to figure out where to hide this little 2.5L deatschwerks surge tank before giving up and just mounting it to the front of the bed and putting 4 holes with rubber grommets in the corner of the bed for line routing. At least troubleshooting should be easy now, right??
IMG_5612.jpeg

IMG_5611.jpeg


Space is surprisingly at a premium underneath the truck in terms of routing fuel lines and external pumps, but I did the best I could, trying to keep my future maintenance in mind and keeping filters and pumps accessible

Pre-pump 40 micron filter (those factory hard fuel lines have since been removed)
IMG_5627.jpeg


Walbro 255 acting as my lift pump, you can see the filter in the background as well, around the frame
IMG_5626.jpeg


I also just mounted the rest of the components where I could but didn’t get around to making the lines themselves until a little later on

Deatschwerks 250 acting as my high pressure pump
IMG_5628.jpeg


10 micron pre-rail filter
IMG_5630.jpeg
 
Next up before just tossing the new motor in was a little bit of what we call “mechanical encouragement” in my line of work, specifically directed towards the firewall

Other people that have done this swap tend to either move the motor forward a couple inches, or cut the firewall around the transmission tunnel and then reweld it, but as I mentioned earlier, I don’t have the skill, space or tools to weld or make custom mounts, so I went with the secret third option, just take a big mallet to the firewall and try not to hit anything important LOL

First fit attempt, not enough clearance
IMG_5568.jpeg


Second attempt, enough clearance for the motor, not enough for the poor heater core pipes that have been slightly modified, whoops
IMG_5570.jpeg


On the third attempt, I got the clearance right but unfortunately a side effect of this truck being low, I had to put the front end on ramps just to get my engine lift in under the subframe, so it was on a weird angle that just proved far too difficult to get the transmission and motor to mate correctly, my friends and I spent what felt like hours about a quarter inch away from mated, but just could not get it to fully seat.
IMG_5569.jpeg


This is where I called it for the night, and upon returning the next day, I just decided to pull the transmission out, mate the motor outside the truck and put it all back in as one unit, and thankfully since I’d drained the transmission to swap the pan on it, it weighed very little, super easy to just pull out and mate to the engine in open air, took less than an hour.

Side effect of this decision is that my little marketplace find engine lift didn’t want to lift the motor and transmission up and over the radiator support where the hood mechanism used to be, so I ended up just cutting that part out with the angle grinder just so I could get the motor mounted. I probably could have manhandled and messed around with it for hours and eventually got it in without having to cut, but at this point I was over it, so cutting that just seemed like the much smaller headache.

IMG_5572.jpeg
 
With the motor physically 3-pointed/mounted, I temp installed the intake and exhaust manifolds to check clearance and make sure everything was going to be where it should be

IMG_5573.jpeg


Turns out the custom downpipe from the RWD manifold has the O2 sensor bungs angled towards the firewall, so some more mechanical encouragement was required to make some clearance for those two, although not nearly as much as the thermostat housing.

Next oddball thing, for whatever reason, the previous owner of the RWD motor used a Mustang throttle body, so the TPS had to be spliced into the harness, but also means the IAC valve is kind of a standalone unit now. Thankfully the PO gave me the IAC that he used, but now I’m kinda working out the plumbing for it, leaning towards using the factory brake booster nipple, as that’s the closest point to the throttle body on the intake side, and the PO welded a bung on the intake pipe just before the throttle body for the intercooler side
IMG_5586.jpeg

IMG_5654.jpeg


I’m planning on running this on speed density, so the next big obstacle for an amateur such as myself is planning out the vacuum plumbing off the intake manifold. I’ve used the taboo speed shop and taken some queues from other vacuum related posts on these forums to come up with a rough port assignment

These assignments have changed slightly since the photo, but I’m just including this photo as a visual reference. I tried to use the factory ports if possible. As of now, the IAC will go through the brake booster nipple, the FPR will use the factory port and my boost gauge will be tee’d with it there.

IMG_5686.jpeg


Do you guys see any issue with me using the factory BOV port as intended, and then running my MAP sensor off of the old PCV(?) system port that points vertically near the fuel rail? I’m running a catch can setup so I don’t plan on using that port anyways

And if that would be an adequate position, would removing a plug on the end of that channel near the old EGR valve and tapping a new nipple for the brake booster affect my pressure readings at all? I don’t see how it would, but I am of course very new to this.

Something like this?
IMG_5757.jpeg
 
Add Value - Be Respectful - No Trolling - No Misinformation - Participate Often!
Support Vendors who Support the DSM Community

Latest Classifieds

Back
Top
