The Top DSM Community on the Web

For 1990-1999 Mitsubishi Eclipse, Eagle Talon, Plymouth Laser, and Galant VR-4 Owners. Log in to remove most ads.

Please Support ExtremePSI

Crash89s Spyder build!

This site may earn a commission from merchant
affiliate links, including eBay, Amazon, and others.

This site may earn a commission from merchant affiliate links, including eBay, Amazon, and others.

crash89

15+ Year Contributor
3,537
181
Mar 5, 2008
Punta Gorda, Florida
2012-2013 winter updates start page 5 post 142

I figure now that I started tearing into the Eclipse that now is a good time to start this! Id really love to get the car into the 10s, although I know that is a ways down the road.

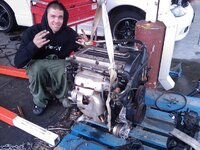
Give y'all a little History. I bought the car March of 2008 mostly stock except an Ebay 16g with 84k miles. I thought this car was the fastest thing in the world. And what happens to a car driving by a 19 year old newb who neglected it and beat on it? Yep, you guessed it. Spun a rod bearing in July, 08. On a tight budget having just joined the Air Force I went the easy/cheap route and bought a new crank and bearings off Ebay. Well 5 months later another driving to a buddys house New Years eve my "fresh" motor decided to crap out on me AGAIN. Then I said screw it and bought a complete motor from JDMdepot.

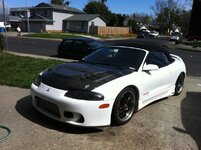
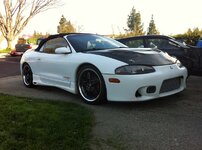
Thats about when I started actually reading up and paying attention to the cars needs and taking care of it. After that it was basic bolt ons and a few clutch jobs.. Lets get on with the pics!!

Post #1 Goals and a little back ground (2008-10)
Post #3 FWD dyno, Suspension, AWD swap (Jan-Sep '11)
Post #4 and 6 Winter 2011/12 Motor build and paint
Post #8 and 9, 11, 17 Engine bay clean up for paint and paint
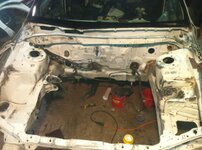
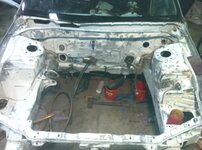
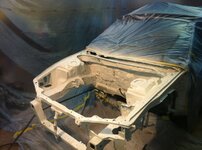
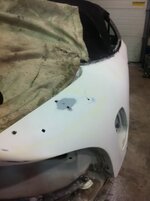
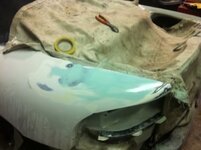
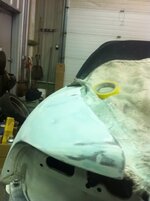
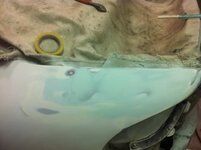
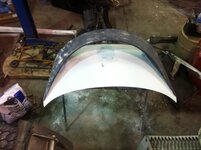
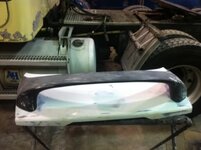
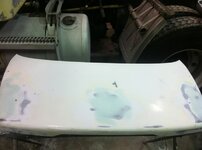
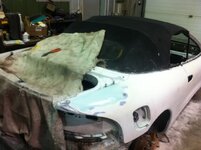
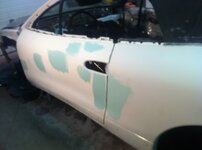
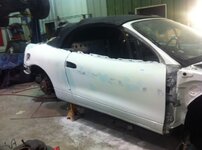
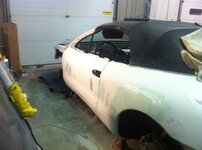
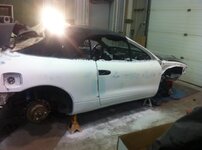
Post #21 and 25 Body work
Post #34 Wire harness/wire tuck.
Post #142 2012-2013 winter build/upgrades start!

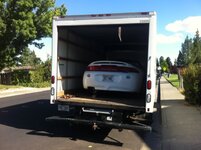
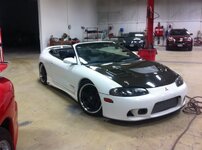
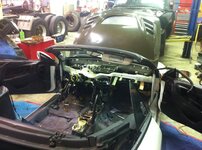
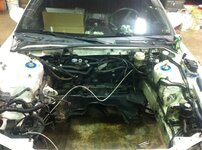
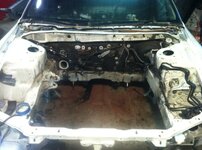
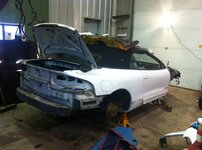
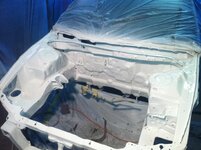
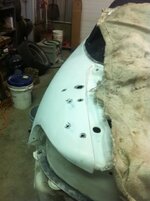
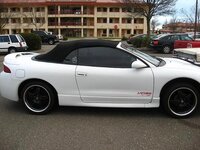
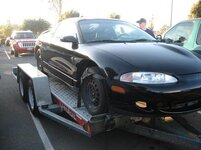
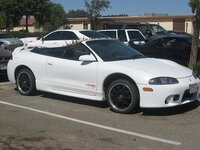
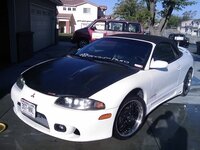
This is just after I bought the car.
461108[/ATTACH]"]
IMG_0580.jpg


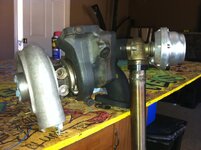
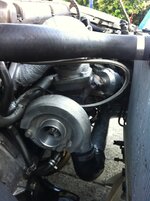
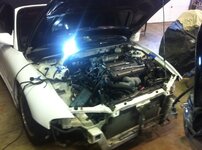
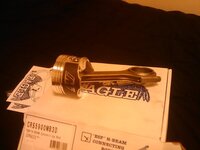
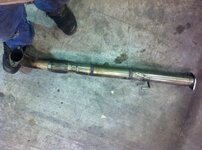
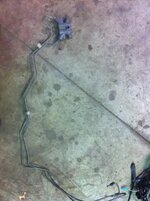
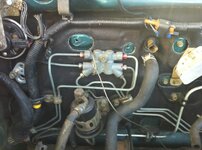
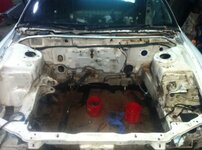
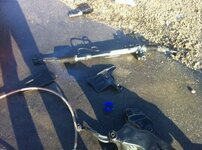
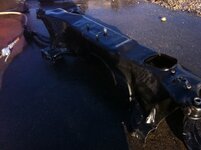
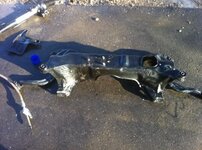
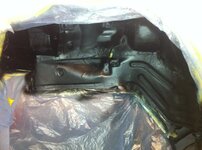
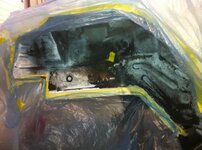
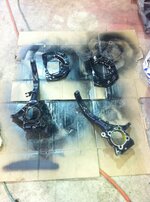
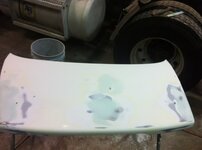
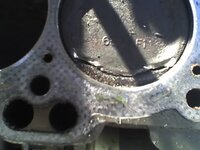
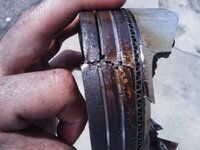
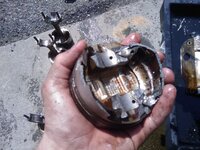
These are from the motor that let go on New Years eve. Thought I had some timing problems..
461110[/ATTACH]"]
pison2.jpg


461112[/ATTACH]"]
brokepiston.jpg


461114[/ATTACH]"]
brokepiston2.jpg


461116[/ATTACH]"]
brokepiston3.jpg


461118[/ATTACH]"]
brokepiston4.jpg


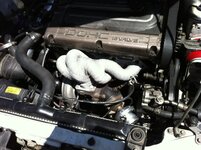
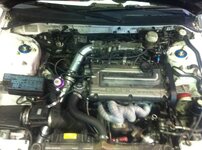
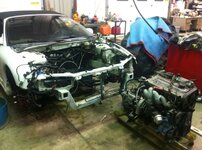
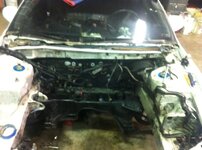
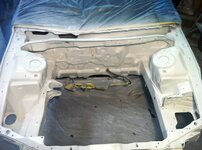
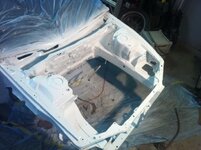
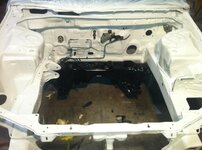
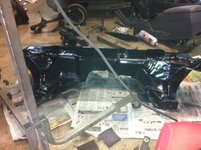
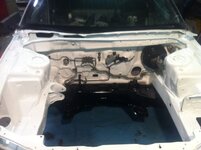
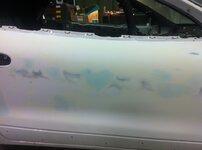
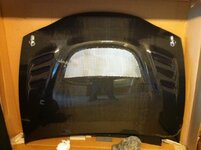
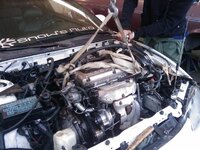
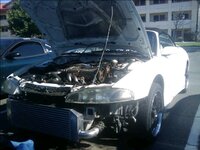
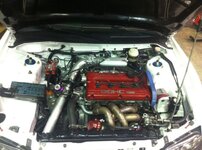
The car for the longest time just had an Ebay 16g, wally255, and VRspeed front mount and CF hood. Then I deployed and got back Jan of 2011 and thats where the fun started.

461120[/ATTACH]"]
hood14.jpg
 

Attachments

  • IMG_0580.jpg
    IMG_0580.jpg
    35.3 KB · Views: 69
  • pison2.jpg
    pison2.jpg
    40.7 KB · Views: 87
  • brokepiston3.jpg
    brokepiston3.jpg
    41.9 KB · Views: 71
  • brokepiston2.jpg
    brokepiston2.jpg
    63.7 KB · Views: 73
  • brokepiston.jpg
    brokepiston.jpg
    60.5 KB · Views: 81
  • hood14.jpg
    hood14.jpg
    44 KB · Views: 76
  • brokepiston4.jpg
    brokepiston4.jpg
    59.6 KB · Views: 61
Last edited:
January 2011 I bought a bunch of parts from being deployed and having lots o moneys!! PR downpipe, Ebay catback, FIC 1000s, AFPR, 20g and 38mm wg, Eibach sprotlines and Tokico Illuminas, BC272s ect ect.. I didnt have link yet so I ran my 20g on a 10lb spring for a while.

20g Install
461122[/ATTACH]"]
20g-1.jpg


461124[/ATTACH]"]
20gin2.jpg


461126[/ATTACH]"]
20gin3.jpg


After a while, I managed to make it to a Dyno before my journey back to Wisconsin. The car made 297whp and 250 tq on the 20g and 10 lb spring. Heres the thread>> http://www.dsmtuners.com/forums/dyno-talk/406948-finally-got-spyder-dyno.html

<iframe width="560" height="315" src="http://www.youtube.com/embed/B94WVvCFPPA" frameborder="0" allowfullscreen></iframe>

Then came the journey home!
461128[/ATTACH]"]
intruck.jpg


461130[/ATTACH]"]
intruck3.jpg


After I was home I wanted a better stance and I had 2 blown struts so I said what the hell..
mmmmmmm
461132[/ATTACH]"]
coilovers.jpg


461134[/ATTACH]"]
dadsshop.jpg


461136[/ATTACH]"]
tree4.jpg


After the shootout I was determined to all wheel swap the spyder before MOD in Normal. And I was successful.. Heres a link to my swap thread. >> http://www.dsmtuners.com/forums/hangout/413350-officially-have-awd-spyder.html
 

Attachments

  • 20g-1.jpg
    20g-1.jpg
    101.2 KB · Views: 84
  • intruck.jpg
    intruck.jpg
    45.9 KB · Views: 90
  • 20gin3.jpg
    20gin3.jpg
    115.8 KB · Views: 87
  • 20gin2.jpg
    20gin2.jpg
    96.7 KB · Views: 93
  • dadsshop.jpg
    dadsshop.jpg
    52.1 KB · Views: 84
  • coilovers.jpg
    coilovers.jpg
    64.7 KB · Views: 75
  • intruck3.jpg
    intruck3.jpg
    61.5 KB · Views: 84
  • tree4.jpg
    tree4.jpg
    95.3 KB · Views: 70
After I moved home Mr Peepers and SlantedJ helped me out with DSMlink, so I threw in my 1000s and started making some decent power. Peepers street tuned the car to ~19-20 psi. I estimated somewheres around 350-360 hp from my butt dyno and looking off similar mods of other members. Best trap speed at the track was on the FWD set up and was 107 mph with a 2.2 60'..

Since I bought the 1g Ive had time to start tearing into the car for the winter build. Plans for the car this winter are full engine build consisting of:
Eagle H beams
Wiseco HD pistons
ACL bearing
ARP main + head studs
Springs are undecided

Hoping to make around 420-440 whp on the 20g on E85 next season.

461138[/ATTACH]"]
newpistons.jpg


Here is a good start on the winter tear down..

461140[/ATTACH]"]
dashout.jpg


461142[/ATTACH]"]
get-attachmentaspx-1.jpg


One last pic of the engine bay in its old state!

461144[/ATTACH]"]
beforeengine.jpg
 

Attachments

  • get-attachmentaspx-1.jpg
    get-attachmentaspx-1.jpg
    61.8 KB · Views: 59
  • dashout.jpg
    dashout.jpg
    116.6 KB · Views: 68
  • newpistons.jpg
    newpistons.jpg
    27.1 KB · Views: 67
  • beforeengine.jpg
    beforeengine.jpg
    72.6 KB · Views: 62
Got a little bit done in the past couple days. Got the motor pulled and cleaned up the bay a little bit, getting it ready to sand and paint. Along the way I found that my passenger side CV boot ripped.. Brand new friggin axle!!!!

461357[/ATTACH]"]
rippedcv.jpg


This was my "expensive" Megan Dp. Till I cut it into pieces and made it work for the All wheel swap.

461359[/ATTACH]"]
downpipe.jpg


Motor out.

461361[/ATTACH]"]
motorout.jpg


461363[/ATTACH]"]
bay1.jpg


Started takin things out.

461365[/ATTACH]"]
bay2.jpg
 

Attachments

  • rippedcv.jpg
    rippedcv.jpg
    61.1 KB · Views: 76
  • bay1.jpg
    bay1.jpg
    75.5 KB · Views: 64
  • motorout.jpg
    motorout.jpg
    73 KB · Views: 78
  • downpipe.jpg
    downpipe.jpg
    75 KB · Views: 77
  • bay2.jpg
    bay2.jpg
    51.2 KB · Views: 74
^^ I will keep that in mind when the time comes!

Well, another update fellas. The car is almost all ready for sanding. Got the bay pretty much cleaned up minus a couple little things and the fuse box. Just going to remove the windows and door handles and Ill be pretty much set! Still cant really decide on the color though. I want to stay white but dont know if I want to throw in a little twist or not or which shade of white.

Also, as I was taking all the brake lines out and such I got to thinking. "I wonder how I can bi-pass all this ABS booshit!" I looked up some stuffs and found that STM has an ABS delete kit. But its 250 bucks.. eff that! Well, guess what didnt have ABS!?!?! The AWD doner!!! Saved me some cash!

461524[/ATTACH]"]
nonabs.jpg


461526[/ATTACH]"]
nonabs2.jpg


461528[/ATTACH]"]
bay3.jpg


461530[/ATTACH]"]
bay4.jpg


461532[/ATTACH]"]
rearoff.jpg
 

Attachments

  • bay3.jpg
    bay3.jpg
    63.1 KB · Views: 71
  • nonabs2.jpg
    nonabs2.jpg
    46.3 KB · Views: 92
  • nonabs.jpg
    nonabs.jpg
    61.5 KB · Views: 81
  • bay4.jpg
    bay4.jpg
    57.8 KB · Views: 77
  • rearoff.jpg
    rearoff.jpg
    74.7 KB · Views: 68
Well guys, Ive been sanding and sanding my engine bay getting it ready for paint. I should have had it painted yesterday but my Dad decided to be a douche and get smashed instead of help me out.. Anywho, heres a couple pics of the progress..

First pic is me smoothing out the bay. Getting all the unnecessary seam sealer and junk off for a cleaner look.
461911[/ATTACH]"]
bay7.jpg


Aaaaand sanding....
461913[/ATTACH]"]
bay8.jpg
 

Attachments

  • bay7.jpg
    bay7.jpg
    89.3 KB · Views: 69
  • bay8.jpg
    bay8.jpg
    85.8 KB · Views: 72
Alright guys, I finally got to paint last night and well uhhh. Im pretty pissed! Im not sure what happened but something didnt go well.. I had my Dad help me with finding paint, mixing, and spraying (hes a body man/painter). I prepped the hell out of this thing for a couple days only to have something #### up and pretty much waste the entire thing. Before we sprayed I blew everything off really well with the air hose, and wiped it down with 541-5 silicone and tar remover.

I used Transtar 6104 primer/sealer and mixed it with 6144 activator at a 2:1 ratio, just like it says on the can. A nice coat of that, let it set for about 15 minutes and sprayed our paint (base coat, clear coat). Paint is an Omni Innsbruck white and mixed with MR185 reducer.. Well, heres what we got. Anyone with an idea of what happened please let me know!

462242[/ATTACH]"]
bay9.jpg


Primer
462244[/ATTACH]"]
bay10.jpg


Paint
462246[/ATTACH]"]
bay11.jpg


462248[/ATTACH]"]
bay12.jpg


462250[/ATTACH]"]
bay13.jpg


462252[/ATTACH]"]
bay14.jpg


Didnt matter if we sprayed another coat on top it just kept doing this.. And its everywhere, not just the strut towers as shown.. Im at a loss and so furious... Like what did I do wrong??
 

Attachments

  • bay9.jpg
    bay9.jpg
    62.4 KB · Views: 69
  • bay10.jpg
    bay10.jpg
    58.6 KB · Views: 64
  • bay14.jpg
    bay14.jpg
    29.8 KB · Views: 69
  • bay13.jpg
    bay13.jpg
    33 KB · Views: 71
  • bay12.jpg
    bay12.jpg
    30.6 KB · Views: 73
  • bay11.jpg
    bay11.jpg
    36.5 KB · Views: 66
NWHtank- I did not drain the compressor, I didnt even think about that. I didnt wash and degrease before sanding but I did wash and degrease after sanding right before paint..

TKR- We have an inline air dryer.

We think we figured out what our problem was. The activator we used the first time was a little old and found out they actually have a shelf life and was bad. So, that being said, the activator wasnt curing the primer like it should, and even though we waited a bit for it to dry before paint it was as if we sprayed primer then right away base coat.

I scuffed the whole engine bay back up yesterday with some 240 grit and scotch pads and my dad resprayed last night! Ill take some pics and put them up when I get a chance!!
 
Well if u didnt clean before u sanded all u are doing is rubbing contaminates into the existing base. Next time degreese and presure wash before and after removing engine. It will help get rid of headaces later. Cant wait to see!
 
Didn't even know you made a build thread! I wish I had the motivation you do! I'm excited to see the progress over winter!
 
Well, Im back with great news!! Paint looks AMAZING!! Amazing with good chemicals will do to paint! :thumb:


462378[/ATTACH]"]
bay15new.jpg


462380[/ATTACH]"]
bay16new.jpg


Then I decided to clean up the front subframe!
462382[/ATTACH]"]
frontsf2.jpg


462384[/ATTACH]"]
frontsf.jpg


462386[/ATTACH]"]
frontsf3.jpg


462388[/ATTACH]"]
frontsf4.jpg


AAAAAANNNND Progress!!
462390[/ATTACH]"]
bay17.jpg


Oh and look what I just bought!!
462392[/ATTACH]"]
hx35.jpg
 

Attachments

  • bay15new.jpg
    bay15new.jpg
    44.8 KB · Views: 66
  • frontsf3.jpg
    frontsf3.jpg
    46.5 KB · Views: 73
  • frontsf.jpg
    frontsf.jpg
    41.7 KB · Views: 69
  • frontsf2.jpg
    frontsf2.jpg
    48 KB · Views: 76
  • bay16new.jpg
    bay16new.jpg
    48.2 KB · Views: 67
  • hx35.jpg
    hx35.jpg
    79.7 KB · Views: 75
  • bay17.jpg
    bay17.jpg
    52.4 KB · Views: 65
  • frontsf4.jpg
    frontsf4.jpg
    49.3 KB · Views: 72
Well, recently Ive been kind of tinkering with this and that.. Kind of like I dont know what Im doing and trying to kill time! At this stage of the build and with SO many pieces just laying around its starting to feel overwhelming! So, to counter that Im just taking things a little bit at a time to keep it moving along. Hopefully it starts to feel its coming together here soon!

My Dad gave me a gift card for a free window tint, so theres one thing I dont have to do! :thumb: Ive been wet sanding the hell out of the car lately getting ready for some body work. Still have to fill the holes from the 3 piece spoiler. I really want to put my 2gb wing on the car, but lately Ive been thinking wingless.. I cant decide!!! AHHHHH..

Well, heres a couple pics of things I did yesterday.
Cleaned up the wheel wells and sprayed them with some rubberized undercoating!
463761[/ATTACH]"]
wheelwell.jpg


463763[/ATTACH]"]
wheelwell2.jpg


Yay, new control arms!!
463765[/ATTACH]"]
controlarms.jpg


Cleaned up the knuckles for a cleaner look!
463767[/ATTACH]"]
paintedknuckles.jpg


I put it all together, still need to pick up some new wheel bearings today before I can finish putting the brakes back together. For now I put my Tokico's back on the car so I dont get overspray on my coilovers. Also going to be picking up an INGALLS front camber kit as well, unless someone has a better suggestion!
 

Attachments

  • controlarms.jpg
    controlarms.jpg
    79.2 KB · Views: 62
  • wheelwell2.jpg
    wheelwell2.jpg
    89.9 KB · Views: 65
  • wheelwell.jpg
    wheelwell.jpg
    63 KB · Views: 67
  • paintedknuckles.jpg
    paintedknuckles.jpg
    75.8 KB · Views: 70
Very nice man can't wait to see the finished product. Spyders have a place in my heart haha always a funny feeling when you see a spyder on the road and dont think much of it and it takes off on you. Very nice keep up the work
 
Alright fellas, Ive been sorta slackin for about a week. I started doing a little more body work and filling the 3 piece wing holes and get ready for the 2gb wing! Heres some pics.

464415[/ATTACH]"]
wr1.jpg


464417[/ATTACH]"]
wr2.jpg


464419[/ATTACH]"]
wr3.jpg


Little bit of sanding with 80 grit and another light coat of bondo.. annnd more sanding.
464421[/ATTACH]"]
wr4.jpg


Finished up with some wet sanding with 220..
464423[/ATTACH]"]
wr5.jpg


464425[/ATTACH]"]
wr6.jpg


Deck lid done and holes drilled for wing.
464427[/ATTACH]"]
wr7.jpg


Bolted up
464429[/ATTACH]"]
wr8.jpg


464431[/ATTACH]"]
wr9.jpg


Going to finish up pulling some bigger dents and filling small door dings tomorrow.
 

Attachments

  • wr2.jpg
    wr2.jpg
    43.7 KB · Views: 73
  • wr1.jpg
    wr1.jpg
    29.9 KB · Views: 73
  • wr5.jpg
    wr5.jpg
    31 KB · Views: 71
  • wr4.jpg
    wr4.jpg
    34.5 KB · Views: 71
  • wr3.jpg
    wr3.jpg
    33.5 KB · Views: 77
  • wr9.jpg
    wr9.jpg
    42.5 KB · Views: 70
  • wr8.jpg
    wr8.jpg
    35.1 KB · Views: 72
  • wr7.jpg
    wr7.jpg
    38.7 KB · Views: 77
  • wr6.jpg
    wr6.jpg
    40.7 KB · Views: 75
So much for "finishing" up body work! haha. Well I got a start anyways. Here we go!!

464560[/ATTACH]"]
bodywork2.jpg


464562[/ATTACH]"]
bodywork.jpg


Popped out a ding on the left rear quarter panel, it cracked.. Fantastic.. So, I started grinding a little off thinking there wasnt much bondo underneath.. I was wrong!! I could have kept going but that would mean more work!
464564[/ATTACH]"]
bodywork3.jpg


Right side almost finished.
464566[/ATTACH]"]
bodywork4.jpg


Aww my car loves me!! :D
464568[/ATTACH]"]
bodywork5.jpg
 

Attachments

  • bodywork2.jpg
    bodywork2.jpg
    41 KB · Views: 64
  • bodywork4.jpg
    bodywork4.jpg
    62.1 KB · Views: 65
  • bodywork3.jpg
    bodywork3.jpg
    59.4 KB · Views: 72
  • bodywork.jpg
    bodywork.jpg
    54.2 KB · Views: 70
  • bodywork5.jpg
    bodywork5.jpg
    46.8 KB · Views: 72
It helps being unemployed at the moment so, I have the whole day everyday to devote to the project. Keep it up, you'll get there!

Im not going to be doing any work on the car today. The body work is just about finished. I need to wet sand the car back down with 220 and then we will be ready to shoot primer! Since my Dad works in a body shop we will have access to a paint booth. No more make-shift booth in the garage! hahaha
 
Well guys, the doors and rear quarters deck lid and rear wing are ready for primer, FINALLY! Couple more little layers of bondo, and a final wet sand with 220. After we spray some primer down Im going to tackle the hood. For those of you who seen my car at the Shootout you know that it was damaged. For those of you who dont know, Ive got a pic for ya! :thumb: Originally I wasnt going to fix the hood at all. Then my dad and some buddys kept givin me shit "You're doing all this work and you're going to put a junk hood back on it?!!" blah blah. So, Im going to fix it and paint it white like the car! I think it will look pretty neat! Most likely going to buy a new hood too! Heres some pics!

464800[/ATTACH]"]
cfhood-1.jpg


464802[/ATTACH]"]
bodywork6.jpg


464804[/ATTACH]"]
bodywork7.jpg


464806[/ATTACH]"]
bodywork8.jpg


464808[/ATTACH]"]
bodywork9.jpg


464810[/ATTACH]"]
bodywork10.jpg


This body is SO straight you guys have no idea!! Probably 45 to 50 hours of just sanding. With only a paint stick and some paper and a bucket of water! Its nothing easy but its the ONLY way to get these results!!
 

Attachments

  • bodywork6.jpg
    bodywork6.jpg
    66.4 KB · Views: 64
  • cfhood-1.jpg
    cfhood-1.jpg
    117.6 KB · Views: 71
  • bodywork9.jpg
    bodywork9.jpg
    56.7 KB · Views: 60
  • bodywork8.jpg
    bodywork8.jpg
    60.9 KB · Views: 61
  • bodywork7.jpg
    bodywork7.jpg
    66.1 KB · Views: 71
  • bodywork10.jpg
    bodywork10.jpg
    47.6 KB · Views: 71
Support Vendors who Support the DSM Community
Boosted Fabrication ECM Tuning ExtremePSI Fuel Injector Clinic Innovation Products Jacks Transmissions JNZ Tuning Kiggly Racing Morrison Fabrications MyMitsubishiStore.com RixRacing RockAuto RTM Racing STM Tuned

Latest posts

Build Thread Updates

Vendor Updates

Latest Classifieds

Back
Top