jongraack
10+ Year Contributor
- 154
- 1
- Jul 14, 2011
-
Saint Joseph,
Michigan
First off, thanks for showing interest in my build. I've been puting this off since I joined the site so I figure I'll let you guys and gals know what's up on one of my builds.
I bought a beautiful green 96 GST Automatic about a year ago for a low price of $2500 with only 102000 miles and it was a virgin . Drove it 200 miles in the first 2 days and parked it. I have not started it since due to being under construction. Of course while I was driving it I was also checking to see if anything felt wrong or if a CEL was going to eventually come on. The only thing I noticed that needed assistance right away was the front driver side suspension components. No CEL and no driving problems. Shifted great and the beast pulled nice for having a stock turbo.
After parking it I had to decide what I was going to do with this wonderful machine. I decide to go with a Drag/Street build and more-so towards the drag . So I went ahead and did a compression check to see if the motor was still performing as it should. Compression was the same accross the board and showed no signs of change. That made me happy. So I decided to wait on the motor and make that the last thing I do since I can start the car at any time.
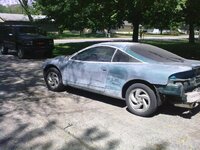
The body of course was the 2ga style and even though it looks nice, I still prefer the 2gb style. So I went ahead and bought all the 2gb parts I needed. I had to buy a new hatch because mine was rusted a little on the lip and lucky me, it ended up being a hatch that took a 2gb high rise spoiler. (Eventually I want a fiberglass hatch/hood) Less holes to fill. I am having the door handles and any other holes in the body shaved and filled. No wipers or squirters either. (NON RAIN CAR PERIOD) I spent 3 days sanding the whole car by hand in one direction through the clear cloat and well in to the paint. I am still in the process of filling imperfections. (I am doing everything myself that I can to save money and learn along the way/plus I'm OCD) Now the car looks fade green . I am undecided if I am going to change the color to satin black or if I will be going with the factory color
 . One way or another, it will be painted.
The interior was all grey with cloth seats. I knew I wanted the leather but I wasn't sure what color scheme I wanted to go with. I was going to do the tan and black or the grey and black. I decided grey and black because the tan and black just doesn't look as nice with a green(if I go factory color) car as the grey and black IMO. I got the grey leather seats and a great clean set at that. (Still need driver's seat) I also got the grey leather door panels. I gutted the whole car and painted almost everything black beside the main dash piece. The doors are partially black. I spent a lot of time painting all these parts so it would turn out right the first time. 3 layers of paint and 3 layers of clear. (Don't yell at me for painting the interior please, it's not ricy)
Goal is to build thetranny, motor, and head to withstand 700+hp. Not sure if I am going to go with a stroker or just build the crap out of the 2.0!?!?!?
Here is what I have done so far.....
Deleted:
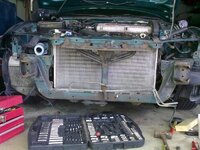
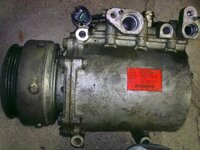
A/C system
Cruise control
EGR- Block-off Plate Installed
HVAC
Charcoal Can.
To be deleted after ECU upgrade:
Everything not needed
New Parts Bought:
CXRacing Bar-n-Plate FMIC Kit 2.5" pipes, core-24"x12"x3" (bolt-on & it was,,,,,almost)
Megan 3" downpipe (courtesy of Extremepsi.com)
Megan 3" catback
FP Race Manifold (courtesy of Forced Performance)
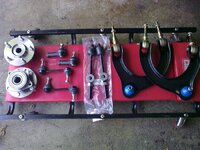
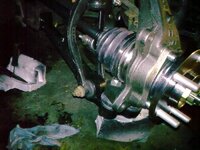
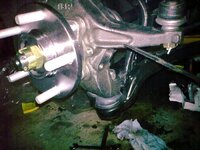
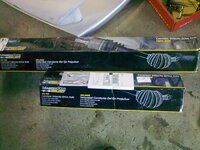
Front R&L Knuckle OEM (Extremepsi)
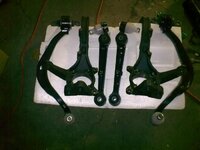
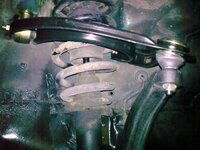
Front R&L upper control arms OEM (Extremepsi)
Front R&L lower control arms (Extremepsi)
Front R&L wheel bearing
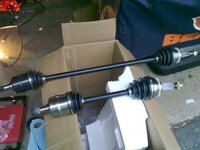
Front axles & seals
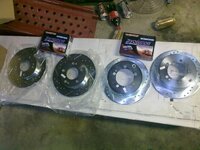
Drilled and slotted rotors all around
Inner & Outer tie rods
Sway bar links
Timing belt kit (Extremepsi)
2gb front bumper
Used Parts bought:
TD05H MHI Big 16g
1g BOV
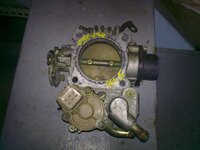
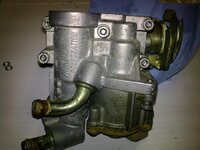
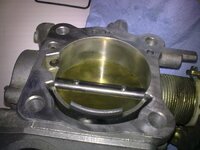
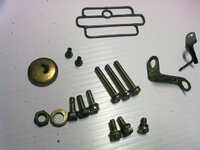
1g throttle body (rebuilt by me)
2gb high-rise spoiler
2gb rear bumper
2gb side skirts & door caps
FP 4" intake
Rebuilds: Done by me
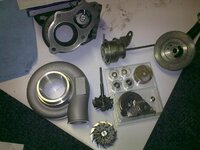
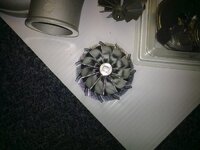
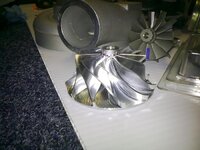
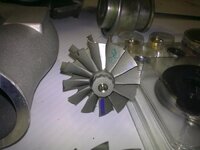
MHI Big 16g w/upgrade: New TD05h Turbine shaft///New .70 a/r turbine housing internally gated///new 20g Billet 11-blade compressor wheel///new 20g 3" compressor housing///full rebuild kit
1g Throttle Body: Full rebuild kit w/FIAV bypass plate
Parts to come:
Holset HX40 Billet 7-Blade
BEP T3 .70 Housing
60-1 TD06H4
O2 housing with 38mm vband wastegate
Manley 2.1 94mm Stroker Crank
Manley 85.5 stroker 156mm long rod pistons (CR 10.1 or 8.5)
Manley 156mm long rod 4g63
DSMLink V3 Full or AEM standalone
Coilovers (real deal not junk)
***Avid Racing motor mounts (roll stops 90A/engine & tranny 75A)
Speed density
Innovate LC-1 wideband
MBC
Fluidamper harmonic balancer
High-flow fuel filter
***Aeromotive 340lph high-output fuel pump, or a 440 pump***
FIC 1650cc (low) injectors
E85 conversion
Shift box
Tranny cooler
Red top battery
Mitsubishi Galant alternator-direct bolt-on
and much more..............
I'm sure there is some stuff I'm forgetting but I will update on the rgular.
Thanks for looking!!!
Any and all critisism is welcome.
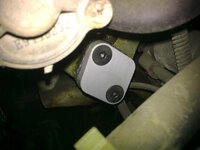
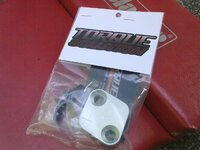
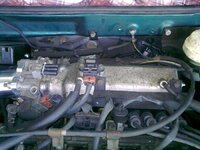
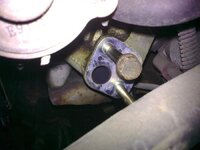
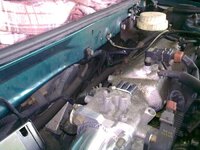
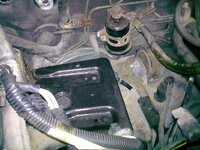
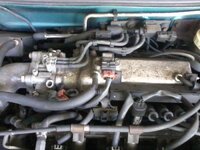
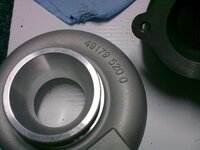
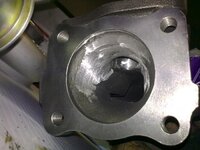
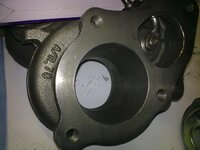
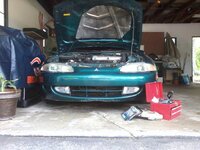
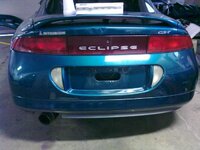
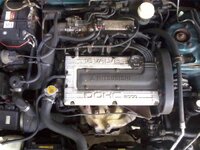
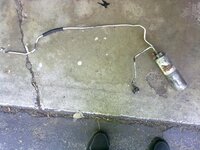
Here are some random pictures: I will post more pictures with the posts that explain them.
I bought a beautiful green 96 GST Automatic about a year ago for a low price of $2500 with only 102000 miles and it was a virgin
. Drove it 200 miles in the first 2 days and parked it. I have not started it since due to being under construction. Of course while I was driving it I was also checking to see if anything felt wrong or if a CEL was going to eventually come on. The only thing I noticed that needed assistance right away was the front driver side suspension components. No CEL and no driving problems. Shifted great and the beast pulled nice for having a stock turbo. After parking it I had to decide what I was going to do with this wonderful machine. I decide to go with a Drag/Street build and more-so towards the drag
. So I went ahead and did a compression check to see if the motor was still performing as it should. Compression was the same accross the board and showed no signs of change. That made me happy. So I decided to wait on the motor and make that the last thing I do since I can start the car at any time.The body of course was the 2ga style and even though it looks nice, I still prefer the 2gb style. So I went ahead and bought all the 2gb parts I needed. I had to buy a new hatch because mine was rusted a little on the lip and lucky me, it ended up being a hatch that took a 2gb high rise spoiler. (Eventually I want a fiberglass hatch/hood) Less holes to fill. I am having the door handles and any other holes in the body shaved and filled. No wipers or squirters either. (NON RAIN CAR PERIOD) I spent 3 days sanding the whole car by hand in one direction through the clear cloat and well in to the paint. I am still in the process of filling imperfections. (I am doing everything myself that I can to save money and learn along the way/plus I'm OCD) Now the car looks fade green
. I am undecided if I am going to change the color to satin black or if I will be going with the factory color. One way or another, it will be painted.The interior was all grey with cloth seats. I knew I wanted the leather but I wasn't sure what color scheme I wanted to go with. I was going to do the tan and black or the grey and black. I decided grey and black because the tan and black just doesn't look as nice with a green(if I go factory color) car as the grey and black IMO. I got the grey leather seats and a great clean set at that. (Still need driver's seat) I also got the grey leather door panels. I gutted the whole car and painted almost everything black beside the main dash piece. The doors are partially black. I spent a lot of time painting all these parts so it would turn out right the first time. 3 layers of paint and 3 layers of clear. (Don't yell at me for painting the interior please, it's not ricy)
Goal is to build thetranny, motor, and head to withstand 700+hp. Not sure if I am going to go with a stroker or just build the crap out of the 2.0!?!?!?
Here is what I have done so far.....
Deleted:
A/C system
Cruise control
EGR- Block-off Plate Installed
HVAC
Charcoal Can.
To be deleted after ECU upgrade:
Everything not needed
New Parts Bought:
CXRacing Bar-n-Plate FMIC Kit 2.5" pipes, core-24"x12"x3" (bolt-on & it was,,,,,almost)
Megan 3" downpipe (courtesy of Extremepsi.com)
Megan 3" catback
FP Race Manifold (courtesy of Forced Performance)
Front R&L Knuckle OEM (Extremepsi)
Front R&L upper control arms OEM (Extremepsi)
Front R&L lower control arms (Extremepsi)
Front R&L wheel bearing
Front axles & seals
Drilled and slotted rotors all around
Inner & Outer tie rods
Sway bar links
Timing belt kit (Extremepsi)
2gb front bumper
Used Parts bought:
TD05H MHI Big 16g
1g BOV
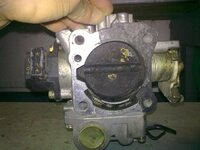
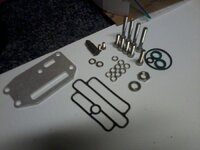
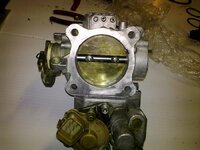
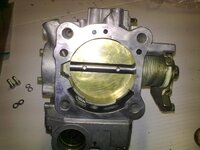
1g throttle body (rebuilt by me)
2gb high-rise spoiler
2gb rear bumper
2gb side skirts & door caps
FP 4" intake
Rebuilds: Done by me
MHI Big 16g w/upgrade: New TD05h Turbine shaft///New .70 a/r turbine housing internally gated///new 20g Billet 11-blade compressor wheel///new 20g 3" compressor housing///full rebuild kit
1g Throttle Body: Full rebuild kit w/FIAV bypass plate
Parts to come:
Holset HX40 Billet 7-Blade
BEP T3 .70 Housing
60-1 TD06H4
O2 housing with 38mm vband wastegate
Manley 2.1 94mm Stroker Crank
Manley 85.5 stroker 156mm long rod pistons (CR 10.1 or 8.5)
Manley 156mm long rod 4g63
DSMLink V3 Full or AEM standalone
Coilovers (real deal not junk)
***Avid Racing motor mounts (roll stops 90A/engine & tranny 75A)
Speed density
Innovate LC-1 wideband
MBC
Fluidamper harmonic balancer
High-flow fuel filter
***Aeromotive 340lph high-output fuel pump, or a 440 pump***
FIC 1650cc (low) injectors
E85 conversion
Shift box
Tranny cooler
Red top battery
Mitsubishi Galant alternator-direct bolt-on
and much more..............
I'm sure there is some stuff I'm forgetting but I will update on the rgular.
Thanks for looking!!!
Any and all critisism is welcome.
Here are some random pictures: I will post more pictures with the posts that explain them.
Attachments
Last edited:
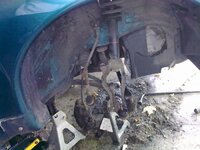
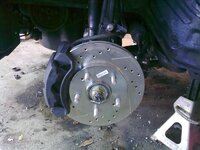
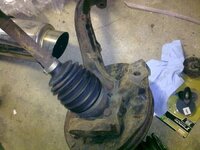
 . My initial goal was to replace a wheel bearing and a weak tie rod end on the driver's side. What a joke this became real fast
 From there I decided that everything was coming out and nothing but new was going back in. Being that the axle was siezed to the hub assembly, everything from the axle seal out had to be replaced. Knowing that I was replacing everything I didn't hold back when removing the parts. Everything came out fairly easy but the passenger axle was a little tricky and the sway bar links had to be cut. After squeezing a pry bar between the housing and axle and giving a nice solid hit, the axle popped right out.