Timing belt tensioning tips (for 4g63 turbo):
Follow the VFAQ timing belt installation procedure exactly:
For 1g: Timing Belt VFAQ (Timing Belt TSB - ENHANCED)
For 2g: Timing Belt VFAQ
with the following tips (read this all before beginning):
Replace the auto tensioner with new factory one if it is leaking or weak (no after-market or you will regret it - they don't last). Compress it first in a vise to put the holding pin in (eg. 1/16 allen wrench). Compress it VERY, VERY, VERY slowly (steps of: 1/4 turn max of vise handle, then wait 10 seconds for it to settle, repeat) or you will damage the seals in it. If oil comes out you’ve just blown your $100 auto tensioner, so I’m not kidding – go very slowly!
Important note from VFAQ (step 33 of 2g) that I want to repeat here: NOTE: THE EXHAUST CAMSHAFT SPROCKET MAY ROTATE IN THE COUNTERCLOCKWISE DIRECTION AS THE BELT IS TENSIONED. THIS SHOULD BE CONSIDERED WHEN INSTALLING THE TIMING BELT. If the camshaft sprocket timing marks don't line up after tensioning the belt with all the other timing marks lined up, loosen the belt and re-tension it, but try rotating the exhaust sprocket slightly clockwise (1 tooth off) first. The cam sprocket marks must not only align with each other but also with the head surface. When all sprockets are on their marks, it helps to place a straight edge horizontally across the center of the cam shaft sprocket attaching bolts. Then you can just align the cam sprocket marks with the straight edge (see attached pics).
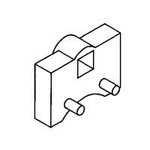
Sometimes with the engine in the car, measuring the distance between the tensioner arm and auto tensioner body (usually with a drill bit) is hard to see or do. Example: Can't get in there or see if drill bit is truly parallel to the auto tensioner top (which affects measurement) or you can’t get a 2.6 ft-lb torque wrench on the tensioner pulley special tool MD998767. You can replace all that complicated tensioning torque stuff (which you can rarely get right with the engine in the car anyway - no room) with the following alternative. Just adjust the tensioner pulley so that the auto tensioner holding pin (eg. 1/16 allen wrench) slides freely all the way through the auto tensioner body and pin holes (after you turn the crankshaft 6 revs and wait 15 minutes for the belt to stretch and auto tensioner to settle). Adjust the tensioner pulley to do this and it will automatically make the distance between the tensioner arm and auto tensioner body (drill bit measurement) be about .157 in. (spec is .150 - .177 in.). I've done over a dozen dsm timing belts this way with every one done correctly. In fact you don’t have to get the MD998767 tool to adjust the tensioner pulley (with 2.6 ft-lbs torque - ya right) as the DSM manual states. Instead you can use a 90 degree pliers in the 2 tensioner pulley holes to adjust it (you may have to cut off one of the handles to clear the compressor pulley and grind the tips a little to fit in the holes).
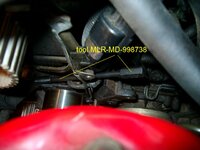
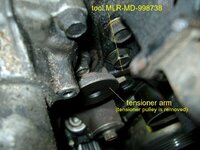
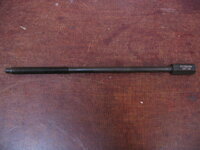
The other MD998738 tool (the threaded rod) is also used to compress an already installed auto tensioner to put the holding pin in. I recommend getting it if you are going to do more than one timing belt (threads match exactly and won't wear anything - as opposed to the VFAQ battery hold down rod which works (thread is same pitch), but thread teeth are cut at a slightly different angle). Otherwise for one timing belt, you can use the VFAQ battery hold down rod idea (Timing Belt VFAQ Addition 1) when the tensioner is already installed. So to summarize, to put the holding pin in, you can either use the threaded rod to compress an already installed auto tensioner or you can just remove the auto tensioner and compress it very slowly in a vise (then you don't need the rod).
--> THE EASIEST TENSIONING METHOD I’VE FOUND (instead of the above): If installing auto tensioner, compress it first in a vise to put the holding (aka granade) pin in (eg. 1/16 allen wrench). [Compress it VERY, VERY, VERY slowly (steps of: 1/4 turn max of vise handle, then wait 10 seconds for it to settle, repeat) or you will damage the seals in it. If oil comes out you’ve just blown your $100 auto tensioner, so I’m not kidding – go very slowly!] Now bolt auto tensioner on. Now install threaded rod (special tool MD998738 or battery hold down rod) and after contact with arm, turn VERY SLOWLY just enough to compress auto tensioner so you can remove the holding pin. After holding pin is removed, continue to turn threaded rod until the pin hole is just below the auto tensioner body holes (where holding pin slides into). You can use an inspection mirror and holding pin to check this (see attached pics). Then while leaving rod there, tension tensioner pulley using crowbar with rag over it (to not damage tensioner pulley) from below using water pump as pivot point (see attached pics). Make tension VERY tight and then tighten bolt. Now back off rod, rotate crank 6 times, wait 15 minutes (for the belt to stretch and auto tensioner to settle), check if the auto tensioner holding pin slides freely all the way through the auto tensioner body and pin holes, repeat until it does. You’re DONE. Remove threaded rod.
Replace the “B” belt and it's tensioner pulley also at this time. And if you haven’t replaced the water pump in the last 40k miles (or you suspect a problem with it), now is the time since you must remove the timing belt to do it. Also get a new water pump gasket and replace the O-ring on the crossover inlet pipe by putting it on the pipe end first, coating with coolant, and then insert pipe with O-ring into water pump - do not put the O-ring into water pump first as it will not seat properly and will leak. I recommend a dealer water pump as they always out last any after-market ones (worth the extra $). Replacing the timing belt tensioner and idler pulleys at this time is also a good idea if they haven't been in the last 50k or they make noise when you spin them.
Attachments
-
 Special Tool MD998738 in place 1.jpg44.5 KB · Views: 2,720
 -
 Special Tool MD998738 in place 2.jpg52 KB · Views: 3,444
 -
 Special Tool MD998738.JPG56.1 KB · Views: 2,622
 -
 Special Tool MD998767 drawing.jpg3.6 KB · Views: 18,713
 -
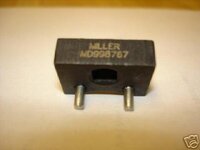 Special Tool MD998767.JPG10.3 KB · Views: 19,408
 -
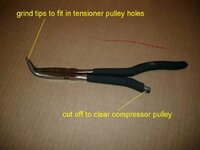 90 Degree Pliers.jpg41.8 KB · Views: 2,326
 -
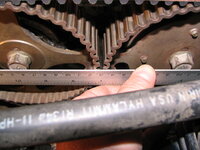 Timing cam shaft sprockets alignment.JPG109.3 KB · Views: 1,790
 -
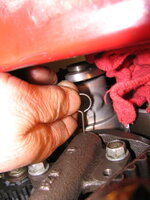 timing belt tensioning - checking tensioner hole alignment with grenade pin.JPG54 KB · Views: 384
 -
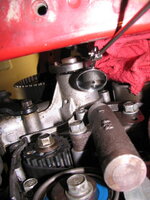 timing belt tensioning - checking tensioner hole alignment with mirror.JPG64.2 KB · Views: 368
 -
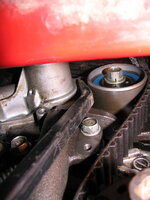 timing belt tensioning - tensioning tension pulley crow bar position.JPG54.7 KB · Views: 427
 -
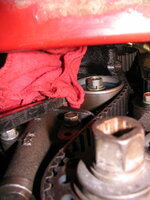 timing belt tensioning - tensioning tension pulley with crow bar and rag.JPG54.7 KB · Views: 364
Last edited:


