
Leonthefaded
Supporting VIP
- 1,622
- 5
- Aug 3, 2011
-
Ewa Beach,
Hawaii
JOURNAL ENTRY 1
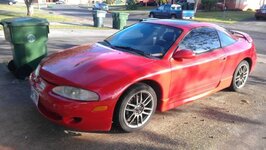
Project: RedSun 1995 Mitsubishi Eclipse GSX 5-Speed Manual Transmission
Goals :
*Full 2Ga to 2Gb Conversion w/ Hardtop conversion
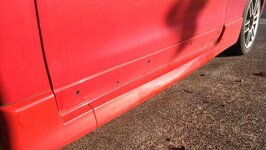
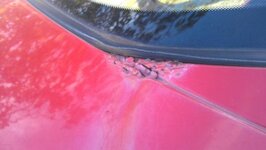
*Full restoration of the exterior (Rust removal, Paint, Tint)
*Interior remodel (Racing seats, Partial Gut-out, Sound system, Grey to Black leather)
*Return 100% of mechanical functionality (In-completed and unaccomplished services , AC, Heat, Sensors, Troubleshoot and remove check engine codes,
etc..)
*Stage 1 Upgrade Path
*Suspension components geared towards Gymkhana (Rally/Autocross)
*Full engine bay cleanup and dress
JOURNAL INDEX
Journal Entry 2 - Apexi, Leaks, Learn and Bro-love
Journal Entry 3 - Unicorns, OEM and The Story So Far
Journal Entry 4 - Fuel, Spark, Air and A Bleak Future
***********************************************************************************
Story:
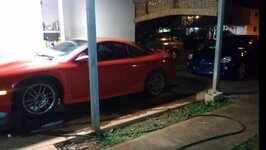
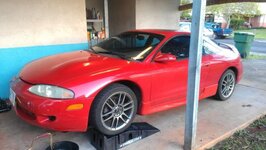
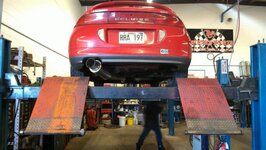
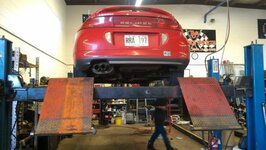
I purchased this awesome 1995 GSX from a good man named Jim on 9 FEB 2012, I recently sold my 98 GS(R.I.P) for $3000 and just so happened to today pick this bad boy up for $3500. I wanted to build my GS towards Gymkhana but knew all the limitations I was placed with having FWD, but now with AWD and a more powerful power plant (4g63T) I am confident and ready to push my mechanical and technical skill to the limit.
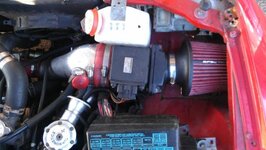
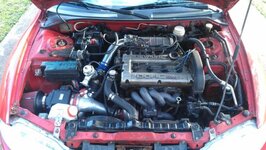
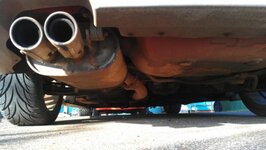
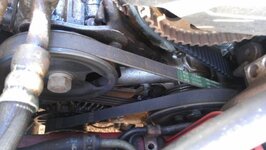
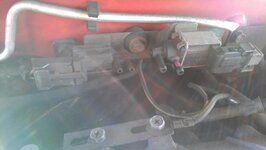
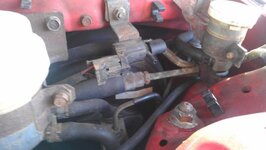
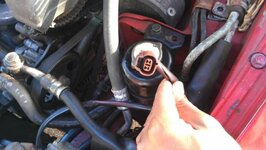
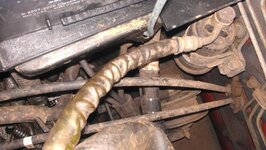
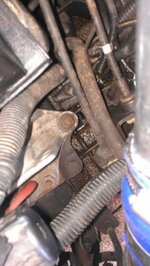
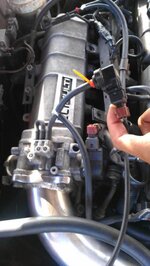
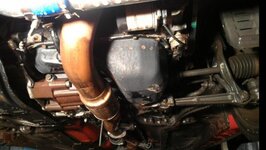
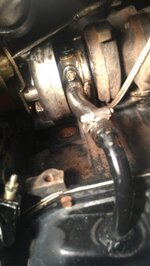
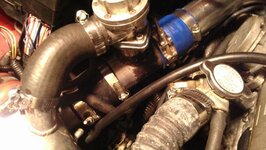
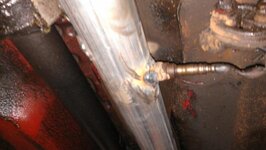
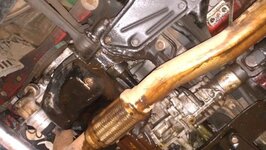
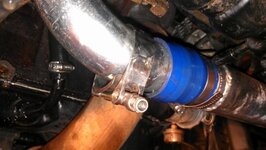
The RedSun as I call it, has A LOT of issues. Currently I know I should not drive it very far or harshly, knowing full well that inside the engine bay, there is A LOT of disconnected electrical wires, plugs are unplugged, sensors go unconnected leaving gauges like the engine temperature gauge dead. Grounding wires are corroded, oil is leaking as well as burning in certain areas. Dry rotted, brittle and suspicious lines are visible. It goes unsaid there are a lot of quick and sloppy DIY modifications and bolts on all around, ranging from the Glowshift gauge tapped to the dash, to the improperly connected turbo-timer, brining back to the UNCIRCULATED Turbonetics BOV.
The RedSun does not come without its decent list of upgrades. Tein Basic Coilover Suspension, 5ziGen MK6 Wheels, New tires, Aftermarket MAF-Intake, Newer upper intercooler plumbing. I am excited and amazed by the gravity of the situation I am in. I finally found the car that I have been searching for awhile now. On the same note I need to fix a lot of things before I can comfortable drive it with no problems. It runs yes, but for how long.
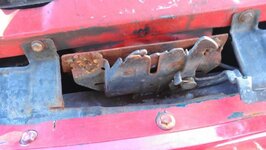
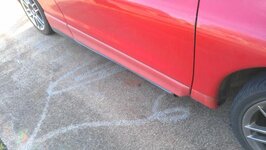
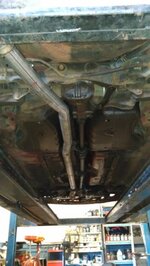
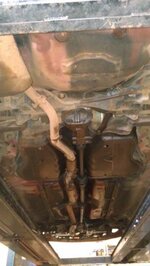
First things first. I need to tackle the rust damage, and repair everything I can body wise, at the same time fixing all of the deficiencies in the engine bay and the functionality of the motor and supporting systems. After that Ill be working my way into the interior of the RedSun I pray it doesnt melt my wings of hope on my ascension to Gymkhana.
For even more photos visit my photobucket
Project: RedSun 1995 Mitsubishi Eclipse GSX 5-Speed Manual Transmission
Goals :
*Full 2Ga to 2Gb Conversion w/ Hardtop conversion
*Full restoration of the exterior (Rust removal, Paint, Tint)
*Interior remodel (Racing seats, Partial Gut-out, Sound system, Grey to Black leather)
*Return 100% of mechanical functionality (In-completed and unaccomplished services , AC, Heat, Sensors, Troubleshoot and remove check engine codes,
etc..)
*Stage 1 Upgrade Path
*Suspension components geared towards Gymkhana (Rally/Autocross)
*Full engine bay cleanup and dress
JOURNAL INDEX
Journal Entry 2 - Apexi, Leaks, Learn and Bro-love
Journal Entry 3 - Unicorns, OEM and The Story So Far
Journal Entry 4 - Fuel, Spark, Air and A Bleak Future
***********************************************************************************
Story:
I purchased this awesome 1995 GSX from a good man named Jim on 9 FEB 2012, I recently sold my 98 GS(R.I.P) for $3000 and just so happened to today pick this bad boy up for $3500. I wanted to build my GS towards Gymkhana but knew all the limitations I was placed with having FWD, but now with AWD and a more powerful power plant (4g63T) I am confident and ready to push my mechanical and technical skill to the limit.
The RedSun as I call it, has A LOT of issues. Currently I know I should not drive it very far or harshly, knowing full well that inside the engine bay, there is A LOT of disconnected electrical wires, plugs are unplugged, sensors go unconnected leaving gauges like the engine temperature gauge dead. Grounding wires are corroded, oil is leaking as well as burning in certain areas. Dry rotted, brittle and suspicious lines are visible. It goes unsaid there are a lot of quick and sloppy DIY modifications and bolts on all around, ranging from the Glowshift gauge tapped to the dash, to the improperly connected turbo-timer, brining back to the UNCIRCULATED Turbonetics BOV.
The RedSun does not come without its decent list of upgrades. Tein Basic Coilover Suspension, 5ziGen MK6 Wheels, New tires, Aftermarket MAF-Intake, Newer upper intercooler plumbing. I am excited and amazed by the gravity of the situation I am in. I finally found the car that I have been searching for awhile now. On the same note I need to fix a lot of things before I can comfortable drive it with no problems. It runs yes, but for how long.
First things first. I need to tackle the rust damage, and repair everything I can body wise, at the same time fixing all of the deficiencies in the engine bay and the functionality of the motor and supporting systems. After that Ill be working my way into the interior of the RedSun I pray it doesnt melt my wings of hope on my ascension to Gymkhana.
For even more photos visit my photobucket
Attachments

Last edited:
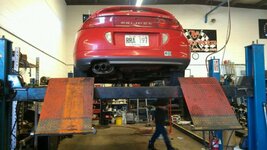
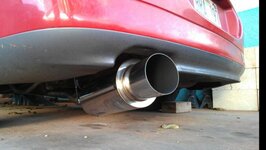
 . Fix it! I am happy u finnaly got what u wanted! Is that the state inpspecton sticker on the back bumper?


 This car is the last car I will EVER buy. Build. Droll over.


