Ok, so if your like most DSM drivers, you always carry a long wooden stick to prop up your hatch when you have to open it, because your hatch struts went bad. I did this for a while, but fears of the hatch coming down and taking my head off when i was leaning in prompted me to do something about it.
First thing. Find a place with struts. I had a 30$ gift certificate to Napa, so it only ended up costing me around 15 dollars. Your local Mitsu dealer has them, but try Autozone or Napa first, they are usually cheaper. Expect to pay around 50 dollars.
2. Prop up your hatch somehow, most of you will use that wooden stick you have...
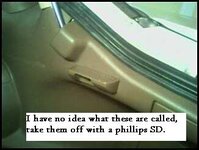
3. Take off the rests for the cover that comes down with the hatch, see the picture.
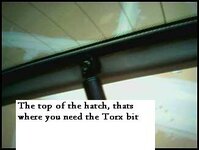
4. Use a torx bit to take off the struts where they connect at the top of the hatch.
5. You dont need to take off all that plastic trim in the hatchback, just pry it open with a screwdriver or something while you go.
6. Using a 10 millimeter wrench, take off the two screws that hold the bottom part of the strut into the body. Be carefull not to drop these screws, as they are needed later.
7. Take out the old strut carefull not to break the plastic.
8. Compare the new strut with the old one, make sure they are the same.
9. Line up the bottom part of the new strut just as the old one came out, see the picture.
10. Again, be carefull not to drop the screws, but put them back in one at a time using the 10 millimeter wrench. If you can, try to pry the plastic back enough so you can fit your fingers in there to hand tighten it first.
11. Screw the second screw in. Now that the bottom part of the strut is attached to the body, all thats left is installing the top part to the hatch itself. line it up, and use a Torx bit to screw it back in there.
Bingo. do the same thing with the other side. Your head will thank you.


