JAXWHITE1G
10+ Year Contributor
- 78
- 5
- Dec 16, 2009
-
Jacksonville,
Florida
I have a couple of projects to finish before I can do a thread on the TMIC so I'll start with this one.
I had planned to wait untill finished before posting but had some time at work so I thought I would start now.
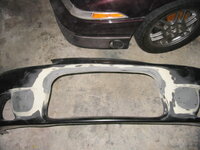
I started with a new Mitsubishi cover.
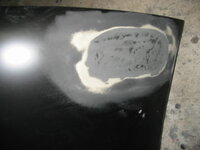
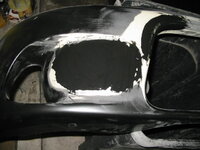
Wanted a custom look but not ricer so I didn't want to go too far. Using a 3" grinder disk I cut out the flanges on the side marker and the fog light openings.
Use thre grinder to sand around the edge smoothing the ridge and preparing for adehesive
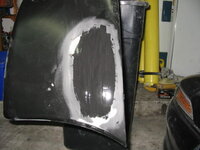
I used a hand held saber saw to cut out the radiator opening and prepaired it like the smaller openings.
There are many products available to use for this but I have found 3M 8115 panel bond to be the best. It is tough sticks to anything and sands and feathers well and dries very slowly giving plenty of work time but can be cured with heat in about 20 min if desired.
There are faster ways to do this but I decided to do it the way most of you can to make it easier for you top copy.
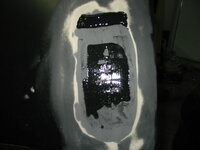
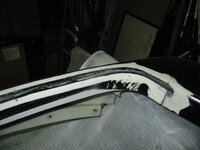
Place masking tape over tha outside and lay drywall tape on the inside and spread the adhesive over it.
This is just a backing and provides no real support.
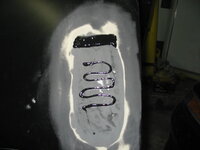
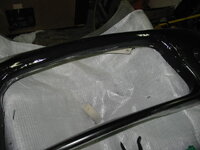
On the radiator opening I used some plastic irragation tubing and heated it to curve around the upper edge of the opening.
I taped it in place then put some screws to hold it tight before gluing
You must support the cover to make sure it it straight before applying adhesive I taped it to the stand and the ends together.
Again i placed some drywall tape for support and glued it in place.
I had planned to wait untill finished before posting but had some time at work so I thought I would start now.
I started with a new Mitsubishi cover.
You must be logged in to view this image or video.
You must be logged in to view this image or video.
Wanted a custom look but not ricer so I didn't want to go too far. Using a 3" grinder disk I cut out the flanges on the side marker and the fog light openings.
You must be logged in to view this image or video.
You must be logged in to view this image or video.
You must be logged in to view this image or video.
Use thre grinder to sand around the edge smoothing the ridge and preparing for adehesive
You must be logged in to view this image or video.
I used a hand held saber saw to cut out the radiator opening and prepaired it like the smaller openings.
You must be logged in to view this image or video.
There are many products available to use for this but I have found 3M 8115 panel bond to be the best. It is tough sticks to anything and sands and feathers well and dries very slowly giving plenty of work time but can be cured with heat in about 20 min if desired.
You must be logged in to view this image or video.
There are faster ways to do this but I decided to do it the way most of you can to make it easier for you top copy.
Place masking tape over tha outside and lay drywall tape on the inside and spread the adhesive over it.
You must be logged in to view this image or video.
You must be logged in to view this image or video.
You must be logged in to view this image or video.
This is just a backing and provides no real support.
On the radiator opening I used some plastic irragation tubing and heated it to curve around the upper edge of the opening.
You must be logged in to view this image or video.
You must be logged in to view this image or video.
I taped it in place then put some screws to hold it tight before gluing
You must be logged in to view this image or video.
You must be logged in to view this image or video.
You must support the cover to make sure it it straight before applying adhesive I taped it to the stand and the ends together.
You must be logged in to view this image or video.
You must be logged in to view this image or video.
Again i placed some drywall tape for support and glued it in place.
You must be logged in to view this image or video.
You must be logged in to view this image or video.
You must be logged in to view this image or video.