KCDsmDude
Proven Member
- 374
- 235
- Oct 11, 2020
-
Fairfield,
Ohio
Follow along with the video below to see how to install our site as a web app on your home screen.

Note: This feature currently requires accessing the site using the built-in Safari browser.

This site may earn a commission from merchant
affiliate links, including eBay, Amazon, and others.
This site may earn a commission from merchant affiliate links, including eBay, Amazon, and others.


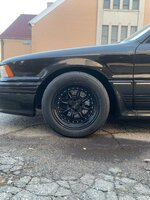
Nice update - hope you'll keep sharing as you work through the build. Would love to see more photos when you get a chance too.Been out of the DSM scene for over 10 years, but finally got back into it this past October. Purchased a built Galant, and have been stacking parts for further upgrades. Ideally I'd like to make 700 whp on the new setup, while keeping outside appearing "stock". Only thing is the wheel/tire combo are very aggressive so anyone in the "know" will know.
Current Mod List:
Eagle H Beam Rods
Weisco Pistons
L19 HS
MLS HG, OEM crank
GSC high rev springs and retainers
HKS 272's
Walbro 450 high flow e85 pump, 2150 FIC's, Aeromotive FPR, AN line from rail to FPR
SS clutch line
Scirocco radiator with 16 an fittings
3000 gt shifter
4 bolt rear, rear arms are tubular with active toe eliminator
D2 coilovers with camber plates
15x8 xxr 002 with R888R tires
Manual rack
Bolt on 6262 (stock exhaust mani)
AEM WB02
ECMlink V3
Jacks stage 4
Comp twin disc
Tial bov
JMFab Drag Race intake mani
ETS intercooler kit
Hallman MBC
Sparktech COP (no cdi yet)
93 headlights
What I have sitting in the apartment:
Gen 2 6466
Dual tial 38 mm wastegates
Morrison Fab divided t4 manifold with downpipe and dumptubes
DSS alumimum DS - used
S90 throttle body - used
ECB-1 boost/afr/fuel temp gauge
JM Fab small battery kit and tray
All new Ground wires for the entire engine bay - 6 gauge - 6 of them
All new vacuum lines - 25 feet of 3mm and 4mm line - will be replacing all the line in the car
I move into a house in the coming weeks, and will have the garage space to finally dig into the issues on the car.
Additional plans I have for the car:
- Remove the ABS system and replace all brake lines with stainless steel. Seems I can pick up a non-proportioning ABS 1g valve for cheap, and JNZ tuning makes a kit that replaces all the lines for the front wheels. Also found a post that said if you call them, they would make rear lines as well.
- Add a CDI box - likely the ARC 2
- Replace the drives side window regulator and window switch - doesn't want to roll up very well and the it won't roll up the passenger or rear windows at all
- Locate a f***ing drivers side a-pillar
- Paint the car - 30 year old paint is ROUGH
- Put the stock O2 back in it, as well as the ECB-1 setup so tuning is easier for someone much smarter than I
- Have the entire exhaust system from downpipe back changed over to a lighter metal
- Replace the stock fuel lines with SS
- Clean up engine bay wiring/grease removal
Current issues I have with the car:
Note: that I'm an idiot when it comes to electrical things, but I'm forcing myself to learn. I'm sure I will be posting some VERY elementary questions starting out, but I'd rather ask and be sure, than risk blowing something up; spent a pretty penny on the latest round of upgrades.
First Issue:
The car will not connect to Link. I have tried the following: Two laptops, both driver versions, both Link versions, three different USB cables (one brand new from ECMLink). The car recognizes the com port and that does pop up, the correct driver IS installed. Browsing Link forums, the next thing I'm going to try and do is:
- verify the OBD port is getting power/data using this link: https://www.ecmtuning.com/wiki/diagport-12pin
- verify that there is a connection between Pins 1 and 2 on the ECU and pins 1 and 10 on the OBD port.
- If this is true and there is continuity, open up the ECU and look for any damage
My question here is, how do I check to see if PIN 12 has connectivity to ground? I have my voltmeter set to OHMS, do I place one clamp on PIN 12, and another on a nut/bolt that's screwed into the chassis? Can I use the bolt that's near the fuse box/OBD 1 port? What kind of reading should I be expecting to see on my voltmeter? Close to zero? Should it beep if I have it set to the correct setting? I know that for Pins 1/2 to Pins 1/10 I should hear a beep.
How does one check for this? Pins 1 and 10 should not have connectivity to chassis ground and should not be connected with each other. Check that this is true. And please, explain it as if you were explaining it to a child, or a golden retriever.
Second Issue:
The car, at WOT, breaks up around 5,000 RPM plus. If I stay out of boost, I can creep it up to 7k just fine. I've replaced the plugs and that didn't impact it one way or another. But without being able to LOG it, I can't get much detail out of the car. I did a boost leak test, and that came back "fine", car didn't want to go above 27 psi, their is a "hissing" sound coming from the wastegate at that psi. I popped off the vacuum line and plugged it with my hand, hissing went away and car held the remaining psi for well over a minute. I've seen some folks post on other forums that their Tial WG leaks around 30 psi, they spoke with Tial and said this is expected. I believe it was a Honda forum, maybe Subaru, I can locate it if needed
Previous owner connected to Link just fine before I bought the car Oct 2020, this whole time I've had it, I've not been able to get Link to connect. Car pulled strong when I got it, but developed the spark/boost related issue I highlighted above. However, that's not worth really digging into it since I'll be making so many changes to the car
Once I get all the upgrades on, would love to see 7-750 whp out of her.
Thanks for looking! Any help with the Link issue is appreciated, but hoping that I can figure it out after a few hours of research and figuring out how to use a voltmeter, ha.
Nice update - hope you'll keep sharing as you work through the build. Would love to see more photos when you get a chance too.
Definitely, will be pretty silent over the coming weeks as I try and hunt down this ECMLink issue, but should see some big updates coming late April/early May.

I've done some digging and looked up a few tutorials online, also have someone local coming to help me out. But does anyone viewing want to answer this from my OP?
"The car will not connect to Link. I have tried the following: Two laptops, both driver versions, both Link versions, three different USB cables (one brand new from ECMLink). The car recognizes the com port and that does pop up, the correct driver IS installed. Browsing Link forums, the next thing I'm going to try and do is:
- verify the OBD port is getting power/data using this link: https://www.ecmtuning.com/wiki/diagport-12pin
- verify that there is a connection between Pins 1 and 2 on the ECU and pins 1 and 10 on the OBD port.
- If this is true and there is continuity, open up the ECU and look for any damage
My question here is, how do I check to see if PIN 12 has connectivity to ground? I have my voltmeter set to OHMS, do I place one clamp on PIN 12, and another on a nut/bolt that's screwed into the chassis? Can I use the bolt that's near the fuse box/OBD 1 port? What kind of reading should I be expecting to see on my voltmeter? Close to zero? Should it beep if I have it set to the correct setting? I know that for Pins 1/2 to Pins 1/10 I should hear a beep.
How does one check for this? Pins 1 and 10 should not have connectivity to chassis ground and should not be connected with each other. Check that this is true. And please, explain it as if you were explaining it to a child, or a golden retriever."
 .
. 

Can you, please, add some arrows to you photosDidn't get as much done as I wanted to, house stuff and other life items came up.
-Partially installed my Hallman MBC cockpit add on, thankfully I have two of those boost controllers because I lost one of the barbs/fittings so I'll just take it from the other.
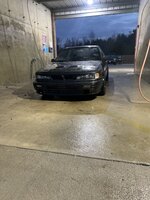
-Assembled the other wastegate and put it on the setup for viewing pleasure, I will need to rotate the compressor housing and placement of the dump tubes when in the car, but for now it looks pretty.
- Removed the coolant lines flowing to the firewall. I wont ever need heat in the car as I don't drive it when it's that cold, if I do, they make jackets. I looped the lines within in each other.. BUTTT it looks terrible, so I may have someone weld them closed and remove the rubber hose all along.
-Sold my old 6262 setup
Just ordered ABS delete SS brake lines and prop valve from JNZ, as well as both front window regulators,software and employee time tracking software
View attachment 627810
View attachment 627811
Another question on the vacuum lines for the wastegates and MBC; I'm planning to mimic the previous setup but wanted to be sure I wasn't missing anything. https://www.maperformance.com/products/tial-mv-s-38mm-v-band-external-wastegate-tial-mv-s38mm
This tial gates came with plugs for the additional air ports around the base of the gate, but they didn't come with plugs for the water holes..
1 - do I leave the water holes open? Seems like it would be easy to get debris in here and f*** up a gate?
2 - previously the vacuum lines ran from the air port on the side/base of the wastegate to the boost controller, with the top air port open. I plan on doing that exact same thing for my twin setup; both vacuum sources from side of the wastegates to a T, that T to the boost controller, and the top ports are open. Then the other side of the boost controller runs directly to the nipple on the compressor housing

Make sure you fill the gates up with water before plugging them...……………………...
Just kidding.
I have had connectivity issues with link and the only way I could get the car to "talk" was to start the car and connect then. IDK why it does it, but that is what I do when it happens to me. Sometimes just a bump of the starter while I am trying to connect will get it. No rhyme or reason to it and it has never been mentioned as a fix in any FAQ that I have read.
You will really like the Vibrant line. It will make you say "why did I ever fool with that stainless stuff" after you get to work with it.
Alignment should not matter at all and just leave the water ports open. Make sure an extra air ports are plugged obviously.