
The Top DSM Community on the Web
For 1990-1999 Mitsubishi Eclipse, Eagle Talon, Plymouth Laser, and Galant VR-4 Owners. Log in to remove most ads.

Search results for query: *
- Users: greekgodchaos
- Order by date

What did you do to your DSM today?
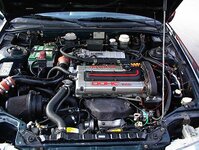
The firewall and shielding. Is that stock? Looks really fresh!- greekgodchaos
- Post #9,159
- Forum: The Hangout
-
What did you do to your DSM today?
Catch up post: Finally, after 3 years, I got the engine back in 2 days ago. Yesterday I finished installing my Snow Performance Water/Meth kit and installing my prettied rear diff cover with the new AO Customs precut silicone gaskets I ordered.Today I ripped open my 4 transfer cases and...- greekgodchaos
- Post #9,158
- Forum: The Hangout
-
-
Resolved Transfer case sealant?
I'm cleaning out my old cases and are these flanges in need of a thin layer of gasket maker or is it just metal on metal?- greekgodchaos
- Thread
- Replies: 3
- Forum: Newbie Forum
-
1G Cyclone Intake Manifold Information (Translated OEM Diagrams and Gaskets)
I have a bitchin' cyclone manifold and I needed the torque specs for putting it back together after getting new gaskets for it. Found and translated these factory diagrams. NOTE that Torque values on the page are in kg/m. Converter here.Additional diagrams can be found here.I found these...- greekgodchaos
- Thread
- cyclone cyclone intake diagram galant gvr-4 gvr4 jdm
- Replies: 3
- Forum: Bolt-on Tech
-
1G Alternative Spoiler Fasteners
I'm looking for elusive Talon Spoiler center nut screws and I am wondering if anyone has found a possible alternative to using them.- greekgodchaos
- Thread
- Replies: 0
- Forum: Appearance/Interior/Exterior
Wanted 1g Spoiler Mounting Hardware
I am looking for the OEM mounting pieces that come on the 1ga Eagle Talon's with the 3 piece spoiler, but I only need the hardware from the center hatch wing. Specifically the screws that hold the thing on. All 8 are preferable but Ill take what I can get.- greekgodchaos
- Classified ad
- Discussion: 1
- Category: DSM Parts Classifieds
-
Resolved Cyclone Intake Manifold Gaskets in 2024
Nuts, he beat me to it. Oh well, great resource to have. Much appreciated!- greekgodchaos
- Post #7
- Forum: Newbie Forum
-
What did you do to your DSM today?
Tore my Cyclone manifold apart and started on getting new custom gaskets made for it.- greekgodchaos
- Post #9,087
- Forum: The Hangout
-
Resolved Cyclone Intake Manifold Gaskets in 2024
Going to go with AO customs for the Cyclone gaskets as well as a few others as well. Link is in the comments below.Part of my build involves the mythical VR4 Cyclone Intake manifold, which it being 30 years old, could use new gaskets; especially when my 20g is going to be pushing 25psi through...- greekgodchaos
- Thread
- cyclone intake gaskets
- Replies: 6
- Forum: Newbie Forum
-
1G ATI Super Damper Offset from Alternator/Water Pump Pulleys 91 6-bolt
After reading that, it seems as though the Fluidampr and the ATI damper were both designed around the 1990 timing belt cover that didn't have those raised ribs, 91+ got the ribs and now we are seeing people having to remove them to alleviate this issue.Hope that alt belt will be OK if the...- greekgodchaos
- Post #13
- Forum: Newbie Forum
-
1G ATI Super Damper Offset from Alternator/Water Pump Pulleys 91 6-bolt
I just took a dremel to raised ribs and ground it down flush with the rest of the cover. Went too deep at the bottom, so I globbed some RTV behind the thin spots. Anything to save this black cover, seeing as a new black one would set me back almost $200. I'm getting a new alternator belt...- greekgodchaos
- Post #11
- Forum: Newbie Forum
-
1G ATI Super Damper Offset from Alternator/Water Pump Pulleys 91 6-bolt
Much appreciatedRight now it's 16mm bs spacer>metal plate>ati hub>damperThe timing belt lines up just fine. Right now the one thing I can think of is if an Eagle 2.3 crankshaft has a shorter end shaft than the 2.0 ones, which measures 15mm.- greekgodchaos
- Post #10
- Forum: Newbie Forum
-
1G ATI Super Damper Offset from Alternator/Water Pump Pulleys 91 6-bolt
EDIT: I think I found the issue. I didn't install the balance shaft sprocket. I only used that ring spacer that comes with the BS delete kit. I'm thinking they designed it based around having that installed, not just a spacer. But even so, the thickness of the spacer (~14mm) should be the same...- greekgodchaos
- Post #8
- Forum: Newbie Forum
-
1G ATI Super Damper Offset from Alternator/Water Pump Pulleys 91 6-bolt
Yes I am still using both of them. And it does butt up against then, but when the damper is bolted on it is rubbing badly against the timing belt cover and the pully is off by a bit compared to the water pump and alternator.- greekgodchaos
- Post #6
- Forum: Newbie Forum
-
1G ATI Super Damper Offset from Alternator/Water Pump Pulleys 91 6-bolt
No, that one in the picture is the one I had on my OEM gear, there is a larger and flatter one that came with it that does go on the outside, but I feel I may have needed that thicker one inside the hub before I slid it on. Its off by I would say the thickness of that washer in the picture.- greekgodchaos
- Post #3
- Forum: Newbie Forum
-
1G ATI Super Damper Offset from Alternator/Water Pump Pulleys 91 6-bolt
Big thanks to everyone who contributed to this thread and helped solve the issue of why it was hitting the cover when properly installed.EDITED FOR CLARITY:I installed my ATI hub and damper with the provided hardware in addition to the BS spacer and metal crank plate, but it was hitting...- greekgodchaos
- Thread
- Replies: 12
- Forum: Newbie Forum
-
1G ARP main Studs hitting oil pan
Awesome thanks! I Google failed me but I'm great full you didn't 🫶@1990TSIAWDTALON it's a stick, what is the rear main modification?- greekgodchaos
- Post #4
- Forum: Bolt-on Tech
-
DSMTuners Discord
How come we don't have a Discord server set up yet? Are there any DSM servers out there anyone knows of?- greekgodchaos
- Thread
- Replies: 10
- Forum: The Hangout
-
1G ARP main Studs hitting oil pan
I'm finally getting my engine put together, but I have encountered that the oil pan is hitting my Arp main stud nuts on the rear of the engine which is causing the oil pan not to sit flush with the block. Now, before I take the air hammer to it. Should I dent the pan or should I bore the oil pan...- greekgodchaos
- Thread
- Replies: 4
- Forum: Bolt-on Tech
-
What did you do to your DSM today?
I FINALLY ASSEMBLED MY ENGINE, tack welded the timing belt metal cover plates that had split apart, painted them matte black to match the VR4 black cover, installed the new dimpled/slotted EBC rear Rotors, reinstalled the calipers, and had many Cola and Potayto Chips. Umaru!- greekgodchaos
- Post #9,072
- Forum: The Hangout
-
1G PTT Twin Disc Clutch Master Info Thread (6-bolt AWD)
Wanted to add a post I found regarding the Isuzu slave cylinder:"Take this as you may, but you NEED to put that isuzu slave in, in order to get that clutch to perform properly. I had one before I switched to AUTO, and it was a bi*** to get working & adjusted properly. The OEM slave will push...- greekgodchaos
- Post #20
- Forum: Drivetrain Tech
-
1G Attaching an Eagle Talon Middle Wing to a Laser hatch
Reference diagram.- greekgodchaos
- Post #4
- Forum: Appearance/Interior/Exterior
-
1G Attaching an Eagle Talon Middle Wing to a Laser hatch
I have a Laser hatch without any holes to secure my 91 Talon center wing, I swapped it with a buddy a long time ago for the Batmobile look, but I want to go OEM+ this time around. How should I go about securing the center wing without drilling through the wing itself?- greekgodchaos
- Thread
- Replies: 3
- Forum: Appearance/Interior/Exterior
-
What did you do to your DSM today?
Just put her in a tiny harness and hang her from the roll cage (must install one for safety purposes. )- greekgodchaos
- Post #7,889
- Forum: The Hangout
-
What did you do to your DSM today?
My vote is for boostane. Def. Never heard of it but that.- greekgodchaos
- Post #7,824
- Forum: The Hangout
-
What did you do to your DSM today?
Something akin to turbo banket material.- greekgodchaos
- Post #7,817
- Forum: The Hangout
-
What did you do to your DSM today?
Might want to add a layer of protection on the inside of the shield. I plan on lining mine with fire resistant high heat blanketing.- greekgodchaos
- Post #7,815
- Forum: The Hangout
-
What did you do to your DSM today?
OEM color scheme dictates the top should be matte black and the lower part be polished bare, or at least silver. 🤖Jk to each their own.Why they didn't match them at the factory is anyone's guess. I'm partial to all polished but these parts are battered and rare AF these days.- greekgodchaos
- Post #7,813
- Forum: The Hangout
-
What did you do to your DSM today?
Finally able to walk without crutches so I've been limping around trying to get caught up.Finished installing the seals on my VR4 calipers, then reinstalled them. (1g 1993 calipers need 1993 seals due to 2 different size pistons. 91-92 AFAIK have same size pistons.)Pressed in fresh motor...- greekgodchaos
- Post #7,767
- Forum: The Hangout
-
What did you do to your DSM today?
Got my H-cross exhaust piping to make my dual exit exhaust. Got pretty far with it too.Stared sadly at my calipers that are bereft of large pistons seals. (Seals FINALLY showed up with the correct sizes. 1993 VR4 calipers have 2 large 2 small pistons per side, so you NEED to get 93 seals...- greekgodchaos
- Post #7,723
- Forum: The Hangout
-
-
What did you do to your DSM today?
Went to rebuild my VR4 calipers and found out some calipers are different and have different seal sizes. 2 large pistons, 2 small pistons, and the seals I got only fit the smaller pistons.Also finished sanding my Talon middle spoiler.- greekgodchaos
- Post #7,708
- Forum: The Hangout
-
What did you do to your DSM today?
I got a bellow pneumatic air jack off Amazon and it's the best toy I have. 5 seconds and then car is 16" up. You can't have those handles on though, otherwise its too high.- greekgodchaos
- Post #7,705
- Forum: The Hangout
-
Question by 'greekgodchaos' on classified ad 'Taillights'
Which gen?- greekgodchaos
- Classifieds question/comment
 Closed
Wanted 1g Driver side engine mount uncut
Looking for a driver side engine mount bracket uncut. Circled in the photo. Hmu if you have one. Undamaged preferable.- greekgodchaos
- Classified ad
- Discussion: 1
- Category: DSM Parts Classifieds
-
Old School DSM & 4G63 goodness-Ads, Commercials, Tuning etc.
Pretty sure those were reprints because I have like 3 of those lol- greekgodchaos
- Post #488
- Forum: The Hangout
-
What did you do to your DSM today?
Fabbed up a kick plate trim piece that never was but should have been. Ordered a few yards of fabric to reupholster the panels to match my door inserts.- greekgodchaos
- Post #7,698
- Forum: The Hangout
-
What did you do to your DSM today?
Just some no brand seats I found on eBay. Looked way more appropriate for the car than the last ones I had. Had to order from 2 different sellers because I couldn't find them for sale in a pair. It was really weird. Could only find 1 passenger seat in the states.- greekgodchaos
- Post #7,696
- Forum: The Hangout
-
What did you do to your DSM today?
Sorted wiring and got my interior buttoned back up.Ordered new black AN fittings for OFH and AFPR.Started working on more replica labels.- greekgodchaos
- Post #7,694
- Forum: The Hangout
-
What did you do to your DSM today?
Post in thread 'Transmission barcode label' https://www.dsmtuners.com/threads/transmission-barcode-label.543334/post-153881879- greekgodchaos
- Post #7,686
- Forum: The Hangout
-
What did you do to your DSM today?
Got my sticker paper so I printed a full sheet of barcode decals. Looks clean AF.Installed the WSS billet bracket bushing replacement inserts. My stock ones crumbled apart when I took the bolts off.Finally found a welder to do the bung since my old one was jammed up against the throttle stop...- greekgodchaos
- Post #7,683
- Forum: The Hangout
-
OEM Straight-Cut Oil Pump Gears Available
No no, I was just asking in general. I've measured helical and straight cut to be identical so I never saw any issue to swap the straight cut into a helical case. Never had any issues myself.- greekgodchaos
- Post #30
- Forum: Vendor Announcements
-
OEM Straight-Cut Oil Pump Gears Available
Wouldn't one assume that if the helical and straight cut were the same exact dimensions height and width wise they can be used in a helical case? I've done that twice already without issue. 🤷♂️- greekgodchaos
- Post #28
- Forum: Vendor Announcements
-
1G 1ga Talon wing hole spacing
I have a Laser hatch that has no holes for the center wing. Looking for precise measurements of the spacing for the holes. Just need the marked ones, the rest can be extrapolated since they're spaced equally top to bottom. Hoping someone can help out.- greekgodchaos
- Thread
- Replies: 0
- Forum: Appearance/Interior/Exterior
-
What did you do to your DSM today?
Installed new power steering linesTidied up the wiringRemoved the shitty 350z louvers and evo 5 bottom wing. Reinstalling my Talon middle wing.- greekgodchaos
- Post #7,682
- Forum: The Hangout
-
What did you do to your DSM today?
Finished and reinstalled the knuckles.Detailed the inner hood.Wrapped wiring loom with tape.Raged about the taxes I owe 🤬- greekgodchaos
- Post #7,678
- Forum: The Hangout
-
What did you do to your DSM today?
Helicoiled my transmission mounting bolt holes 12x1.25Pressed in my new studs and hubs (Tip: don't install the metal ringed inner seal until AFTER you press the hub in, because you'll need to press the inner bearing race back in when the hub pushes it out, and if you install the seal prior...- greekgodchaos
- Post #7,670
- Forum: The Hangout
-
What did you do to your DSM today?
Fire help.But yeah those things are such a PITA. Even using snap ring pliers I had a hell of a time getting them out. And without a press I don't know how anyone could do this job without damaging the bearings or the inside of the knuckles.- greekgodchaos
- Post #7,665
- Forum: The Hangout
