

SasaniFab
Proven Member
- 2,433
- 782
- Dec 1, 2013
-
Mexico,
Connecticut
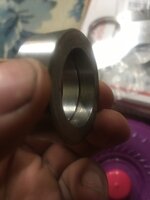
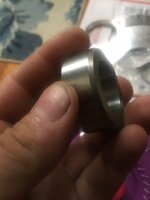
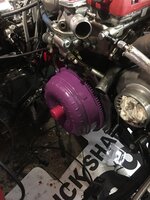
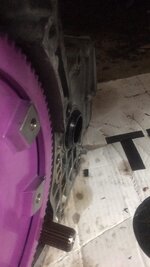
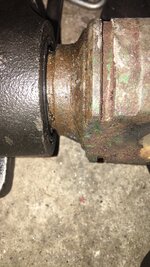
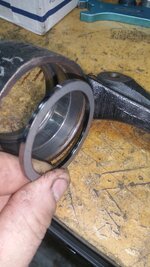
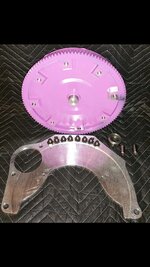
As some of you know jeff Bush offers a kit to install the precision 2g converter in a 1g. The kit includes a new billet transmission adaptor plate, transfer case shim, half shaft bearing shim, machined pilot bearing and longer dowels for the transmission. The converter includes 8 flex plate bolts. The first thing that you need to do is remove the bearing from the 1/2 shaft to install the shim. This solves the oil leak issue. The mount on the transmission needs to be slotted to accommodate for the lateral movement towards the frame rail. When installing the flexplate it’s recommended to remove the washer plate on the crank as you loose clearance when using the kiggly flex plate and the convertor May hit the crank bolts. Jeff includes a new pilot bearing he machines so that the converter has more engagement. Everything is labeled with the correct installation orientation. I have to say I’m extremely impressed with Jeff and his kit. The parts and his customer service are top notch. As always if anyone is interested in his kit and has questions message me, I’ll get you sorted out
Attachments
-
 2354D29D-F930-4CC8-B78D-DD71BD8820C8.jpeg1.1 MB · Views: 351
 -
 7D832A55-94FE-4B3D-B573-E71E5CE12A72.jpeg923.9 KB · Views: 285
 -
 E4FCA0E4-AF09-4841-971F-35F4C8D72561.jpeg935.9 KB · Views: 279
 -
 03A1F43C-3499-451F-B415-CDC3FE0FF71E.jpeg1.3 MB · Views: 303
 -
 C8055211-CDFE-41FC-AE85-172015F79E25.jpeg266.4 KB · Views: 291
 -
 762DA59C-5E62-43C9-91DF-AF9C7B0C36DF.jpeg412.8 KB · Views: 306
 -
 6116445E-D634-48D1-BA10-9A4375BE7D17.jpeg495.3 KB · Views: 311
 -
 D1EA0FD6-583F-45EC-BBB5-4ECD28834943.jpeg424.5 KB · Views: 300
 . As far as the engagement , that is a good ?ill ask him