The Top DSM Community on the Web

For 1990-1999 Mitsubishi Eclipse, Eagle Talon, Plymouth Laser, and Galant VR-4 Owners. Log in to remove most ads.

Please Support Fuel Injector Clinic
Please Support STM Tuned

My fuse box relocation (project log)

This site may earn a commission from merchant
affiliate links, including eBay, Amazon, and others.

This site may earn a commission from merchant affiliate links, including eBay, Amazon, and others.
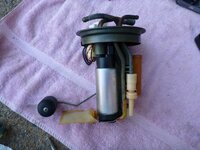
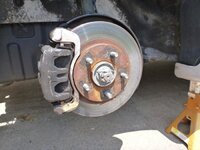
Figured I'd add in a few more things here, more to keep track of it myself than for any other reason.


(4/2013) Evo 9 fuel pump

After installing the fuel pressure sender, I noticed my fuel pressure would drop at WOT as the rpm's increased even though it could still (barely) maintain a 12:1 afr. Surprise, surprise, the stock fuel pump can't keep up with E85 even on the t25. $20 and a lot of time trying not to break the fuel feed line off the sender, an Evo 9 pump made its way in. I also drilled out the siphon while I was at it, I think to 7/64".

P1050824.jpg


(5/2013) Carlisle Performance and Style autocross

Just a local autox at the Carlisle Performance and Style show that I did last year as well. Slightly different course and lots of rain throughout the weekend, so my runs were limited. I was consistently 1 second slower than my buddies Evo, this must change in the future! (No pictures, sorry.)


(5/2013) TrackDaze - Summit Point Shenandoah Circuit

First time road racing and I had a blast!!! The car ran great except I cooked the wbo2 sensor. It would overheat after about 7 minutes on the course, and since I use it as a narrowband as well I just locked the car in open loop. Didn't have a replacement with me, but the car ran great anyway, so I just replaced it later. Racing is hell on brakes, and you can see how the black paint cooked off my calipers so they're now half-white. The brakes never failed or severely faded, but my confidence level in them just wasn't high (blank rotors and EBC yellow stuff pads). Read the link below for more pictures and videos. Brian took so many awesome videos and pictures since his car wasn't there.

http://www.dsmtuners.com/forums/roa...rackdaze-summit-point-shenandoah-circuit.html

https://www.youtube.com/user/turbosax2

attachment.jpg


attachment.jpg


P1060674.jpg


(8/2013) Viscous coupler swap

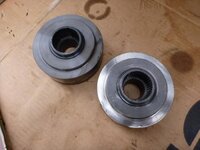
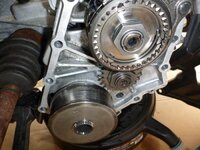
My friend noticed at the Carlisle autox that on launch my front tires spun and the rears did nothing. I wasn't up for pulling the rear end of the car apart for inspection, so I took a stab at just replacing the viscous coupler with a used one from TMZ. The old one didn't look bad, but slow-mo videos after the swap show that the VC is doing what it should be, although the fronts do still spin considerably more.

Original on left, replacement on right:

P1060643.jpg

P1060659.jpg


(8/2013) DG Coilover changes

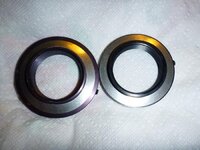
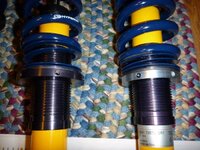
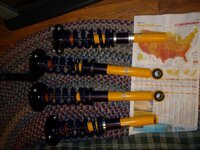
Tore down the coilovers for a good cleaning. Replaced the Torrington bearings. My front tires were rubbing on the lower spring perches at full lock (made a nice squeaking sound), so I got a new set of perches and had them machined down to just a hair bigger than the Torrington bearing races. (This eliminated the rubbing on the passenger side but still rubs just a tiny bit on the driver side, not a big issue). It's nice to be able to turn full lock again without everyone hearing it. Switched the springs from 650/350 to 800/400 and re-corner balanced and aligned the car. I cut my inner tie rods to fix my front toe adjustment issue:
http://www.dsmtuners.com/forums/han...-toe-adjustment-problem-tie-rod-too-long.html

P1060707.jpg

P1060714.jpg

P1060712.jpg


(8/2013) Gutted 2g maf

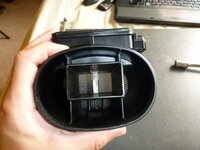
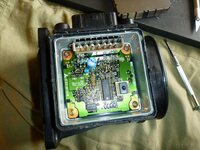
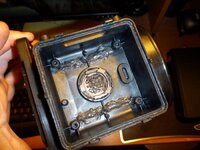
It's been a long time since I switched to speed density, so my stock maf is just holding my filter. I finally got around to gutting/porting it. This actually took a LOT of work, but it turned out nice. Beside the increased flow I'll gain, it actually cut the weight of the maf in half.

Before:

P1060724.jpg

P1060746.jpg


After:

P1060764.jpg

P1060771.jpg


(8/2013) 2013 Buschur DSM Shootout

Shootout! Did four test and tune drag passes, missed 3rd on the first pass but on the next three passes I was pretty consistent right around 13.7 @ 99mph. Unfortunately, I couldn't beat my best of 13.5 @ 100. Autox rocked with a best time of 31.1 seconds, but with 35 cars in the street class there was some hefty competition and I didn't place. The autox cars were WAY faster this year than last, and the course was just as fun as last years. I'll put up some video of the course at some point.

DSC_0117.jpg

DSC_0147.jpg

DSC_0149.jpg
 
Just read through the whole thing. Thanks for posting the link. Can't wait to see what else you have in store, but it's been a great inspiration to see all the maintenance/repair/supporting mods you did before making big power. I don't have the skillset/time/extra car to do all of it, but it's sure fun to watch!

Don't be shy about the youtube uploads either! I subscribed LOL
 
Ok, it's been way too long since the last update but I started working on the car again recently.

Awhile ago I polished my Greddy intercooler pipes (got them used from a friend). Here is a before and after type shot.

View attachment 95993

View attachment 95994

And I modified a 1g bov to fit the Greddy flange. See here for more info. Blasted and powdercoated it midnight black chrome.

95911d1244435088-punishment-2g-ic-pipes-no-1g-bov-love-img_8488.jpg


My ECU harness is now 95% done, the other 5% will be done at the same time as the fuse box harness. The connectors I'm using are Deutsch connectors from laddinc.com. I use a special crimper to crimp all the terminals. Any empty spots in the connectors are filled with plugs to environmentally seal the connectors. Every position in the connectors is numbered so I made a chart of which wire goes where, making maintenance easy in the future. I think there were only 2 wires that needed lengthened, the rest were shortened by at least 2 feet, sometimes up to 4 feet. By using the connector I was able to keep soldering to a bare minimum, mostly just on the power and ground wires (grounds were all moved inside cabin). The injector clips all go into one big connector so I can remove the harness without unplugging the individual clips. The injector connector mounts to the bottom of the intake manifold with a bracket from laddinc. If anybody is really interested in the connectors I can give more info on them, but they are really nice. I threw in a picture of my alternator plug from Ballenger Motorsports, great prices and service there and the crimper I got from there is really nice. Also in the pictures is where I mounted the power transistor and injector box, underneath the relays near the ecu. I liked this spot because it kept all the electronics in the same general area. I'll post pictures of the harness installed next time I put it in.

View attachment 96005

View attachment 95995

View attachment 95996

View attachment 95997

View attachment 95998

View attachment 95999

View attachment 96000

View attachment 96001

View attachment 96002

View attachment 96003

View attachment 96004


A lot of hours went into that harness and each wire was placed precisely. I went through and checked every wire in the harness to verify it went to the right place; it was a good feeling when they all were right LOL I'm now working on the fuse box harness. First I need to mount the fuse box. I found a good place for it so I'll show that once I make mounting brackets for it. Then on to redoing the wiring on the harness.

Oh, and I picked up a used copy of v2 dsmlink for a good price too so I'm set there.

I really want to bring my car to the 2nd Annual Northeast DSM Meet on August 8th so that's my goal. After I finish the fuse box harness (hopefully this week), I want to pull the engine out on Sunday. Then I'm (hopefully) going to paint the engine bay to make it look nice again and paint all the front suspension stuff, powdercoat a few more random pieces, relocate the battery, and put it all back together.

Been reading and rereading your build thread, it is very inspiring and detailed. love every bit of it:thumb:

what did you do with knock sensor? did you run it through mil spec connector? i remeber you said not to touch or cut thick green cover. I am doing wire tuck and a bit stuck on how to go about knock sensor.
please help:D
 
View attachment 154981
Swapped from a mbc to ebc using ECMLink. The solenoid is mounted to a bolt that was drilled and tapped, then installed in the scatter shield.
Where did you find that connector for the EBCS? I have been looking all over!

Thanks for the help BTW. I hope to get my battery relocation done as soon as the Knukonceptz parts arrive! Both you and your brother are an invaluable source to this community. :thumb:
 
You beat me before I could edit my post haha. Found the catalog, DTP series?
 
Just wanted to bump this thread because it's an insanely amazing build. I keep referencing back to this thread to give myself the proper kick in the butt to get my build going again.

Any updates??
 
I finally got and installed an intercooler (no piping yet), and am still working on the turbo pieces. A couple of other little things. But hopefully in a few weeks I'll have a nice update for a big upgrade I'm working on and am super excited about :)
 
A bit late here on the update, but I've done a few things to the car this year.

The FIC 2150's were swapped for FIC High-Z 1100's. Both are fantastic, the 2150's were just super-overkill for my little turbo (no pictures).
My LC-1 wbo2 died, so it was replaced with a BMS AFR500 (same as the discontinued NGK Powerdex AFX). The AFR500 seems like a much higher quality unit and I'd definitely recommend it (no pictures).

CF fog light covers (held on with safety wire), CF spark plug cover, hood struts, engraved VIN tag:
20150426_134541 (Large).jpg

20150426_134600 (Large).jpg

20150929_225611 (Large).jpg
20150929_225619 (Large).jpg


And the big one, brakes! This new setup is absolutely fantastic, besides a nasty squeal. I really can't say enough about how well they work.
Front:
JDM Galant knuckles with ABS sensors
Essex AP Racing Competition Brake kit for an Evo
Carbotech XP 12 for road race and AX6 for autox/street
Spiegler brake lines
ARP wheel studs

Rear:
Girodisc 2 piece rotors
Stock Brembo Evo Caliper with Racing Brake SS pistons, high temp dust boots, and coated by Detective Coating
Carbotech XP 10 for road race and AX6 for autox/street
Spiegler brake lines

3g master cylinder
2x Male M10 x 1 Bubble, Female M10 x 1 Inverted adapters (from seller goodbrakes on eBay)
ThermoTec heat shield on front lines

11313005_10100606210002576_7352563428083668971_o.jpg

11738013_777387687397_9219477659504678223_n.jpg

12048994_788311431127_588263819_n.jpg


On 8/9 I did an autox at Pitt Race:
11825880_781612411017_7388205989032811461_n.jpg


And on 9/27 I did an HPDE at Pitt Race (full track):

With my new tow rig:
12022485_10207932837264580_6320816185730135026_o.jpg


12068450_10207932876145552_1615292827635644166_o.jpg

12068530_10207930850614915_1434035525036358696_o.jpg

12031449_10207932980588163_4382161948127314521_o.jpg
12028630_10207932869745392_8246252522041539821_o.jpg


This F430 was in the Novice group with me. I couldn't pass him, but I maintained distance behind him for a few laps once we passed that slow red Porsche. He'd pull away easily on the straights, then I'd make up the distance in the corners. Really nice car! I'll post videos from the event later.

12038227_789340004857_7799920528129394886_n.jpg
12036842_789340054757_186142300301797800_n.jpg
12075010_789340084697_800059407038155675_n.jpg
 
(8/2013) 2013 Buschur DSM Shootout

Shootout! Did four test and tune drag passes, missed 3rd on the first pass but on the next three passes I was pretty consistent right around 13.7 @ 99mph. Unfortunately, I couldn't beat my best of 13.5 @ 100. Autox rocked with a best time of 31.1 seconds, but with 35 cars in the street class there was some hefty competition and I didn't place. The autox cars were WAY faster this year than last, and the course was just as fun as last years. I'll put up some video of the course at some point.

View attachment 160006

View attachment 160007

View attachment 160008

Dude....I had no idea you were running the AX at the ShootOut! I would have said hi.

Also I think you meant 41.1 seconds, as I won the DSM Class with a time of 40.6. :)

Youve got so much more potential! Keep it up.
 
That was from 2013, I didn't get to the SO this year, unfortunately. I had to settle for an autox session at PittRace that day, instead.
 
Jason Drew made it for me. I can't remember his forum username, though.
 
Just to throw some support behind you: It was really fun going through all the pages watching your progress from start to work in progress finish (we're never really finished with DSM's are we?). Gave me some good ideas for my Spyder, and a lot of lessons learned. Thanks for adding in your lessons learned bits too, that's what the forums are all about aren't they? I'll be subscribing to this thread, and look forward to seeing more from the car.
 
Thanks for the support! I've spent the last month or so doing a full detail/paint correction. Maybe I'll put up some pictures, but silver is tough to show good paint, at least with my photography skills. Next up is the long anticipated turbo swap :)
 
Last edited:
I took the car down after the HPDE in September to start my winter project. I decided to fully detail the car before it got too cold. I also replaced the lower and upper window trim with brand new ones. The detailing involved clay barring, full paint correction with the Flex buffer, touched up all of the rock chips with a Dr. Colorchip kit, Klasse All-In-One, two coats of Klasse High Gloss Sealant Glaze, and two coats of Pinnacle Souverän Paste Wax. I repolished the headlights as well since they weren’t looking so good anymore. I attempted twice to cover them in VentureShield but couldn’t get satisfactory results, so I put that off for the moment. This whole process took about five weeks since I work very slowly.

1.jpg

2.jpg

3.jpg


I finally got around to reinforcing the door handles with azdave’s kit that I’ve had for years. I never had an issue with them, but better safe than sorry. I also tweaked the window slider pads to make the window rattle less when closing the door with the windows down. And I took the opportunity to swap out the door speakers for a set I picked up for $5 at a meet a few years back. They look a bit better than the stock ones… (No pictures.)

My VEI gauge oil pressure sender failed, so I contacted VEI about it. They now switched from a one-wire sender to a three-wire sender, which is a nice change. I swapped out my oil pressure sender from a 200psi SSI sender to the 100psi version (same one I use for fuel pressure) and sent my gauge back to VEI for conversion. I also sent back the other gauges and had them replace the color filters on them all since they had aged a bit. The sender was mounted similarly to how it was before

4.jpg


I installed my Kiggly HLA pressure regulator.

4.5.jpg


Then, let the turbo swap finally begin!

I first got an FP 68HTA, but later changed my mind and had Justin build me a non-water-cooled 20g. I paired this with an FP exhaust manifold and Punishment Racing MVS o2 housing. All of these were ported, polished, and flanges trued by me. The PR o2 housing required the most work by far to get everything acceptable. Swain Tech coating went on next. PR advised me not to take the wastegate off to get it coated, but I did anyway. It was a huge pain to get back on and I should have heeded their advice, but it did turn out nice.

5.jpg

6.5.jpg

6.jpg

7.jpg


On my previous turbo oil feed line, I used DEI heat sleeve and it turns out it wasn’t quite up to the task. I’m going to try Techflex Insultherm this time around and if that doesn’t work I’ll give DEI titanium sleeving a shot. The turbo to manifold bolts were drilled and safety wired for assurance.

8.jpg

9.jpg

10.jpg


To use the new turbo, I decided to swap to a 1g thermostat housing and non-turbo water pipe. Unfortunately, the waterpipe didn’t fit with the scatter shield, so I heated and bent the water pipe until it fit properly. Then, I cut the end of the heater hose off and used a bypass rubber hose (Dayco 87653) since this is my only thermostat bypass loop now. I re-beaded the end using an Earl’s tube beader. (The tube beader was terrible out of the box and got stuck in my first test piece since the balls didn’t retract when done and the bead was very shallow. I had to drill out the holes and use oversized balls, and shave down the center bolt to accommodate the larger balls.) Finally, the water pipe was powdercoated and reflective heat wrapped. The thermostat housing was glass bead blasted, then I installed the ECU temp sender, aftermarket gauge temp sender, and a 4psi pressure switch for my warning light. I tapped the unused holes to NPT threads and installed SS plugs. A new 180* OEM thermostat was used. The feed hole from the block to turbo was plugged with an OEM BSPT plug. I used a 1g lower radiator hose and did not have to cut the shifter counterweight due to how I bent the water pipe.

11.jpg

12.jpg

13.jpg

14.jpg

15.jpg

16.jpg

17.jpg

18.jpg

19.jpg

20.jpg


I had to relocate my BCS to make the plumbing shorter and safer. Since there was lack of mounting holes, I used an L bracket to mount the BCS flush with the frame. The backside was counterbored to sink the bolts in, and the top hole was slotted so I can flip the BCS 180* if I ever need to change up the plumbing. I used push-to-connect swivel fittings and 0.245" ID polyurethane tubing from McMaster since the wastegate and BOV specify minimum 6mm (0.24”) ID tubing. I had to get a little creative routing the hose from the BCS back to the vacuum block under the intake manifold, but I think it will be OK. I also put a ⅛” NPT bung on the lower intercooler pipe in case I ever need to switch the boost source. The swivel fittings are extremely convenient!

21.jpg

22.jpg

23.jpg
 
Last edited:
It took me a long time to choose, but I finally decided on a Blitz 23102 intercooler meant for a Nissan S13 due to it’s size, construction, and design. I modeled some brackets in SolidWorks and made them at work from 7/16” 6061 aluminum. The FMIC is rubber grommet mounted on the sides using the stock fog light holes and solid mounted on the top. The side brackets were a several-week project since they involved machining, bending, and polishing to match the endtanks. I’m really proud with how these turned out but I forgot to take more pictures! The bumper cover was trimmed to fit but I kept the mustache portion and as much plastic as I could so no air can go around the FMIC. I’m going to investigate using the stock (modified) ducting later on, or make my own if I have to.


After much measuring, I decided on Vibrant 2.5” aluminum tubing and couplers, and Breeze Hi-torque liner worm drive clamps. I also switched to an Evo III throttle body and a Tial QRJ BOV. I had to trim the 90* couplers coming off the FMIC. I had PRL Motorsports weld them up and bead the ends - they did a great job and I was especially impressed with how well they blended the Tial flange on the inside. I’m extremely happy with how well the tubing routing turned out while managing to keep the pipes simple. It comes really close in quite a few places. I spent a lot of time modeling bends in SolidWorks and printing them out to test fit different pipes from different manufacturers before deciding on the bends I needed to make it work the best. The picture below is just a fraction of the paper templates I had!

23.1.jpg

23.2.jpg

23.3.jpg

23.4.jpg

24.jpg

24.5.jpg

24.6.jpg

25.jpg

26.jpg

27.jpg

28.jpg


The intake pipe was made from a carbon fiber bend and a Green Filter.

29.jpg

30.jpg


These pictures were taken yesterday.

31.jpg

32.jpg

33.jpg

34.jpg


So the car is up and driving now, although there are a few things left to do before she’s race-ready.
  1. Make a mounting point for the intake pipe.
  2. Route a -10 line from catch can to intake pipe.
  3. Boost leak test.
  4. Tune
And in the not too distant future, these need to be done before turning the wick up.
  1. Rewire fuel pump.
  2. Probably have to upgrade fuel pump, we’ll see how far the Evo9 pump goes.
  3. Head studs
Let me know if you have any questions or want more pictures of something in particular!
 

Attachments

  • 24.4.jpg
    24.4.jpg
    363 KB · Views: 121
Last edited:
Support Vendors who Support the DSM Community
Boosted Fabrication ECM Tuning ExtremePSI Fuel Injector Clinic Innovation Products Jacks Transmissions JNZ Tuning Kiggly Racing Morrison Fabrications MyMitsubishiStore.com RixRacing RockAuto RTM Racing STM Tuned

Latest posts

Build Thread Updates

Vendor Updates

Latest Classifieds

Back
Top