The Top DSM Community on the Web

For 1990-1999 Mitsubishi Eclipse, Eagle Talon, Plymouth Laser, and Galant VR-4 Owners. Log in to remove most ads.

Please Support STM Tuned
Please Support ExtremePSI

1992 Talon Tsi AWD Re-habilitation

This site may earn a commission from merchant
affiliate links, including eBay, Amazon, and others.

This site may earn a commission from merchant affiliate links, including eBay, Amazon, and others.

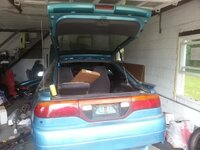
End goal ? Seeing it move on 4 wheels would be nice. I want show and go, hx35/272/full 3"/ecmlink. dropping the power steering but keeping a/c. I've rebuilt and worked on so many, but this one I really want to shine inside and out, top and bottom.
 
awesome man, im currently working on a 92 tsi as well. mine is way worse than yours. check out my build and let me know if you need a hand with anything
 
8/10/14:
Over the past week or so, I removed the trans, steering lines, steering rack, head, block, front subframe stuff...
4WFzaJml.jpg


Saturday went to my local junkyard and found this puppy:
agJc3qHl.jpg


WH1C next to the 18g that I'm selling.

The reman steering assembly came that I bought off ebay for $85 shipped, which I'll be depowering:
ufQ4sUMl.jpg


Finally starting to see the engine bay! Once I clean up the ground and surrounding area some more, I'll get to shining it up:
JO5BLarl.jpg


After getting the block on the engine stand for blueprinting, I noticed the rods had Clevite bearings, looks like the coating is worn, but the bearings aren't horrible:
EhIhaDNl.jpg

Plus I'm learning a little more about the motor's history. I surmise it has been rebuilt at least twice, because each rod has the number stamped:
kjHP0WMl.jpg

Probably from when the clevite bearings went in, but oddly, and not in sync with the number stamps, are these punched holes:
3rfM3wjl.jpg


The punched holes do not match the number stamps. So somewhere along the way, whoever rebuilt the motor 1 of the times didn't care which rod came out of which cylinder.

Waiting on a crank pulley tool so I can blueprint the crank, see how we're doing there....
 
Yessir, I believe its the "big" WH1C, off a mid 90's cummins. Will take apart to inspect/clean and take wheel measurements. Possibly tonight.

Last night did some blueprinting, here's what I found:

I have dissassembled the block and so far found oem rods/pistons/crank. Everything looks ok. Crank turned smoothly and easily with the shortblock still assembled. Upon further inspection, the crank is machined .01" on the pins and journals, both rod and main bearings are clevite 77 +.25mm, all seem pretty worn. I'm getting 1.7620"-1.7625" mic'ing my rod journals and all the mains are 2.235". I also re-torqued the rods, and came up with 1.760"-1.7615"; making oil clearance calcs range from .0009-.002". Rod clearances were all .006/.007 using a feeler gauge.

Tonight will also be cylinder bore inspection, remove oil squirters. Baby steps, baby steps.[DOUBLEPOST=1407975568][/DOUBLEPOST]Here are all my numbers so far, 1st time blueprinting something (Jafro please forgive me):

o0YojNxl.jpg

ueNerHzl.jpg

rPsWTBLl.jpg


So in conclusion, I don't think this block has ever been machined, just worn about .3mm in diameter over the 222k miles it's been driven.
 
Last edited:
Did some more math tonight, following Jafromobile's videos. Tonight was the piston to cylinder wall clearance, quick and easy check.

So I get out the FSB, it says the piston diameter for DOHC Turbo should be:
84.96 - 84.99 (3.3449 - 3.3461) mm (in)

My measurements??????
mfobyZfl.jpg


That's right, it says 3.365", BIGGER than they're supposed to be. Check out the clearance, .005" to .006". I'm surprised they're not slapped to shyte, not even sure if being over on spec would cause slapping.
Factory clearance is 0.0012-0.0020, so you can see these were way out of spec.
There's no markings on the cylinder walls, but there are some "polished" areas on the pistons.
So how the hell are they bigger than they're supposed to be..... About .020" bigger. Maybe someone threw in .020-over factory 63DT pistons ? Must be, let's check out what ASA says...
Hrmmm, appears you can (well used to be able to) get OEM pistons AND rings, at .010, .020, .030, and .039 oversize! Who woulda thunk it. I guess that's what's in here, learn something new every day.
 
Last edited:
I believe they make an OEM topped piston that can be .020 bigger, doesnt seem too crazy to me
 
They made 10, 20, 30, and 40 over sizes. I'm going with aftermarket on the build, but at least I know what's going on. None of these changes are documented in the folder I got with the car.
 
8/16/14:
Felt like I did a lot today, but the pictures don't do the time I spent justice, LOL. I've been second guessing my bore measurements, so I busted out the telescopic gauges, and came up with the same numbers as the bore dial did:

iAgsWHil.jpg


Also inspected the deck, came up with a couple low points:
M3zjt5Ll.jpg

6D3286xl.jpg

This isn't right at the limit of having to do something, or not.....
The FSM states: "Flatness of gasket surface - 0.05mm (.0020in), with a Limit of 0.1mm (.004"). As noted above, at the locations where there was a .002" low spot, .003" would not fit. So I'm spot-on where it's supposed to be, I guess ? In Jafromobile's "blueprint 108", it looks like his low spots were .005", so he got his deck machined. I'll have to see what the machine shop recommends.

and cleaned off the serial number plate, LX4040 yo!
5sPAc3Ul.jpg


Sandblasted a bunch of parts today, rear brake line holder thingy's that go in the wheel well, the large stud assembly that mounts to the body to mount the front of the rear subframe to, and the steering assembly brackets:
ZZgmzmAl.jpg

(One blasted, one not)
Also wire-wheeled all the bolts that go with the aforementioned parts. All parts are outside now with a completed primer paint set, and working on their first coat of black.

Since I can't find a local "new" rear diff cover, I decided to clean mine up, and paint it. I figure the rear sees about 200F as a high temperature, so I decided to play it safe and use some caliper paint on it:
dxDJEPHl.jpg


Also trying out this product on the rear itself (has to 'dry' for 24 hours):
W0DDTSXl.jpg


Once it's dry, its supposedly a primer. So I'll use the caliper paint on this too. I have new bolts and seals for this, so I'll do them as soon as the paint is solid, clean out the housing as best I can. Then I'll mount her up to my lovely subframe and the rear of the car is just about done!
 
Last edited:
Thanks man, started tearing it down a long long time ago, never even heard it run. Hell it would barely even move when I picked it up. Plus really only being able to work on it every other weekend kinda hinders progress, but I'm getting along.

Today got back to painting the rear diff:
OCK5k77l.jpg


Also replaced the front and side seals, applied the super grey to the diff cover, hand tightened, and waited an hour before tightening.

Finally brought the rear subframe home as well, mounted the diff up to the subframe:
HlDE5eJl.jpg


Chased the threads for where the subframe 3-bolt stud thing mounts to the body, and do yourself a favor, go pick this up at Home Depot while its on sale now, its so awesome:
ugcUDT3l.jpg


You can turn the key by hand, with a big socket on the end, or it also has a 3/8 socket hole on the bottom there, plus it fit this almost too large m12x1.25 tap. This is a great addition to having to tap anything on the car, instead of using that huge 2-handle T-bar thing.

So here are the threads I chased on both sides of the car, also wire-cupped any rust off this area, and primed it:
BPJyqf7l.jpg


Then sprayed some black under there and mounted up the subframe mount stud:
Xndm5VCl.jpg


And FINALLY, something went back on the car:
juY0L3xl.jpg


I'll mount up the rear struts this week, check tightness on all the subframe hardware, and mount up the rear brakes. Maybe a few test pics with a wheel installed :) We'll see how this week goes...
 
that is beautiful. keep it going! Where is the serial number place on the block? are certain castings better than others?
 
That hole at the bottom of the block is the dipstick tube, so follow that straight up. The flat part where the serial is hidden behind the water pipe on an assembled block.

Is one better than another ? I doubt it, they were all cast in Japan I'm pretty sure. So you don't have to follow the "don't buy something made on Monday" clause for USA built stuff ROFL
 
8/20/14:
Cleaned up the front case and took it apart for inspection. Appears to be aftermarket, not sure who's, because it has helical gears and not straight cut. Some minor grooves on the flat surfaces, and the gears look good.
hPv0rFfl.jpg


But inside where the main pump sprocket goes is a BIG groove. Something must have gotten caught in there for awhile and chewed it up, not sure if you can see where there's almost a step in this channel:
BGphrdMl.jpg


By gravity only, this is how far the gear shaft slides in until it hits that groove:
gomrAHUl.jpg


It should slide in and out all the way, with no help. So this front case is poopies.
 

Attachments

  • 5bY6Lbwl.jpg
    5bY6Lbwl.jpg
    50.9 KB · Views: 197
  • gomrAHUl.jpg
    gomrAHUl.jpg
    47.4 KB · Views: 144
  • BGphrdMl.jpg
    BGphrdMl.jpg
    50.2 KB · Views: 152
  • hPv0rFfl.jpg
    hPv0rFfl.jpg
    50.6 KB · Views: 148
  • cnnTsbQl.jpg
    cnnTsbQl.jpg
    61.2 KB · Views: 156
  • 1ldyvrPl.jpg
    1ldyvrPl.jpg
    62.9 KB · Views: 150
  • duv4igml.jpg
    duv4igml.jpg
    65.5 KB · Views: 151
  • 4ohPt7Gl.jpg
    4ohPt7Gl.jpg
    56.2 KB · Views: 162
Last edited:
I too have helix gears in my front case and until fully seated they catch up a bit on the shaft, once in place however with very little lubrication the spin extremely well… i can't figure out the maker as they have no identifying marks and they were installed before i had the vehicle….. always nice surprises when you tear things down on a "stock" car to find several aftermarket items already in place….
 
I think the site's screwed up or something tho, I put the pictures in the same way I always do, and the site turned them into attachments?

And I'll just get a new front case with straight-cut gears. Probably just go mitsu for both... measure twice, cut once, you know ?[DOUBLEPOST=1408973191][/DOUBLEPOST]8/22-23 weekend:
Oh look, new hatch struts! Heavy ass hatch, LOL...

5bY6Lbwl.jpg


Found these on ebay, $53 shipped for the pair :) I'll get to putting them on tonight, then grab one of my new wheel/tires and see how she looks:
cnnTsbQl.jpg


8/23/14:
Had a problem with the passenger brake pad bracket, the inside pad just wouldn't go in, so I ground that down a little and touched it up with the black caliper spray paint I already had. So I have all the pads in, moved back over to the driver's side to see how these SS brake lines look, and they just seem so "tight". There's no labels on any lines as to which go where, and I searched on here to see if someone did a how-to, but no luck. The old lines are long gone in the trash, so maybe I got it right on the first try:
1ldyvrPl.jpg


Oh yea, while I was putting the rear struts in last night, I remembered (like a year ago) when I took the stock one out, one nut fell into the abyss behind the back seat, so I tore out all the friggin panels to get to it. Low and behold, another surprise! Upgraded Alpine speakers:
duv4igml.jpg

Not the brand I'd go with, but whatever, they're in there. I figured the audio was all stock, since it still has the factory head unit.

So I wanted to see how the rims would look on the car, the blue in the rim clashes with the Tennessee Blue, but the Black sure brings out the top half of the car:
4ohPt7Gl.jpg


Also stripped the original paint on the valve cover, and gave it a little paint job (ceramic black with red letters)...
qr3L6UYl.jpg
 
Last edited:
I was checking out ebay at work, like I do every day, different searches all the time regarding DSM stuff, and I was currently shopping for bearings, not knowing really which brand I want, ACL/Clevite/King/etc, then once I pick a bearing, do I want race or regular ? Probably regular, for longevity. I don't really want to tear the engine apart every year, I'd rather build it for 100k miles, and just change the oil.

So I came across an auction for a crank from Daniel's Auto Recycling in Norcross, Georgia; it stated "mint condition, standard size, hot tanked, and polished." So I even called about it, and I guess I got Dan's cell, sounded like he was taking his kids somewhere, LOL. He told me he wouldn't sell junk, it's been mic'd, etc. So I pulled the trigger ($212 shipped!), and he shipped it out that day...
SFKRU28l.jpg


It's spot on, really happy to have found a std oem crank, I really didn't want to use mine since it was cut. Here are the numbers on the new crank close-up:
5Otb3BXl.jpg


There were a couple .0005's that I didn't record, because my micrometers are only supposed to be accurate to .00X, so anything between, say, .018 and .019, I just recorded as .018. I just wrote in the .0005 in that last main journal column to remind myself later there were a couple in-betweens.
 
8/30:
Started playing with my front lower control arms, and just decided I'd rather have new ones. So I played around with the spindles instead, by removing the front bearings.

First you press the hub from the inside out:
0WpzSkXl.jpg

ykcfoZel.jpg


Then you get to this crazy bearing assembly:
3NW6Rk8l.jpg


Very 22 years of yicky:
1CH1w82l.jpg


No scoring or anything on the internals, which is nice, and the whole assembly did turn nicely before disassembly.

Went ahead and threw one of the dust covers in my blasting booth, here's one blasted, one not:
O1E3Yrzl.jpg


I also decided to just wire brush the other one, and see if there's really a difference in paint/texture between blasted and just wire brushed:
HWZwE77l.jpg


HUGE difference, for whatever reason, that aluminum oxide does a great job smoothing out all the bumps and pitting.
 
9/4:
Got some goodies in, those new front lower control arms came in. But I'll be stripping the bushings and the ball joint to put in my poly bushings and moog ball joint:
mnBNaHtl.jpg


and my beautiful HX35 w/ BEP housing, ACL Race Tri-Metal Bearings, and K1 lightweight rods:
vzUJ33al.jpg

HX35 plate:
nUomxfnl.jpg
 
9/7/14:
More sandblasting, yay! Finally got to the spindles which sat outside for a week, so here's one blasted and one not:
7tiY35gl.jpg


Gave them a new coat of primer and then pressed in the new bearings on each:
yHw7js4l.jpg


You have to be careful because the inner races are kind of "floating" in the bearing assembly. Here's both done, but the snap-ring tool at my buddy's shop is poopoo, and I need something with more leverage to get those bastards in:
ZfYqZCvl.jpg


Also removed the poopie ball joints and bushings from my new front lower control arms:
TWExyUil.jpg


Now I have to get those 2 pressed in bushings out, so I can install my nice poly bushings on the 4 points, then my nice moog ball joints, rough up the paint, then give it a coat of that black caliper paint.

Oh yea, and my nice new front hub assemblies (compared to the original ones):
y4HPs3Ol.jpg
 
Support Vendors who Support the DSM Community
Boosted Fabrication ECM Tuning ExtremePSI Fuel Injector Clinic Innovation Products Jacks Transmissions JNZ Tuning Kiggly Racing Morrison Fabrications MyMitsubishiStore.com RixRacing RockAuto RTM Racing STM Tuned

Latest posts

Build Thread Updates

Vendor Updates

Latest Classifieds

Back
Top