The Top DSM Community on the Web

For 1990-1999 Mitsubishi Eclipse, Eagle Talon, Plymouth Laser, and Galant VR-4 Owners. Log in to remove most ads.

Please Support Fuel Injector Clinic
Please Support ExtremePSI

Fuse box relocation questions

This site may earn a commission from merchant
affiliate links, including eBay, Amazon, and others.

This site may earn a commission from merchant affiliate links, including eBay, Amazon, and others.

Best advise I could give it to take your time, label everything and only cut and extend one wire at a time.
And like iugrad92turbo said put the harness in the car and mock up the length of each wire or extend one at a time to get them where they go while leaving the harness in the car. It might take pulling the wires in and out a bunch of times but the end result will be nicer.
A wire tuck is one of the most time consuming projects ever!!

Good luck
 
Both suggestions are good ^^.

If you don't want to put and remove the harness so many times, then go and install the fuse box where you want it, and once is located where you want it, then get a peace of string and use it as the wire harness, the string is flexible and is perfect to get measurements,,.
Do one plug at a time and you will do OK.
 
Thanks for all the tips. I was looking at weller iron today not to bad. I am going to pick that up and some flux. The rest I'm ordering online. I got the spare fuse box de-pinned. I also found out before doing this you need percision screwdriver set. I also used a couple of needles to de-pin ares that needed a longer thiner peace to push down the plastic. I am still learning how to read the wire diagrams in the Mitsu Electrical but am learning. Here are some pictures. Thanks for all the help.

You must be logged in to view this image or video.

You must be logged in to view this image or video.

You must be logged in to view this image or video.

You must be logged in to view this image or video.
 
My old fuse box had tabs missing and the big one on the side was broke. Don't know if i should just do it a easy way an glue a tab on to fix the big one that's broke? I still have to do my harness fuse box and de-pin it.

Also had a couple questions. On choosing your flux how do you know what to get there are so many? There is lead free or no clean lead free or rosin activated? Im confused i read yesterday night about flux and i need some help.

Also on Kester solder how do you choose your solder? I know there is rosin activated or rosin mildly activated? Can some one explain? Just want to know the difference.
 
Another set of good tools for depinning parts. These are knockoffs of Delphi tools, but at a fraction of the price:

http://www.summitracing.com/parts/pco-0660pt

I think if you look around online, you might even be able to get it for $1 less. But $7 for these tools is a steal.
 
Been reading up on some parts i am getting for my build project. I also been reading up on the connectors i am going to be deleting. I have a few questions about them and deleting them.

1.Manifold Differential Sensor (MDP) not sure if i should keep or delete.
2.Cruise Control Vacuum Pump..I already have my cruise deleted just not the connector.
3.Fuel Pressure Solenoid Valve(FPS)
4.Exhaust Gas Recirculation (EGR) Control Solenoid
5.Brake Fluid Level Switch...Ditch or keep
6.Hood Switch
7.Dual Pressure Switch(AC) I am still trying to find this connector on my harness i wrapped it up in tape when i deleted my A/C.
8.Evaporative Purge Solenoid
9.EVAP Emission Purge Control Solenoid Valve.
10.Theft Horn Alarm. Do i also need to delete the ground by the horn.
11.Air Conditioning Compressor(AC)
12.Fuel Pump Check Connector. I have been trying to get more info on how to delete these connectors.

On the MDP sensor my question is will i need this sensor ever on my car. And will the MDP help me on dsmlink? Also on the Fuel pump check connectors i have read you need to make sure it is soldered? Need more info i am not getting it im sorry.

Thanks for reading. Happy New Years to all. :thumb::hellyeah:
 
The MDP input can be used to log a sensor in link (I currently use for my MAP sensor). You won't need the physical sensor if you don't need emissions (it only checks if the EGR is working).

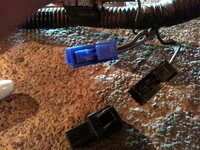
The fuel test connector can just be removed (no adverse affects). It's the engine speed test connector (blue) that needs to have the two wires running to it soldered together if you remove the actual connector. The car won't run if you don't do this.
 
Ok so MDP i can keep right to log values in dsmlink right? And on the fuel test connector how will i remove it or i cant?
 
Yeah if you remove the blue connector just make sure to solder the two wires together. If the two wires don't stay connected the car will only fire on two cylinders
 

Attachments

  • IMG_0270.jpg
    IMG_0270.jpg
    73.5 KB · Views: 177
Thank you snowboarder and my1997gsx. I think I am going to keep the MDP sensor. And for the fuel test connector i will also remove that. The black one is the fuel test connector or blue? And On removing the blue i just make sure the ends are soldered together?
 
Yea me too. Thanks for looking at my build its a project i can say that. I have did alot of reading on tool i will be getting and everything. I just need to delete all the connectors i am taking out now. Then i will mock up the fuse box in car. I am also doing my battery relocation at same time so i am busy with everything else i have got to do in the day. I had my buddy come over and help me on welding Im not a pro at it.
 
I did a slight fuse box tuck last year. A battery relocation is needed for what i did, as the box ends up in the battery's stock location.

So all you need to do it pull the harness into the engine bay a little more. By the alternator, theres a white plastic 'guide' that holds the harness to the frame. unbolt that piece and open it up. simply slide the harness towards the engine bay until the length that was in the plastic guide is in the bay. That will give you about 8 inches or so more to work with.

Then fab up a few little brackets to hold the box and bolt them to the stock battery trey bolt holes, and ta da!

You can see it under where my catch can is, pretty sneaky! looks much better than that damn stock location..
 

Attachments

  • motor1.jpg
    motor1.jpg
    68.1 KB · Views: 214
Looks good. I have my whole harness out already so might as well relocate it. Wish i found this before i decided. To late now. It looks good in that location as well.
 
yea its worth it at this point to relocate it. And also do a good tuck job and take your time. Im taking my time learning as i go and having fun as i am doing this mod.

If i still had the box in and wires in i would of considered doing that like funfettie has. But already came to far to not relocate it.
 
I need some help i just stated on my removal of sensors and i started with the dual pressure sensor. This wire is green and orange. I don't know if i need to remove it all or just the small part were it goes into the solder? Any help.
You must be logged in to view this image or video.

You must be logged in to view this image or video.
 
Cut the wire where it joins into the second one, under the crimp.

Doing the relocation/tuck this way looks so much better in the end imo.
Not the greatest picture but my engine harness is in the car in this picture.
You must be logged in to view this image or video.


Putting the extra time in is really really worth it as it pays off in the end. I've got all my speed density sensors in my harness, gauge sending units, etc. Everything is clean and hidden away.
I'm also now going through my interior harness to delete unneed crap in there; it's totally unneeded but I just want to have it done.
 
That is a good looking bay with wire tuck. This is why i am taking my time. It looks good

And ok were joints meet i will solder and heat shrink it.

I missed this connector when i was labling i cant find it. It is up by the fuse box.
You must be logged in to view this image or video.

You must be logged in to view this image or video.
 
Last edited:
Had a good day today picked up a E-PROM ECU for $20. Here are some pictures. All it needs is dsmlink now. :D
You must be logged in to view this image or video.

You must be logged in to view this image or video.

You must be logged in to view this image or video.
 
Support Vendors who Support the DSM Community
Boosted Fabrication ECM Tuning ExtremePSI Fuel Injector Clinic Innovation Products Jacks Transmissions JNZ Tuning Kiggly Racing Morrison Fabrications MyMitsubishiStore.com RixRacing RockAuto RTM Racing STM Tuned

Latest posts

Build Thread Updates

Vendor Updates

Latest Classifieds

Back
Top