The Top DSM Community on the Web

For 1990-1999 Mitsubishi Eclipse, Eagle Talon, Plymouth Laser, and Galant VR-4 Owners. Log in to remove most ads.

Please Support Kiggly Racing
Please Support ExtremePSI

Crash89s Spyder build!

This site may earn a commission from merchant
affiliate links, including eBay, Amazon, and others.

This site may earn a commission from merchant affiliate links, including eBay, Amazon, and others.

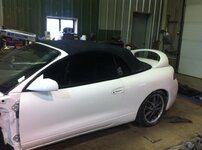
i hope to do the same of my eclipse spyder gs ;)

your car is going to be a beast XD
 
Looking good crash!! :D

Kenny, Pakes does not have a torque plate for 4g63's. However, I think we can convince him to buy one, as we give him enough business. The best thing to do is to call and ask Pakes about it.
 
Thanks J! I cant wait till we get my car running and Beaky!! Southern Wi is going to be DSM central!! haha

Well guys, I finished up my wiring harness the other day and mocked up the holset to see how difficult its going to be to make my dump tubes.. Also to get some references for people that are thinking of getting a RedJack manifold.

472429[/ATTACH]"]
wiring9.jpg


472431[/ATTACH]"]
wiring10.jpg


472433[/ATTACH]"]
mockup.jpg


One of the things I dont like about the manifold is that if you look closely, you can see one of the studs is touching the runner. I cant fit a regular stud nut or washer on there. Even if its the first one I try to start. The other is that they use standard threads in the flanges :/
472435[/ATTACH]"]
mockup2.jpg


472437[/ATTACH]"]
mockup3.jpg


472439[/ATTACH]"]
mockup4.jpg


472441[/ATTACH]"]
mockup5.jpg


472443[/ATTACH]"]
mockup6.jpg


472445[/ATTACH]"]
mockup7.jpg


As you can see, there isnt much room. I can definitely see now why they say you need a 1g radiator. Its gonna be fun making my exhaust and dump tubes!! :thumb:
 

Attachments

  • wiring9.jpg
    wiring9.jpg
    44.8 KB · Views: 35
  • mockup.jpg
    mockup.jpg
    44.9 KB · Views: 33
  • wiring10.jpg
    wiring10.jpg
    47.1 KB · Views: 29
  • mockup2.jpg
    mockup2.jpg
    44.3 KB · Views: 33
  • mockup3.jpg
    mockup3.jpg
    48.1 KB · Views: 38
  • mockup4.jpg
    mockup4.jpg
    49.1 KB · Views: 38
  • mockup5.jpg
    mockup5.jpg
    46.2 KB · Views: 30
  • mockup7.jpg
    mockup7.jpg
    46.6 KB · Views: 28
  • mockup6.jpg
    mockup6.jpg
    44.5 KB · Views: 30
Sweet, almost there...I like the high wing job on it! For the exhaust manifold, that's a little to close to the radiator, if you ask me?!...LOL
 
I know some of you probably read that and were like "0_o werent you on link already?" Yes, I was. But, I was borrowing it from SlantedJ from here.. You know, the guy who made the shootout videos?! Yea.. I had to give his ecu back so we can get his car back together. So, I dropped the 600 bucks for full v3 today.

On another note, /J came by yesterday and took some sweet shots of the engine bay/car for me with his new fancy camera! I cant wait to see how they turned out. Ill be sure to post em up for sure!!

I dont have any pics to update today but I did get my windows in and pulled the motor. I also put in the rest of the small things that Id left out of the bay previously, IE: power steering stuff, clutch and break reservoirs, clutch line, fuel filter ect ect.. So, theres a little update. Ill get some pics today hopefully..

Todays agenda is to start cleaning up my trans and all aluminum parts. Might be getting some things powder coated.

EDIT: He sent me a couple pics. He was trying out a new camera last night and somethings didnt turn out as expected. However, I did like a couple. so here they are!

472632[/ATTACH]"]
jpics.jpg


472634[/ATTACH]"]
jpics2.jpg


472636[/ATTACH]"]
jpics3.jpg
 

Attachments

  • jpics.jpg
    jpics.jpg
    92.5 KB · Views: 34
  • jpics2.jpg
    jpics2.jpg
    81.6 KB · Views: 32
  • jpics3.jpg
    jpics3.jpg
    60.2 KB · Views: 40
Last edited:
Thanks for letting me drool over the project :hellyeah:

One of these days I'm going to learn how to use a camera :D
 
Hey fellas, been doin some work on the car yesterday. This weekend I was trying to find a place to make me some flanges for my wastegates and hotside so I could make my dumps and exhaust. I finally found a guy through my dads cousin, he gonna be doing something with them today. Aside from that, Tom Dorris emailed me and said they just received my ECU!! I would have liked to have the car going by this weekend but I think early/mid week next week is more do-able. There is a small car show on the 7th of next month and Im definitely making it to it! Heres a couple pics.

I cleaned up all my aluminum parts, and didnt like how my intake, throttle body and thermostat housing looked. So, I degreased them and painted them with high temp paint!!
473710[/ATTACH]"]
intake.jpg


Painted my valve cover as well! I will probably end up having someone powdercoat me one soon. This was just to get me by.
473712[/ATTACH]"]
vc.jpg


I got all my wiring harness in so I put my dash back in.
473714[/ATTACH]"]
dashin.jpg


New tinted windows
473716[/ATTACH]"]
windowsin.jpg


I had some old crappy wannabe projector headlights that didnt shine for crap. So I got some OEM lights!
473718[/ATTACH]"]
headlights.jpg


EDIT Just ordered me a new 4 bar MAP sensor, water pump and Gates timing belt.. Engine assembly this weekend!
 

Attachments

  • dashin.jpg
    dashin.jpg
    67.5 KB · Views: 34
  • intake.jpg
    intake.jpg
    69.5 KB · Views: 35
  • vc.jpg
    vc.jpg
    71 KB · Views: 37
  • headlights.jpg
    headlights.jpg
    70.1 KB · Views: 36
  • windowsin.jpg
    windowsin.jpg
    62.5 KB · Views: 33
Last edited:
Whats going on fellas!! Today I got my head all rebuilt. Started with a good, used head.. Kind of dirty but not too bad. Installed my BC springs and my 272s from my old motor. Heres some pics.

Head when I started.
473876[/ATTACH]"]
head.jpg


473878[/ATTACH]"]
head2.jpg


Little engine degreaser and a pressure washer fixed all that!!
473880[/ATTACH]"]
head3.jpg


473882[/ATTACH]"]
head4.jpg


Primed and drained my lash adjusters and valve springs installed!
473884[/ATTACH]"]
head5.jpg


Cams and rockers installed.
473886[/ATTACH]"]
head6.jpg


Cam gears on and valve cover setting on!!
473888[/ATTACH]"]
head7.jpg


Tomorrow is engine assembly!!!!
 

Attachments

  • head.jpg
    head.jpg
    52.2 KB · Views: 42
  • head4.jpg
    head4.jpg
    51.5 KB · Views: 37
  • head2.jpg
    head2.jpg
    55.4 KB · Views: 37
  • head3.jpg
    head3.jpg
    55.3 KB · Views: 32
  • head5.jpg
    head5.jpg
    56.4 KB · Views: 37
  • head6.jpg
    head6.jpg
    54.8 KB · Views: 34
  • head7.jpg
    head7.jpg
    55.4 KB · Views: 34
Indeed!! Probably worked on the engine for a good 6/7 hours today!! Got the block cleaned out rings checked, pistons together, block assemble and bearing clearances checked, BSE ect ect. Im still waiting on my water pump to get here and the JBweld to cure then I can get the rest of the motor together. I should be getting my flanges tomorrow so I can weld up my exhaust and dump tubes. Were almost right on schedule!!

engine2.jpg

engine3.jpg

engine4.jpg

engine6.jpg

engine7.jpg

engine8.jpg

engine9.jpg

Just for kicks bolted the intake and turbo on!!
engine10.jpg

engine11.jpg

Oh!!! and link came today!!
link.jpg
 

Attachments

  • engine2.jpg
    engine2.jpg
    48.2 KB · Views: 14
  • engine4.jpg
    engine4.jpg
    49.8 KB · Views: 17
  • engine3.jpg
    engine3.jpg
    43.8 KB · Views: 14
  • engine7.jpg
    engine7.jpg
    49.9 KB · Views: 11
  • engine8.jpg
    engine8.jpg
    42.2 KB · Views: 11
  • engine6.jpg
    engine6.jpg
    49.2 KB · Views: 12
  • engine9.jpg
    engine9.jpg
    46.2 KB · Views: 14
  • engine10.jpg
    engine10.jpg
    75.2 KB · Views: 15
  • engine11.jpg
    engine11.jpg
    81.8 KB · Views: 14
  • link.jpg
    link.jpg
    101.6 KB · Views: 16
Poor mans BSE!!!

474023[/ATTACH]"]
engine13.jpg


OFH porting
474025[/ATTACH]"]
engine14.jpg


Front case and OFH installed. Im still waiting on my water pump to come in.
474027[/ATTACH]"]
engine12.jpg
 

Attachments

  • engine12.jpg
    engine12.jpg
    94.5 KB · Views: 39
  • engine14.jpg
    engine14.jpg
    108.3 KB · Views: 40
  • engine13.jpg
    engine13.jpg
    80.3 KB · Views: 36
Small but kind of big update today guys.. Also a small change of plans for a little bit. The people I had making the flanges for my waste gate dumps and turbine housing are taking way longer than last friday to finish them.. Sooo as a result, I am obligated to bolt my 20g back onto the motor for break in and a little while as I gather a little more money for the feed and drain for the holset. Well here are some pics from tonights work..

474246[/ATTACH]"]
engine15.jpg


474248[/ATTACH]"]
enging16.jpg


Big thanks to /J today for giving me a hand with everything!!!!!!!
474250[/ATTACH]"]
engine17.jpg


Our buddy kenny (Kp116) swung by as well tonight and gave us a hand, Thanks to him as well.. As of now there is just two motor mounts in.. Lots more to do tomorrow!! Keep yall updated!
474252[/ATTACH]"]
engine18.jpg
 

Attachments

  • engine15.jpg
    engine15.jpg
    71 KB · Views: 34
  • enging16.jpg
    enging16.jpg
    85.4 KB · Views: 32
  • engine17.jpg
    engine17.jpg
    85 KB · Views: 31
  • engine18.jpg
    engine18.jpg
    82 KB · Views: 34
Thanks Scott!! The reason for this whole thing was to make it look good, and have some serious bite that people wouldnt expect.. I really hate that I had to put the 20g back on for a short while. But, I guess its better this way.. I need to catch up on my funds a little bit. Plus this will give me more time to order the right stuff I need for the holset and actually make a quality exhaust instead of rushing to make something work..

How is yours coming!?!? You running yet!
 
These pictures doesn't even do it justice! Looks even better in person! Hopefully tomorrow is the day!
 
Well I didnt get a chance to start the car yesterday. I really underestimated all the little things and how much they time they take to do. But, I got everything in the engine bay finished. Without the help of /J and another buddy of mine I wouldnt be where I am. All I have to do today is finish up my gauge wiring and figure out how to navigate through link a bit and get an idea on SD and Ill be able to take her down the road!! Heres some pics!!!

Engine bay is finished!
474456[/ATTACH]"]
fullengine.jpg


474458[/ATTACH]"]
newstance.jpg


474460[/ATTACH]"]
newstance2.jpg


474462[/ATTACH]"]
newstance3.jpg


The "custom" exhast" lulz
474464[/ATTACH]"]
exhaust.jpg
 

Attachments

  • newstance2.jpg
    newstance2.jpg
    76 KB · Views: 28
  • newstance.jpg
    newstance.jpg
    75.5 KB · Views: 23
  • fullengine.jpg
    fullengine.jpg
    79.3 KB · Views: 33
  • newstance3.jpg
    newstance3.jpg
    79.2 KB · Views: 26
  • exhaust.jpg
    exhaust.jpg
    64 KB · Views: 31
Support Vendors who Support the DSM Community
Boosted Fabrication ECM Tuning ExtremePSI Fuel Injector Clinic Innovation Products Jacks Transmissions JNZ Tuning Kiggly Racing Morrison Fabrications MyMitsubishiStore.com RixRacing RockAuto RTM Racing STM Tuned

Latest posts

Build Thread Updates

Vendor Updates

Latest Classifieds

Back
Top