The Top DSM Community on the Web

For 1990-1999 Mitsubishi Eclipse, Eagle Talon, Plymouth Laser, and Galant VR-4 Owners. Log in to remove most ads.

Please Support ExtremePSI

Some General DSM Maint Questions.

This site may earn a commission from merchant
affiliate links, including eBay, Amazon, and others.

This site may earn a commission from merchant affiliate links, including eBay, Amazon, and others.

esoteric

10+ Year Contributor
160
0
Jul 19, 2010
PA, SK_Canada
I am planning on learning to work on this car myself to save myself insane amounts of money and also learning how to work on cars again (used to in high school) So I can restore my falcon.

Anyway.


1. Timing belt tension - What in gods name is going on when I get to the tensioning part of this procedure. I know the 2 holes on the tensioner pully need to be at slightly counter clockwise of 11 and 1 but how the hell does the auto tensioner work? What are they reffering to when they say to screw the tensioner in to create tension? How does the tensioner arm work in conjuction with the auto tensioner?

Will these things become more clear when I have the special tool screwed in and am taking it apart?

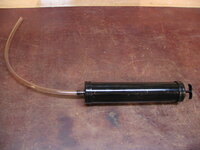
2. Changing transmission fluid, what kind of fluid is best and do I need any special tools to do it? What is the easiest way to funnel fluid into the fill hole? Can the car be on jackstands while doing this so I can get under it?

3. Tcase and rear diff fluid, how do I change these properly? what fluid goes in them.
 
Timing belt tension - What in gods name is going on when I get to the tensioning part of this procedure. I know the 2 holes on the tensioner pully need to be at slightly counter clockwise of 11 and 1 but how the hell does the auto tensioner work? What are they reffering to when they say to screw the tensioner in to create tension? How does the tensioner arm work in conjuction with the auto tensioner
You either need to buy that tensioner tool, or take a length of 8mm rod (which I did) to make that tool. this sets the auto tensioner to the pulley adjustment so the belt tension is correct.

look more into this link Timing Belt VFAQ (Timing Belt TSB - ENHANCED) OR, if you're a 7bolt, look at this link - http://vfaq.com/mods/timingbelt-2G.html .. which explains on what is going on. And, if/with you being a 7 bolt motor, you'd roll that tensioner pulley counter-clockwise to get the tension.

Changing transmission fluid, what kind of fluid is best and do I need any special tools to do it? What is the easiest way to funnel fluid into the fill hole? Can the car be on jackstands while doing this so I can get under it?
Depends if your Auto or manual: Auto would be SP-II, or ATF+4 fluids and nothing else. Manual, well this is a personal topic that hundreds on here swear by different fluids that works for them. Thus, to be safe and not to make any recommendations: I'm only going to comment that I use Redline MT-90 for my tranny fluid. Tool would be a 22mm box end wrench to undo the bolt at the end of the transmission housing. I used a funnel to do the fill and I just did mine while on the ground, but you can use jackstands as long if all four corners are up in the air evenly.

good luck-DSM
 
Manual.

I have read the vfaq I am just unsure of what is actually doing the tensioning, I know the tool you screw in the long one that you can make out of a battery hold down bar, is that what is doing the tensioning? I have seen that I might need a tool that fits into the 2 holes?

The vfaq was a little too vague for me to fully understand what is going on :hmm:

Can you reach the drain plug when its fully on the ground?
 

Attachments

  • manual pump for tranny oil (2 x 10 metal).JPG
    manual pump for tranny oil (2 x 10 metal).JPG
    47.4 KB · Views: 208
Thanks, I have read all the tips but the problem I am having is understanding what is actually doing the tensioning, is the special tool #MLR-MD-998738 the one pushing the tensioner arm in and out?

So what is the point of this then

You must be logged in to view this image or video.


Where the 2 lower arrows are pointing, I know one is the tensioner arm and the other is the auto tensioner BUT how do they work? I am unsure on how they actually function to set the tension, from what I know I use #MLR-MD-998738 screwed in to take tension off and unscrew it to put tension on and use the bent pliers to adjust the tensioner pully, so where does the arm and auto tensioner come in?

I am 110% confused at what to actually do when it comes to actually working with these 2 pieces. :banghead::banghead::banghead::banghead::banghead:
 
That auto tensioner is what the coiled spring on a tensioner pulley assembly for a conventional OHC motor does - to keep the belt tension at a constant and adjust when belt begins to stretch to keep the same amount of tension.

But, with DOHC configuration, the coiled spring isn't as strong since you got a longer belt travel and another sprocket that is used by the belt, thus the auto tensioner works better since it hydraulic and has greater pressure on the belt to keep the same amount of tension.

Thus the pin from the auto tensioner has to be at a right distance for the pulley on the arm to work and this is why you set that distance between the base of the tensioner and the arm a proper distance.

It's more easier to adjust the pulley than to adjust the auto tensioner-why the auto tensioner is bolted down first.
 
So from what I understand I adjust the auto tensioner with the threaded tool and put a "grenade" pin in it to hold it down whilst I set up the tensioner pully, then I back the threaded tool either in or out until the pin moves in and out freely then use another tool to adjust the tensioner pulley so the holes are slightly CC from 11 and 1.

Do I understand this right?
 
So from what I understand I adjust the auto tensioner with the threaded tool and put a "grenade" pin in it to hold it down whilst I set up the tensioner pully, then I back the threaded tool either in or out until the pin moves in and out freely then
No, but close - the "grenade pin" has to be removed so the rod in the auto tensioner can be free while you adust the arm with the threaded tool.

I can tell that you're still lost, so here we go how I did mine per step:

This is actually a two step process: 1)- adjusting the auto tensioner to the tensioner arm and 2)-to adjust the pulley to the auto tensioner. We have to adjust the auto tensioner to the arm first:

1- with belt all installed and laced correctly around all pulleys and sprockets (with the bulldog clips still holding the belt in place over the cam sprockets to keep the sprocket marks aligned..) with the sprockets at their respective marks on block, you loosen the pulley on the adjustment arm.

2-with the auto tensioner installed, make sure that the "grenade pin" is in holding the push rod in place.

3-thread in the 8mm arm adjustment tool til the end of it is touching the pulley tensioner arm. Then, thread down on the 8mm rod slightly on the tensioner arm so the "grenade pin" can then be removed.

4-put a drill bit of the .157 size (which will be the 5/32" drillbit size)on top of the auto tensioner and thread down the 8mm tool til the top of the tensioner arm is barely touching the drillbit and stop turning the 8mm tool.

5-roll the tensioner pulley clockwise till the pulley is against the belt and you can feel if you got 2ft-lbs of pressure against the tool that is turning the tensioner pulley. If you get this, tighten down the tensioner pulley bolt.

6-Back off the 8mm tool til the end of the tool is clear from the tensioner arm and the drill bit (in which you can use two bit sizes being of 5/32" up to 11/64th" - .157 to .171 for the clearance between the two surfaces) distance is between the top flat surface of the auto tensioner and the flat surface of the tensioner arm that the tensioner rod is pushing up against. If you got too much clearance, you'll have to repeat these steps again til you get it right, for all of this is so crucial for proper belt timing to the motor...

..and granted, this is the most difficult OHC/DOHC motor that I've done when it comes to belt timing. But, after a few times, one can make the job a lot easier..

good luck-DSM
 
Support Vendors who Support the DSM Community
Boosted Fabrication ECM Tuning ExtremePSI Fuel Injector Clinic Innovation Products Jacks Transmissions JNZ Tuning Kiggly Racing Morrison Fabrications MyMitsubishiStore.com RixRacing RockAuto RTM Racing STM Tuned

Latest posts

Build Thread Updates

Vendor Updates

Latest Classifieds

Back
Top