davidaham
10+ Year Contributor
- 156
- 1
- Nov 21, 2008
-
Frierson,
Louisiana
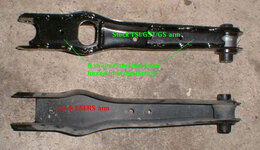
Ok so i ordered a used rear sway bar set from miller imports parts. Just thought i would up load some photo's in case some one wonted to do the swap also
first pic. my rear sway bar setup came already assembled so i installed it still assembled.
only change i made was i did not reuse the old bushings instead i ordered some Prothane Rear Sway Bar Bushings.
second pic. just a closer pic
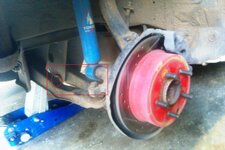
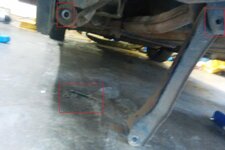
third pic. a side view of the lower control arm the red circle is the inner bolt you will have to remove
forth pic. the bottom two squares are the only two bolts that hold the rear control arm on.
the upper two squares are preexisting threaded bolt holes. these bolts hole's will hold the Sway Bar Bushing and bracket in place see pic 6
fifth pic. remove the two bolts and tap the control arm and they will fall right out. now just insert your new control and reverse the previous step very easy.
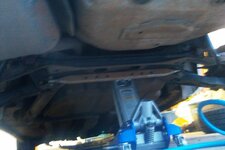
sixth pic Rear Sway Bar Bushing and bracket. no modification needed here the bracket bolt's right up.
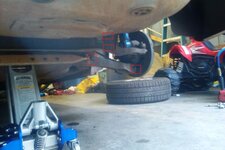
seventh pic a finished view. the pic is kinda blurry. droids dont take such good photo's after you drop them a few times.
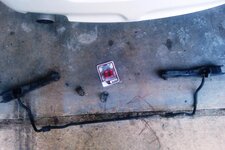
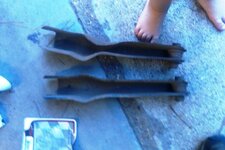
eighth pic this is all you should have left after you install the rear sway bar conversion kit. as you can see one of my stock control arms was bent and i never new. you will have to excuse the two little feet my son loves to working on my car as much as i do.
final pic just a little upgrade i did while my car was down
the hole conversion took about a hour and a half not bad
SPECIAL THANKS TO MILLER IMPORT PARTS WITH OUT THEM THIS WOULD HAVE NOT BEEN POSSIBLE WWW.MILLERIMPORTPARTS.COM
first pic. my rear sway bar setup came already assembled so i installed it still assembled.
only change i made was i did not reuse the old bushings instead i ordered some Prothane Rear Sway Bar Bushings.
second pic. just a closer pic
third pic. a side view of the lower control arm the red circle is the inner bolt you will have to remove
forth pic. the bottom two squares are the only two bolts that hold the rear control arm on.
the upper two squares are preexisting threaded bolt holes. these bolts hole's will hold the Sway Bar Bushing and bracket in place see pic 6
fifth pic. remove the two bolts and tap the control arm and they will fall right out. now just insert your new control and reverse the previous step very easy.
sixth pic Rear Sway Bar Bushing and bracket. no modification needed here the bracket bolt's right up.
seventh pic a finished view. the pic is kinda blurry. droids dont take such good photo's after you drop them a few times.
eighth pic this is all you should have left after you install the rear sway bar conversion kit. as you can see one of my stock control arms was bent and i never new. you will have to excuse the two little feet my son loves to working on my car as much as i do.
final pic just a little upgrade i did while my car was down
the hole conversion took about a hour and a half not bad
SPECIAL THANKS TO MILLER IMPORT PARTS WITH OUT THEM THIS WOULD HAVE NOT BEEN POSSIBLE WWW.MILLERIMPORTPARTS.COM
Attachments
-
 IMAG0140.jpg37.3 KB · Views: 314
 -
 IMAG0141.jpg47.3 KB · Views: 323
 -
 IMAG0142.jpg45.3 KB · Views: 314
 -
 IMAG0143.jpg40.6 KB · Views: 310
 -
 IMAG0144.jpg33.2 KB · Views: 314
 -
 IMAG0149.jpg63.8 KB · Views: 303
 -
 IMAG0147.jpg47.2 KB · Views: 313
 -
 IMAG0146.jpg36.1 KB · Views: 314
 -
 IMAG0145.jpg33.4 KB · Views: 318
")