The Top DSM Community on the Web

For 1990-1999 Mitsubishi Eclipse, Eagle Talon, Plymouth Laser, and Galant VR-4 Owners. Log in to remove most ads.

Please Support ExtremePSI
Please Support Fuel Injector Clinic

Ciggarette Lighter Gauge Placement

This site may earn a commission from merchant
affiliate links, including eBay, Amazon, and others.

This site may earn a commission from merchant affiliate links, including eBay, Amazon, and others.

97 GSX 97

15+ Year Contributor
730
1
Oct 2, 2007
Perkasie, Pennsylvania
Alright I know I've seen some people dremel out the ciggarette lighter area in a 2G and stick a gauge there. Does anyone have any tips or pictures? I want to stick my AEM Wideband O2 there.
 
I did this last week, and I can tell you to CONSTANTLY recheck the hole sizing. All I did was remove the console, take out the lighter and start hacking away. I didn't mark off the limits of my planned enlargement, but it's a good idea. I just got out the old gerber and went to work checking to see if the gauge would fit every so often. Also remember to carve carefully, the material is old and it tends to crack with tons of pressure on it. There are to "layers" to the console, the top is a lot softer and easily cracked (ask me how I know LOL) so I suggest angling the knife (or whatever you're using) to take of more on the bottom side than the top, then match the size of the top hole to your needs.:thumb:


Eric
 
I did this about a week ago. I simple measured the diameter of the gauge. Then made a circle just a bit smaller with a sharpie. It wasn't a perfect circle.

Then I took out an old soldering iron and started melting through the plastic like butter. After I got my hole approximately the size I wanted I started trying to shove the gauge through it.

I would use a file and rasp (round file) to smooth out the hole and slowly enlarge it until the gauge fit with out to much force. Then I took a large o-clamp and put it on the back side of the gauge and tightened it down so that the gauge would not be able to be easily removed.
 
I have some pics of it after I was done. I didn't really take any while I was doing it. I will look and see if I uploaded them on car domain or somewhere yet.

Pretty bad pics taken with camera phone.
http://www.cardomain.com/ride/3838829/4

I will try and upload some more pictures later tonight when the bandwidth on my satellite connection is restored. I ran over the bandwidth yesterday and it takes 24hrs to restore.

Wow you are smart. I would've never thought of using a soldering iron. I'm assuming that the gauge you used was a 52mm gauge? I'm just making sure 100% that I want to do this before I destroy/cut my mint center console.
 
Uhm yeah It was what ever the standard size is. Not the Smallest and and not the EFFINF huge one. Just the standard aproxx 2inches gauge you can get at O'Reillys.

Edit:

I did it this way so I can tell what my accurate boost level is and because I don't want my car to look street racer ish.

I can't tell you how many times I have gotten pulled over and the Cop looked at my triple gauge a pillar suspiciously. I am really thinking of make a 3 gauge holder out of plexiglass to mount on top of my single din radio and install it without a dash kit. I want to keep all my gauges in the Center console so they don't attract as much attention.
 
I went at it with a solder gun today and it looks decent. I'll get pics up later.
 
Good stuff bro, and man, I wish I would've thought of the soldering iron too LOL. I also put my TT in the coin holder/ thing-a-ma-jig with a lid. I finally reached the same conclusion about using heat, but all I had was my Bic lighter and waaayy too much time on my hands LOL.

I'll get pics up later today in my gallery, especially since I haven't updated the interior in almost 2 years :thumb:


Eric
 
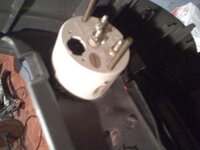
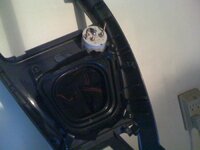
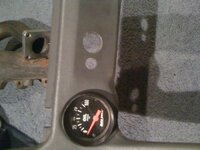
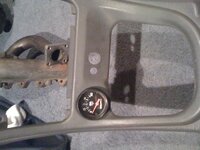
Here is how I did mine..Just remember to cut it out from the back of the console so its cleaner..Gauge in the pic is a bit hurt so don't mind that..But you get the idea
 

Attachments

  • Picture 159.jpg
    Picture 159.jpg
    36.9 KB · Views: 114
  • Picture 155.jpg
    Picture 155.jpg
    45.4 KB · Views: 106
  • Picture 193.jpg
    Picture 193.jpg
    30 KB · Views: 112
  • Picture 170.jpg
    Picture 170.jpg
    31.4 KB · Views: 116
  • Picture 179.jpg
    Picture 179.jpg
    45.6 KB · Views: 121
  • Picture 190.jpg
    Picture 190.jpg
    48.2 KB · Views: 117
Support Vendors who Support the DSM Community
Boosted Fabrication ECM Tuning ExtremePSI Fuel Injector Clinic Innovation Products Jacks Transmissions JNZ Tuning Kiggly Racing Morrison Fabrications MyMitsubishiStore.com RixRacing RockAuto RTM Racing STM Tuned

Latest posts

Build Thread Updates

Vendor Updates

Latest Classifieds

Back
Top