The Top DSM Community on the Web

For 1990-1999 Mitsubishi Eclipse, Eagle Talon, Plymouth Laser, and Galant VR-4 Owners. Log in to remove most ads.

Please Support JNZ Tuning
Please Support STM Tuned

2G Rear Diffuser Design

This site may earn a commission from merchant
affiliate links, including eBay, Amazon, and others.

This site may earn a commission from merchant affiliate links, including eBay, Amazon, and others.

You can measure the pressure drop at any point around the car with a manometer and some tubing. I'm a cheap ass DIY guy, so I just use a U-tube braced to a little board with some water in it, and a couple rulers attached on each side as a positive and negative gauge. Then I put the long end of the tubing where ever I want to measure the pressure differential with a zip tie or tape, and go drive the car. Have someone watch the water and you can get a pretty damn sensitive pressure measurement in inches of water vs ambient pressure. Cheap, accurate, and very informative for testing drag.
 
^ I'd like to see a video of this test, to better understand what your saying.
 
^ I'd like to see a video of this test, to better understand what your saying.

Thought about posting something like this last night. A manometer is pretty basic once you've used one but I don't think a lot of people do.

You must be logged in to view this image or video.


Pressure measurement - Wikipedia, the free encyclopedia

Basically do what he said above, filling a piece of clear tubing with a little water and bending it into a U shape along a ruler (metric is best due to the small increments and easier math). Then leave one end of the tube open to the cabin air and the other end goes to the point where you want to measure the pressure. The fluid level changes based on the pressure differential between each end of the hose. Then do the math below:

Pressure = H*g*rho

where H is the difference in height between the fluid columns, g is the gravitational constant (9.8 m/s^2 in metric or 32.2 ft/s^2 in English) and rho is the density of water, which does change slightly with temperature and is shown in slugs (English unit for density) and kg/m^3 in this link.

You do have to be careful with your units. Your column measurement will likely be in 1/16 inches or mm but the rest of the stuff is all in feet or meters. Now assuming your water is pretty cold...

If you measure in mm:

Pressure (in Pascals) = H * 9.8

If you measure in sixteenths of an inch:

Pressure (in Lbs/ft^2) = H * 0.3254

It should be noted that it doesn't matter what diameter tube you use for this, though if you go to very narrow tubing capillary action will cause trouble. You should be fine with 1/8" tubing and if you add a drop or two of food dye to the water it will make it easier to see without changing the calculations enough to matter for something like this. Also, you do need to hold the tubing and ruler vertical during the test or it won't work. Just the section where the ruler is, the rest can coil around however you want. You should also avoid having water anywhere in the tube other than in the little U section.
 
Another thing you can do is figure out an improved efficiency percentage by measuring fuel economy. Fill up your tank and drive a specific route for about 30 minutes to an hour looping back to the same gas station. Do this multiple times and measure your total fuel used and your mpg. This would obviously have to be a freeway loop to ensure the test would be under the same conditions each time. You would have to find a gas station right by an onramp that you wouldn't have to wait for a stoplight and do a loop right back to the same exit.

After the diffuser is installed, make the same exact loop at the same speeds a few more times and log your total fuel used and your mpg. The difference can then be calculated into a percentage and you can say that the diffuser increased airflow efficiency by 7 percent or whatever.

This is explained at the bottom of this article labled, "Testing Drag"
Autospeed.com Testing Drag
 
Since there was some drama on the forums regarding poor communication from a vendor with an unrelated product, figure I post an update just because :)

I got my first paycheck last week so I am officially back in business! :hellyeah:

I called the fiberglass supply company today and got a quote written up for everything I think I needed. I wanted to take the day to look over everything and make sure I was getting everything I needed. Tomorrow I will place the order for materials.

That's the easy part though I guess. ROFL


p.s.
Once again, want to just say I appreciate my two testers allowing me this time to get resituated.
 
I completely respect your situation dude. I really want you to be able to make these and get some test results in so you can perhaps start making a good product for our community. We lack a diffuser.
I'm sure your other tester feels the same as well man.

Any word on anyone else jumping in to be testers? I'd hate for us to be the only two. Any moderators interested at all? Or jtmcinder? I'm sure they would have a lot to contribute as far as feedback and data goes...

Anyways. I can't wait to see the finished product and having one on my car originally engraved is going to be awesome!

How is the new job by the way?
 
I'm very interested in doing some testing. I am also well versed in composites and am in the process of turning my car into a carbon fiber machine, so they only thing I would request is that if it works I would want permission to make a cf one as I'm in a very weight conscious state right now.
 
@ AngelOfPassion - Job is fine. I havn't programmed in over a year so getting back into gear for my position is going very smooth, which is nice because the language I am programming is is one I havn't worked with before. I have about 6 years in C++, the job position I am in now is C#. Similar, but learning the quirks of the languages and built in things (supposedly to save time) just takes time getting used to. BUT.. this is a work from home job, so I set my own hours which is perfect for my hobby, and this project :)

@phunny - sorry for not replying to you. I got your message on my phone and forgot about it in my PM box when I later got on my PC. At this exact moment, because I am already behind my original schedule and I feel uncomfortable about that, because I have been reminded of my current forum status has reverted back to non-supporting, and especially because of the drama with the unrelated project on the forums: I am not going to be taking on any more testers.

This goes for anoyone else interested in being a tester from this point forward. HOWEVER, If the two guys I have now are unable to produce something I, they, or you other guys want to have done, I have several people who wanted to test I'll reach out to (including you phunny). That point aside, I am confident in myself and the two testers to collect lots of useful data :)

Once the testing process is over and I am happy with that I made, well.. we'll cross that bridge when we get there.
 
What temperature do you think would be experienced OUTSIDE and around the exhaust piping, next to the diffuser? I am looking at a resin that is safe to 150 degrees. It won't be safe in a blown configuration I'd guess, but I don't think it would get over 150 around the exhaust piping. I'm just guessing though.

To get the next step up, a 350 degree safe resin is 2 times the price and requires oven curing. Something I don't have ATM.

Do you guys think 150 degree safe is fine?
 
Last edited:
How close to the exhaust piping are we talking?

I could take a thermometer out and test it after it warms up at idle and see what the ambient temps are... In my head I am assuming that it would be over 150 but we all know what happens from "ass"uming... haha.
 
As close to the piping as you'd cut the diffuser panel.

Could be an inch, I dunno depends how you want to do it. Does the piping really radiate the much heat?
 
Once again I am assuming, but EGT's can hit 1500-1600F at the manifold... it would really amaze me if it was less than 150F ambient temperature around the tailpipe...

It could be under 150F though. I just would be suprised based on my train of thought. I'll grab a kitchen thermometer tonight and measure about an inch from the exhaust tonight at warmed up idle and that can give you an idea...

I think at idle it will be the most vulnerable, especially after a hard pull, since when the car is moving air will be passing through cooling the ambient temp.

EDIT: I am assuming this is the quadrant that the exhaust will be passing through? (I drew this at work with MSPAINT in like 2 seconds so this is not going to have the right angle or anything...)
 

Attachments

  • IMG_0974.jpg
    IMG_0974.jpg
    39.6 KB · Views: 740
Well that is what I thought. It's 1k at the manifold maybe but it is not 1k degrees when you put your hand over the muffler/exhaust gases. And as you said especially when moving air will be flowing around it, and we are talking an inch away from the pipe. My car is inoperable ATM so if you could grab me some temps, that be great. Need to figure out what temps we are working with so I know what resin to get.

If its over 150, l have to see what I can do on my part to get these cured somewhere. A local fiberglass supplier in Cali suggested I come in and discuss having them manufacture the panel for me with the higher temp resin, but I'd bet that cost a pretty penny.

Edit

The exhaust stock enters the panel under the rear cross member, which is one section to the right. The area you got marked is behind the wheel well, though the exhaust kind of turns into that section at the bumper. It will cross over a strake. That is why it's so advisable to reroute exhaust pipe.
 
Last edited:
Holy Johan it crosses the far left strake huh?! Crap. I really wish I didn't just buy that damn Apexi exhaust... Great. Well I guess you will have a tester that can judge the difference between a fully functional one and one with the exhaust modifications...

So it will be more like this then:
 

Attachments

  • IMG_0974.jpg
    IMG_0974.jpg
    40.6 KB · Views: 725
Yes sir.

You might only cut 4-5 inches of the strake as it passes through, maybe more, but a muffler there, and the piping, will be in the way of an ideal flat bottom. There are dozens of people on other car forums that have this hole cut in their home made diffuser so it's not uncommon, it's just not ideal.
 
Last edited:
ADVACO 3200 LVP Isophthalic Polyester Laminating South Resin, this will cure at room temperature with MEK Peroxide.


315-365 temperature. made by ADVANCE COATINGS COMPANY, out of Westminter, MA.

You are probably looking at some kind of ORTHO resin, instead this is an ISOPH, polyester, look it up and see what you think , see if your supplier has it if not I will check with mine and let you know.

Mandy
 
I'll give them a call Monday; I found a local supplier who's prices were similar to the online distributor I had, so ill save 160 on shipping.

Thanks for the info Mandy, you have proven now and on the phone you are very helpful and knowledgable.

AngleofPassion, (or anyone else) where you able to figure out what that radiant temp around the exhaust muffler?
 
I knew that there had to be someone closer to you that would have what you need, I will also call my supplier Monday to get some prices and we can compare notes later.

The prices I told you I get were wrong, since I buy by the roll, they are by pound not yards, so it is even cheaper.

The reason I know about this material is that I was thinking of making some tubing out of it to use maybe after the inter cooler and some after the air filter, just these out the mainstream ideas I get.

Call me if you like after you find out about it.


Mandy
 
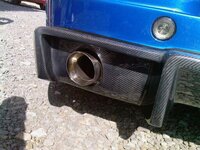
My diffusor is just as close as possible to the exhaust, and i have any issues since 10k mls.
Its made of fiberglass and covered with cf ;-)
 

Attachments

  • uploadfromtaptalk1358091728671.jpg
    uploadfromtaptalk1358091728671.jpg
    50.6 KB · Views: 763
  • uploadfromtaptalk1358091796508.jpg
    uploadfromtaptalk1358091796508.jpg
    46.2 KB · Views: 787
My diffusor is just as close as possible to the exhaust, and i have any issues since 10k mls.
Its made of fiberglass and covered with cf ;-)

Thats a pretty tasteful rear bumper..Add the wale tail, and thats a sexy ass car.
 
Well, summer might be an issue. But I measured ambient temps, after driving, less than an inch from the exhaust and got 72F LOL.

It's too cold out to be doing these things... haha even here.

@Michacolonia
Do you have pictures of that diffuser from under the car?
 
I knew it wasn't no 100s of degrees, if so everyone who stood behind a car would be at risk of burning to death.

I am still going to see if I can get the higher temp resin, no reason not to I suppose, unless it it costs some outragous amount, but 150* safe doesn't sound that bad all of a sudden.

The diffuser pictured above fits under the exhaust muffler (my guess by the cut out of the exhaust tip through the back), I can promise there is no 7* angle there to produce any downforce.

Now this is a functional diffuser:
 

Attachments

  • sierra sierra evo diffuser.jpg
    sierra sierra evo diffuser.jpg
    40.6 KB · Views: 197
Support Vendors who Support the DSM Community
Boosted Fabrication ECM Tuning ExtremePSI Fuel Injector Clinic Innovation Products Jacks Transmissions JNZ Tuning Kiggly Racing Morrison Fabrications MyMitsubishiStore.com RixRacing RockAuto RTM Racing STM Tuned

Latest posts

Build Thread Updates

Vendor Updates

Latest Classifieds

Back
Top