The Top DSM Community on the Web

For 1990-1999 Mitsubishi Eclipse, Eagle Talon, Plymouth Laser, and Galant VR-4 Owners. Log in to remove most ads.

Please Support Morrison Fabrications
Please Support Rix Racing

removing clear coat from carbon fiber

This site may earn a commission from merchant
affiliate links, including eBay, Amazon, and others.

This site may earn a commission from merchant affiliate links, including eBay, Amazon, and others.

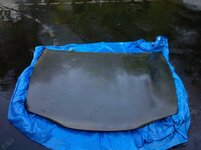
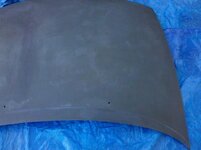
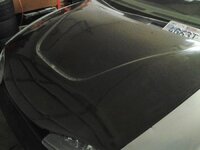
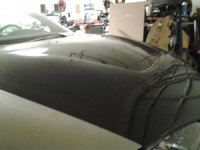
..Just wondering, how are all of these hoods flying up?? I've heard way too many of these cases. I'm assuming they're all CF. I was wanting to go with a CF Hood, paint it to match my OEM color. Haven't done so yet just because of the fact that I don't want to have to put Hood Pins. No Hood pins = Flying hoods?

My guess would be not using hood pins or hood pins failing LOL.
 
the thick line actually broke the carbon fiber and fiberglass underneath. but at both parts you can see the spiderweb of glaze cracking
Since the damage is quite extensive, first is to assess how much damage has happened to the sub-frame. If it's just come apart it can be roughed up, then re-resined and clamped together.

Since the weave is damaged on top, these will be noticable after repairs. take a dremel, or similar rotary wheel, and "V" out the cracks try to not hit the weave too much. Pick up some Resin, and hardener ( lowes, HD). then fill them in, It's ok if the resin is above the hoodline, go slow when mixing, and applying the resin to prevent bubbles.
Resin can actually be pushed into the repair areas with an overlay of waxpaper, and a squeegie.

Once the resin has cured, usually about 2 days then block sand the repair areas. start with 200, and go easy.

After blending the repairs with the undamaged areas, continue sanding the hood with 400- 1500 grit, sand the entire hood, working in the same direction in small areas at a time Careful not to hit the weave. ( the gel-coat is actually thicker than you think) Use plenty of water when wet sanding.

At 1500 grit you can stop, and re-clear the hood.

Although it seems like alot of work, it depends on the amount of damage that occured.

After reading this, you may want to consider a new hood.
 
Hows the progress? I will be doing this to my CF hood when I get it. I learned that DA's and patience are definitely your friend in the body shop world and they make things a ton easier. Goodluck!
 
this is after using TSP and a hours upon hours of wetsanding. in the first pic, did i damage the gel coat or is that just more clear coat? and in the second pic, i cant get that little strip off in the front.
 

Attachments

  • hoodx1 (2).jpg
    hoodx1 (2).jpg
    30.2 KB · Views: 724
  • hoodx2.jpg
    hoodx2.jpg
    41 KB · Views: 709
  • hoodx3.jpg
    hoodx3.jpg
    43.8 KB · Views: 724
^ it's looking pretty even, what grit did you stop at?

do the fingernail test, run it across the mark, starting about 1 inch out, and see if it continues across the spot. no mark=clear, continuous mark = GTG.

If it leaves a continuous mark, then it may be some gelcoat staining, if you wet it does it disappear? if so just go ahead and clear it.

TSP cleaned it up pretty good huh?

i stopped at 1500 but i think im gonna go to 2000 just to make it perfect. but will those rough patches still be there if i clear coat it? and yes! that helped so much :D
 
i stopped at 1500 but i think im gonna go to 2000 just to make it perfect. but will those rough patches still be there if i clear coat it? and yes! that helped so much :D

Basically, wet the hood, while the water is sheeting off, that's pretty much how it will look "cleared".

As for the spots see above^ if they disappear, then you're good to go, at the least they should be greatly diminished.

Personally i would stop at 1500, reason being the clear needs something to bite into, since it's not being sprayed over a base coat, there isn't the typical chemical bonding taking place. if the surface is too smooth, it may just flake off again.

I've almost wondered what would happen if someone used a Matte clear, to give it that "dry" carbon look.

Good to see you've made excellent progress. Trial and error is what taught me how to revive my hood, since ViS discontinued it about 6 years ago.

*on a side note, I did use a DA, with the 3m hookit pad, and 3000 grit to finely sand my gelcoat, then polished it with 3m rubbing compound and a deep carnuba wax, No Clear coat.

Polishes up, and looks "wet" for a while, but then again mine sits in the garage, and rarely sees the elements.

T.C.

wouldnt have been able to do it without you and the rest of the guys here! thanks!:thumb:
but i bought some clear coat remover. do you think it would be necessary to use it?
 
wouldnt have been able to do it without you and the rest of the guys here! thanks!:thumb:
but i bought some clear coat remover. do you think it would be necessary to use it?
Nope, it should be fine without, just make sure before painting that the surface is cleaned again with tsp, then tacked well.

Remember you can always give us Props by boosting our Rep :p

Anyways it was a pleasure to share the knowledge I learned from doing it myself.
 
Nope, it should be fine without, just make sure before painting that the surface is cleaned again with tsp, then tacked well.

Remember you can always give us Props by boosting our Rep :p

Anyways it was a pleasure to share the knowledge I learned from doing it myself.

look back in a few hours and you'll see how it came out!

and stupid newbie restrictions wont let me boost your rep :/

The sky descided it wanted to rain as soon as I prepped the hoood.:ohdamn:
 
Mine flew up as well. Not sure if I should make a thread yet.

But just wondering if painting it to match the body color would hide blemishes like the ones in the pics just above.

I'm not too intent on keeping the CF look. Mine has tons of blemishes, no clear coat left, and some hairline cracks.

I guess it should hide blemishes; my question is if the cracks will make the paint crack at the fault-lines.
 
Last edited:
Mine flew up as well. Not sure if I should make a thread yet.

But just wondering if painting it to match the body color would hide blemishes like the ones in the pics just above.

I'm not too intent on keeping the CF look. Mine has tons of blemishes, no clear coat left, and some hairline cracks.

I guess it should hide blemishes; my question is if the cracks will make the paint crack at the fault-lines.

Not if you "V" out the cracks, and if possible on both sides, re-gel afterwards, and sand to desired finish.

Think of it as basic fiberglass repair, especially if you plan to paint it after.
 
People here pretty much summed it up.. but I'll post what I've done as well, since I just re-cleared and fixed the CF hood on the Talon:

End result from spray paint:
You must be logged in to view this image or video.


First of all, back a few years, the hood did have some nice sized cracks in the CF fabric, as well as missing pieces. To get the cracks fixed, you need sand the area down quite a ways to find the ends of the crack. Once you do, use epoxy to fill the crack from end to end. Let it dry..

You must be logged in to view this image or video.


Then I used some CF fabric and layed it over top the cracked area. You use resin, like fiberglass, to make it harden.

You must be logged in to view this image or video.


Then after that I sanded it some, and used fiberglass to coat it to take out the high spots. Also used a little bit of bondo to fill in some sports too (since that is easier to sand than fiberglass)

After that comes the fun part of paint. Since those patches no longer match the rest of the CF, decided to paint the edges black, and leave the center clear. So sanded the entire hood down with 150 grit sandpaper. Once it got pretty smooth, wiped it down. Then go over it with 320 grit. At this point you can apply the spray paint. There's a few things I've learned about spray paint during this:

A. Do not wear latex gloves when applying... sometimes the paint builds up on them and drips on the surface.
B. DO heed the directions on the can. This stuff is absolutely worthless in higher humidity. LOL... just like it says!
C. Use a continuous flow and end the spray a few inches PAST the panel to get a more even coverage.
D. LIGHT coats!! I have no patience, but learned to develop some after re-doing things a few times. Light coats is key to getting decent coverage.

After the paint, apply clear about 30mins after the color. (of course if you are just using clear, this is irrelevant) Wait about 48 hours, then go back and wet-sand, polish and buff out using the grits suggested above!

Oh yeah... to add insult to injury... the hood latch had something wedged in it the other day.. went to shut the hood and put a nice sized new crack in it. LOL. Oie... but this time going to leave it for a while.
 
These are Pics of my 7 yr old ViS hood, that was sun damaged, and refinished.

Sorry for the crappy phone pix.

There is no clear on this hood, it was finished using the 3M Trizact system, and finished with 3000 grit, machine polished with 3M rubbing compound, then normal Polish. work was completed on this project 8 months ago, and hasn't yellowed.
 

Attachments

  • 2011-09-08 04.16.54.jpg
    2011-09-08 04.16.54.jpg
    33.6 KB · Views: 477
  • 2011-09-08 04.18.10.jpg
    2011-09-08 04.18.10.jpg
    34.2 KB · Views: 465
hey guys i dont mean to hi jack but im in the same boat. Im in the process of reclearing my hood and ive wetsanded all day today and it just doesnt look right. I got all the oxidation off but its not uniform, its kinda streaky. so i went in straight lines and its still streaky, kinda worried if i started painting it you could see this under the coats of clear. any suggestions on what i should do before paint? do you think the tsp would clean this up? also it looks beautiful when its all wet is this a sign its ready for some clear?

bump
 

Attachments

  • securedownload.jpg
    securedownload.jpg
    43.1 KB · Views: 360
hey guys i dont mean to hi jack but im in the same boat. Im in the process of reclearing my hood and ive wetsanded all day today and it just doesnt look right. I got all the oxidation off but its not uniform, its kinda streaky. so i went in straight lines and its still streaky, kinda worried if i started painting it you could see this under the coats of clear. any suggestions on what i should do before paint? do you think the tsp would clean this up? also it looks beautiful when its all wet is this a sign its ready for some clear?

bump

What did ya do? ( make a detailed description of the process you used, it could help out fellow DSM'rs)


what grit did you stop at? ( looks Shiny 1500 git or higher?)


and if it's wet does it look uniform? if so then it should be alright.

Just TSP, and tack cloth it before laying clear, also better to have the clear "GUN" sprayed, than trying to rattlecan it. Since it gives a more uniform pattern and thickness to the coat.


Also Looks like yours is a ViS hood as well..."VAder" Notice how mine doesn't have the "Lifted" portion before the vent?
 
Support Vendors who Support the DSM Community
Boosted Fabrication ECM Tuning ExtremePSI Fuel Injector Clinic Innovation Products Jacks Transmissions JNZ Tuning Kiggly Racing Morrison Fabrications MyMitsubishiStore.com RixRacing RockAuto RTM Racing STM Tuned

Latest posts

Build Thread Updates

Vendor Updates

Latest Classifieds

Back
Top