Priority DSM
Proven Member
- 156
- 33
- Dec 16, 2014
-
Marysville,
California
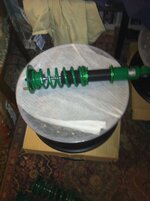
My 1999 2g GST build.
Have a look at the progression below.
Thanks!
Have a look at the progression below.
Thanks!
Last edited:
Follow along with the video below to see how to install our site as a web app on your home screen.

Note: This feature currently requires accessing the site using the built-in Safari browser.

This site may earn a commission from merchant
affiliate links, including eBay, Amazon, and others.
This site may earn a commission from merchant affiliate links, including eBay, Amazon, and others.


")

Just curious. What is your end goal?
")
Very nice. I'm looking at about the same type for my 98 gst. 275 to 300 hp and steet legal.
How do u like the coilovers
Like the build! We have a few matching parts good too see DSM in the build journals.