The Top DSM Community on the Web

For 1990-1999 Mitsubishi Eclipse, Eagle Talon, Plymouth Laser, and Galant VR-4 Owners. Log in to remove most ads.

Please Support STM Tuned
Please Support Rix Racing

Clutch dragging

This site may earn a commission from merchant
affiliate links, including eBay, Amazon, and others.

This site may earn a commission from merchant affiliate links, including eBay, Amazon, and others.

nicknorth11

15+ Year Contributor
663
7
Feb 9, 2005
Grand Blanc, Michigan
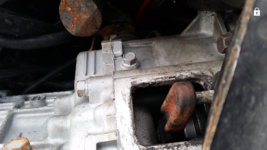
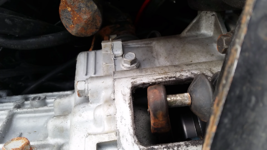
My clutch is dragging off the line and not engaging fully when I need to shift. It has no leaks. Master is brand new OEM. Line is ss straight from master to slave. Clutch/flywheel is QuarterMaster twin disc with about 1200 miles on it. Fork, TOB, and pivot ball are all new 1200 miles ago. Clutch is adjusted perfectly using Jack's method. Tried bleeding it twice. Neither time fixed it. Slave is oldest component, but not all that old. Is there any way to tell if it's working properly? Any other suggestions?
 
I'm not a fan of the QuarterMaster clutches. My friend got one and we dropped the tranny over ten times and tried everything you can think of. We even went as far as to measure the deflection of the fingers to try to get as close to an exact shim on the pivot ball. Everything was OEM and properly machined. We never got it to work. He went to a Exedy clutch and it worked first try with zero problems.

I'm not sure what it is about the QuarterMaster clutches with our cars but they are very hit or miss.

The only thing I can say is make sure you torque everything to QM's specifications.
 
Using jacks method.... meaning you can push the slave in by hand but when depressed and rev up car moves?
 
Last edited:
Also, does the fork position look correct at the slave? It should be more to the driver's side, not in the middle.
 
Have you verified the fork position?

I dug this up fro another thread:
Which flywheel are you using? A Quarter Master one, or a Power Train Technologies one? Have you measured the flange thickness of the flywheel? Then, also measure the amount of thread depth you have in your crank flange. These two measurements should be done to confirm that you are using the proper flywheel bolt for your application.

There are several flywheels on the market that have different flange thicknesses, resulting in customers having the wrong flywheel bolts for their application, as there is the potential to have too long of flywheel bolts that will bottom out in your crank, and not tighten the flywheel. This measurement is important to do, as you want to have the proper length flywheel bolts to maximize the engagement of the flywheel bolts, along with torquing them to the proper torque specification with Loctite Red threadlocker.

Check out this thread for bolt lengths, part numbers, measuring advice, etc.
http://www.dsmtuners.com/forums/drivetrain-tech/266455-ptt-twin-disk-flywheel-bolts.html

As for the install, you will install your flywheel and torque the proper flywheel bolts in a star-pattern with 100 ft/lb torque spec. Then, you will take the rest of the clutch assembly with the clutch install tool installed, and install the flywheel-facing disk, floater, front disk, and fulcrum floater ,then clutch cover -- all in the proper order (the front and rear disks can only be assembled one way correctly where it will properly align up the entire engagement surfaces for the input shaft splines. If you need a picture, you will need to wait a bit as I am out of town.

You will take the rest of the clutch assembly with the clutch alignment tool installed and place it up on the flywheel and hand-thread in the clutch cover bolts to get it to hold on. Then make sure you keep hand pressure on the alignment tool and hand-tighten the clutch cover evenly in a star-pattern using a 1/2" socket and 3/8" ratchet. Be sure to do this evenly. After all the bolts are hand tightened, you will then follow a torque specification around 18-22 ft/lb and you can use Loctite Red on these bolts as well -- it doesn't hurt.

Now, pull out the alignment tool and visually inspect that your clutch disks are evenly centered in the assembly; the floater disks don't move laterally as they are machined to fit the clutch cover posts.

You will also need the clutch fork properly clearanced -- this requires grinding to make it clearance the clutch cover and will then properly engage/disengage the clutch without hitting the clutch cover. If you purchased the clutch fork with the clutch and it is already grinded down to fit, you will be just fine.

Use a Mitsubishi OEM throwout bearing, slave cylinder, and master cylinder. You do not need an aftermarket slave cylinder or an Isuzu one; that is only used with the PTT twin-disk because of its thinner design that is 0.1"-thinne (disk thickness are 0.200" for PTT disks, and QM Rally disks are 0.250" thick).
 
Using jacks method.... meaning you can push the slave in by hand but when depressed and rev up car moves?
Yes.

Also, does the fork position look correct at the slave? It should be more to the driver's side, not in the middle.
I think so, yes. It's been a while since I checked this, but I remember thinking it was ok. I'll double check tomorrow and let you know.

Nate, I've done everything according to that post, including using a machined fork purchased from Tim. All components involved with the clutch assembly sold by Tim were bought directly from him and should work.
I'll verify fork position tomorrow, which I'm fairly certain is good. If that's the case, should I be thinking about a new slave? Btw, do you guys happen to know the proper slave rod travel distance? I found 1g's should be about 14mm, but nothing for a 2g.
 
You need to make sure the plates are not warped. And you need to make sure you have te correct amount of release travel. Its not magic. They work very well, and take a ton of abuse, they are just not very street friendly.
 
I've been out of town for a while, but I just took a look at the fork's position and it's perfectly centered. Not sure why this is the case given everything is brand new. I'll check travel distance and whether or not the fork is hitting the housing tomorrow. I'm thinking I'm going to have to shim it, though.
 
Last edited:
It's not fun to drop it yourself, but it is doable with some creativity.
 
Last edited:
Ok, so I set up my phone to record the fork travel and final position. It's nowhere close to hitting the housing, so that's good, but it's only traveling 9-10mm. (Again, pedal/MC are adjusted all the way out.) Video and pics below.

You must be logged in to view this image or video.
 

Attachments

  • 1.png
    1.png
    190.1 KB · Views: 150
  • 2.png
    2.png
    190 KB · Views: 102
Update guys, I've been talking with Tim and he's given me some good advice. I re-bled the clutch system with the MC rod all the way out (for maximum throw), which must've pushed more air out, because I now have about 16mm of travel. However, the car is behaving exactly the same as it has in the past. Below are new pics and a video showing the improved travel (primarily for Tim's use). I'm going to drop the transmission as soon as I can and make sure I installed everything correctly. I'll keep this page updated.

You must be logged in to view this image or video.
 
You do not need a pedal stop with a QM 7.25" rally twin.

I have already told him that if the pedal starts feeling harder as you push it down that you are over-extending the clutch and you need to adjust the master cylinder rod out (towards pedal).
 
My pedal has never felt hard at any point, so I'm not too worried about that. I'm hoping to drop the transmission early next week, so I'll post back then with an update.
 
Support Vendors who Support the DSM Community
Boosted Fabrication ECM Tuning ExtremePSI Fuel Injector Clinic Innovation Products Jacks Transmissions JNZ Tuning Kiggly Racing Morrison Fabrications MyMitsubishiStore.com RixRacing RockAuto RTM Racing STM Tuned

Latest posts

Build Thread Updates

Vendor Updates

Latest Classifieds

Back
Top