The Top DSM Community on the Web

For 1990-1999 Mitsubishi Eclipse, Eagle Talon, Plymouth Laser, and Galant VR-4 Owners. Log in to remove most ads.

Please Support STM Tuned
Please Support Rix Racing

2G 1st custom job w/ pics

This site may earn a commission from merchant
affiliate links, including eBay, Amazon, and others.

This site may earn a commission from merchant affiliate links, including eBay, Amazon, and others.

jbeaton9292

Proven Member
847
72
Aug 29, 2013
Sterling heights, Michigan
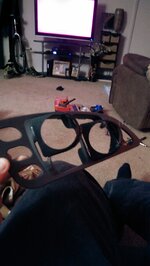
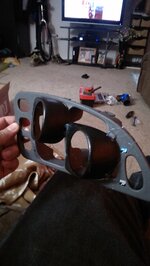
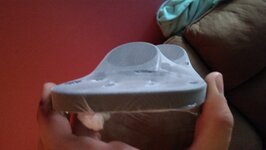
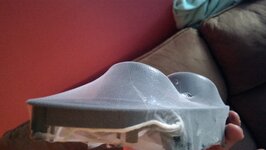
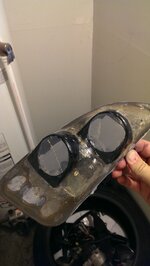
Ok so i decided to try and make my own vent gauge pod for my wideband and boost gauge i used the vfaq to see how its been done gave me a idea of how to go about it

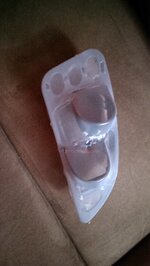
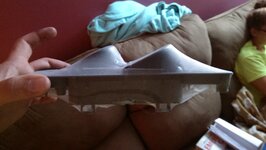
So what i did is took my old 1g a pillar dual pod and cut the gauge holders off angled them by running the on side of fiber cutoff wheel the glued them where i wanted them to vent bezel (hot glue) then i pull nylon leggings over it and glued it down where i needed to hold it all in place (after streched tight) then i used the fiberglass resin kit from walmart 17$ comes with resin hardener spreader stir stick fiberglass cloth (stuff stinks sobad LOL) and just slapped on a quick layer on the nylon so it will harden and add more so it cantleak through the nylon thats as far as ive made it so far pics attached
 

Attachments

  • IMAG0079.jpg
    IMAG0079.jpg
    343.5 KB · Views: 100
  • IMAG0080.jpg
    IMAG0080.jpg
    368.2 KB · Views: 94
  • IMAG0081.jpg
    IMAG0081.jpg
    394.2 KB · Views: 118
  • IMAG0082.jpg
    IMAG0082.jpg
    368.4 KB · Views: 102
  • IMAG0083.jpg
    IMAG0083.jpg
    345.9 KB · Views: 107
  • IMAG0084.jpg
    IMAG0084.jpg
    415.3 KB · Views: 107
  • IMAG0085.jpg
    IMAG0085.jpg
    352.8 KB · Views: 110
You must be logged in to view this image or video.
Second coat of resin 1st layer looked so shitty this layer looks pretty decent i would say im only using a popsicle stick that came in the kit LOL
You must be logged in to view this image or video.
[DOUBLEPOST=1407941622][/DOUBLEPOST]3rd coat coming along well how many coats should i use im making it thick
You must be logged in to view this image or video.
 
Last edited:
Almost done sanding and 3 heavy coats was plenty
You must be logged in to view this image or video.
[DOUBLEPOST=1407951516][/DOUBLEPOST]Finished looks pretty good
You must be logged in to view this image or video.
[DOUBLEPOST=1407952952][/DOUBLEPOST]Painted not gonna lie i was kinda scared to try this but im glad i did it was super easy
You must be logged in to view this image or video.
 
Last edited:
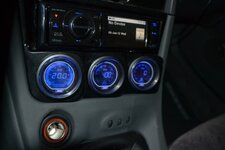
Not bad for your first time! I have a spare vent that I was thinking about doing that with. I just finished one for the drivers door vent but not sure if I am going to use it.

Right now I have a 3 pod vent I made under the radio.
 

Attachments

  • image.jpg
    image.jpg
    35.1 KB · Views: 80
Yea that's the only down side to this mounting solution.

I do mount my tablet to the vent gauges and use that over Bluetooth to display info off my Megasquirt. So the majority of my data is displayed there.
 
Support Vendors who Support the DSM Community
Boosted Fabrication ECM Tuning ExtremePSI Fuel Injector Clinic Innovation Products Jacks Transmissions JNZ Tuning Kiggly Racing Morrison Fabrications MyMitsubishiStore.com RixRacing RockAuto RTM Racing STM Tuned

Latest posts

Build Thread Updates

Vendor Updates

Latest Classifieds

Back
Top