The Top DSM Community on the Web

For 1990-1999 Mitsubishi Eclipse, Eagle Talon, Plymouth Laser, and Galant VR-4 Owners. Log in to remove most ads.

Please Support STM Tuned

1G Talon "Project Deathstroke"

This site may earn a commission from merchant
affiliate links, including eBay, Amazon, and others.

This site may earn a commission from merchant affiliate links, including eBay, Amazon, and others.

Paintballaa5

10+ Year Contributor
530
245
Jan 23, 2012
Houston, Texas
1G Talon "Project Deathstroke"

Here's my build thread for my 1G AWD Talon street car. I'm a full time student and worker, so naturally this build will span over a pretty long period of time, which is perfect because I bought this car to build exactly how I want it, and not be rushed.
This car will be tagged and registered.. After daily-ing and modding a 2g throughout high-school and my first year of college, I became hooked on DSM's. I sold my 2g, bought a 03 Cobra as a DD, and found an INCREDIBLE deal on my Talon.
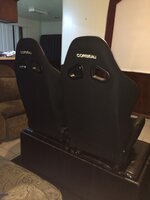
This car has had a long drag racing life, and (knock on wood) hopefully still has a long life ahead of her! Found her as a roller for $900 in almost immaculate shape for a 23 year old car. Came with a 4 bolt rear end, the drive shaft, some Corbeau seats/harnesses, and a box of misc. parts.
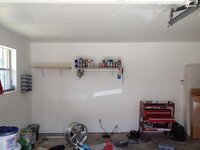
Anyway, I bought the car in September 2013, (during a major storm! Loading/pulling a car on a trailer in flash flood weather is NEVER fun.) and unfortunately, due to my housing situation here at school, it had to stay at my parents house for a little under a year. So here it is, almost June 2014, I'm moving to a bigger, MUCH nicer house with a two car garage, and plenty of shop space. So now that the car will be with me from now on, I decided to go ahead and start the build thread for my Talon; "Project Deathstroke"

So I'll shut up and post some pictures. I'll be updating as progress is made!

dsm5_zps4dc2705b.jpg

dsm3_zpsd772f648.jpg

dsm4_zps1aa6cace.jpg

dsm1_zpsebc78ffc.jpg

IMG_2112_zps77064f05.jpg


My intent with this project is to have fun building it/learning along the way, so if I don't hit my goals then I'll still have accomplished what I wanted.

Right now the major players in the build plan are:
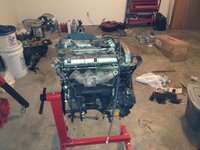
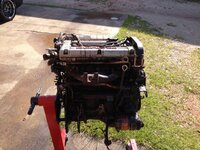
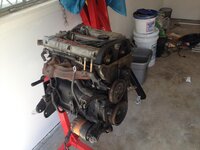
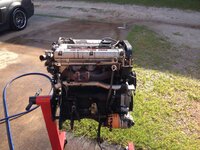
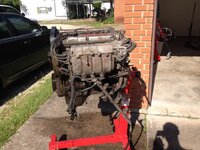
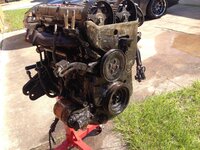
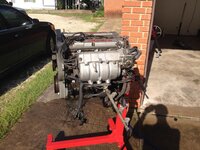
2.3 built stroker motor
BW S366 top mount, twin scroll turbo
Jacks drag race trans
Water/Air IC
SD/dsmlink tuned

Shooting for 600-700 hp, low 10's or high 9's 1/4 mile.

EDIT: Since realizing I'm a broke student, I've decided to wait on these goals. I'm getting tired of looking at a dismantled car, so I'd like to just enjoy it for now. Read on to see what I have going on!
 
Last edited:
Looks like a good starting point for what you're looking to do! The color is great, wish they had manufactured more orange 2g's.

What type of mods are you looking at doing? What are your goals in terms of track times?
 
Looks like a good starting point for what you're looking to do! The color is great, wish they had manufactured more orange 2g's.

What type of mods are you looking at doing? What are your goals in terms of track times?

Thank ya! I fell in love with the color as soon as I saw the pictures my buddy sent me of it. I've updated the bottom of the first post with my major mod plans and goals. Probably should have originally posted that, but it was late LOL
 
Last edited:
June 8th, 2014

Small update, but it really makes way for progress. After moving into my new house last weekend, I was finally able to get a friend with a truck to help me move my long block to the new house and set it up on the stand. Not much of an update, but now that I have it I can pull the valve cover and start going through the head and cleaning everything up real good. Who knows how long it's been sitting. I bought it from a friend who said it came out of a running car. So if all goes planned, i'll just clean it up and stick a 14b on it and drop it in the car. Speaking of which, I guess I could share the plan for that:
Some say I'm crazy for it, but I feel like I should just drop a stock build in the car just for a little bit, then pull it and build it for it's full potential. That way, I can get a feel for the car and make sure there aren't any weird wiring/suspension/brake/ect. surprises before I put in the high hp motor and components. It just makes sense to me.

anyway, I know ya'll like pictures so here it is on the stand.
8A24373E-51E8-4866-AE4B-8D85A881B57E_zps2isahvm9.jpg

Yea it's pretty nasty, but once I get it all cleaned up and change out some gaskets and seals, it should be good as new. And yes, the garage is a mess. Like I said.. just moved into the house.
 

Attachments

  • E9023982-341B-41B1-BBEB-6BE924D5C8DB_zpsimuuqopw.jpg
    E9023982-341B-41B1-BBEB-6BE924D5C8DB_zpsimuuqopw.jpg
    109.4 KB · Views: 100
  • 14B2D43A-4142-4E56-B116-08E902687F92_zpsulsyhfio.jpg
    14B2D43A-4142-4E56-B116-08E902687F92_zpsulsyhfio.jpg
    83.2 KB · Views: 109
  • 14B2D43A-4142-4E56-B116-08E902687F92_zpsulsyhfio.jpg
    14B2D43A-4142-4E56-B116-08E902687F92_zpsulsyhfio.jpg
    83.2 KB · Views: 295
Last edited:
June 10th, 2014

Pulled the motor outside today and decided I'd see how much gunk I could easily get off. Had a bottle of foamy degreaser from work laying around, so I sprayed it down, let it soak for a little bit, and hosed it off. Did this two or three times and let me tell you.. Damn!! I absolutely was not expecting it to work as well as it did. Didn't even hardly put a rag to it, just 10 mins worth of spray and hose off. I'll let the pics speak for themselves.

Before:
8A24373E-51E8-4866-AE4B-8D85A881B57E_zps2isahvm9.jpgA76E9AB2-2005-42F0-8831-FE5F4787EA63_zpsadaao2df.jpg8C7CEF9B-BCDD-4871-A5B7-210F2C2D13D0_zpsk4k3j7ez.jpg689CEBA7-8115-46DD-9FA0-7363B79973A4_zpshpcqc4qx.jpg

After:
DC8297A8-F8C1-4231-BE24-DEC0D2EAD1FA_zpsvc5ppwt7.jpgD58EE738-5D24-4E78-8B23-5569A99D2C56_zps1li9gdsy.jpg73A9788A-F0A5-49DF-9F5F-9C58812E27DA_zpsqwj7awr2.jpg

Obviously still not anywhere near my standard, but now it's not miserable to work on LOL.

And lastly before I sign off: if all goes as planned, I will have the car delivered to me here tomorrow!! So stoked for this, I can hardly contain myself.


Goodnight all
 

Attachments

  • 41A59268-9539-48F1-A8B1-BA417A4DF349_zpsvcgikxws.jpg
    41A59268-9539-48F1-A8B1-BA417A4DF349_zpsvcgikxws.jpg
    44.8 KB · Views: 121
  • A76E9AB2-2005-42F0-8831-FE5F4787EA63_zpsadaao2df.jpg
    A76E9AB2-2005-42F0-8831-FE5F4787EA63_zpsadaao2df.jpg
    178.6 KB · Views: 107
  • 8A24373E-51E8-4866-AE4B-8D85A881B57E_zps2isahvm9.jpg
    8A24373E-51E8-4866-AE4B-8D85A881B57E_zps2isahvm9.jpg
    85 KB · Views: 109
  • 05D3C181-5346-455A-AEC2-E0B9A508ED8F_zpslajp1wps.jpg
    05D3C181-5346-455A-AEC2-E0B9A508ED8F_zpslajp1wps.jpg
    54.3 KB · Views: 102
  • 6143860E-1817-4F67-B45D-85E83C5A5F53_zps0nynoxew.jpg
    6143860E-1817-4F67-B45D-85E83C5A5F53_zps0nynoxew.jpg
    51.9 KB · Views: 117
  • DC8297A8-F8C1-4231-BE24-DEC0D2EAD1FA_zpsvc5ppwt7.jpg
    DC8297A8-F8C1-4231-BE24-DEC0D2EAD1FA_zpsvc5ppwt7.jpg
    173.8 KB · Views: 94
  • 689CEBA7-8115-46DD-9FA0-7363B79973A4_zpshpcqc4qx.jpg
    689CEBA7-8115-46DD-9FA0-7363B79973A4_zpshpcqc4qx.jpg
    148.6 KB · Views: 107
  • 8C7CEF9B-BCDD-4871-A5B7-210F2C2D13D0_zpsk4k3j7ez.jpg
    8C7CEF9B-BCDD-4871-A5B7-210F2C2D13D0_zpsk4k3j7ez.jpg
    172.7 KB · Views: 101
  • D58EE738-5D24-4E78-8B23-5569A99D2C56_zps1li9gdsy.jpg
    D58EE738-5D24-4E78-8B23-5569A99D2C56_zps1li9gdsy.jpg
    214.7 KB · Views: 106
  • 73A9788A-F0A5-49DF-9F5F-9C58812E27DA_zpsqwj7awr2.jpg
    73A9788A-F0A5-49DF-9F5F-9C58812E27DA_zpsqwj7awr2.jpg
    140.2 KB · Views: 116
  • 41A59268-9539-48F1-A8B1-BA417A4DF349_zpsvcgikxws.jpg
    41A59268-9539-48F1-A8B1-BA417A4DF349_zpsvcgikxws.jpg
    44.8 KB · Views: 294
  • 6143860E-1817-4F67-B45D-85E83C5A5F53_zps0nynoxew.jpg
    6143860E-1817-4F67-B45D-85E83C5A5F53_zps0nynoxew.jpg
    51.9 KB · Views: 266
  • 05D3C181-5346-455A-AEC2-E0B9A508ED8F_zpslajp1wps.jpg
    05D3C181-5346-455A-AEC2-E0B9A508ED8F_zpslajp1wps.jpg
    54.3 KB · Views: 271
Last edited:
Wow, it's been an incredibly long time and I completely let this thread go. I mostly have been posting progress pics on Facebook, (the only reason I still keep one of those) but I decided to finally update this thread. A lot of things have changed, I've been somewhat held up by college.. funds are tight.. And some of the immediate goals for the car have changed. Future goal is still the same.

I decided it would be best to keep this somewhat a street car, and to just put a mild motor in it for now. That way I can save and build a motor on the side. But I mostly want to just enjoy the car for now. I'm tired of looking at it in pieces, and it will still be a hell of a fun car, even without a massive turbo.

I'll try to keep it in sequential order, but it's been a while so it may be slightly out of order. And this is definitely not all the things I've done, just all that I could dig up picture wise.
Incoming pic dump in 3.. 2.. 1..


Car finally made it to my place, here at school.

2B6CFE11-D6A0-4872-9276-3A7FD75AD0A4_zpsjw09omtg.jpg
 
Last edited:
Unfortunately a lot of the wiring is in terrible shape. Have been doing away with this since day 1
E6F3D34A-BB85-4C49-B0CE-7BF56470D361_zpsblbs20tq.jpg

Old pictures of when I first got it. Wiring stashed everywhere..
C8BAADCF-C72A-48ED-9DD3-7EF57C23C11A_zpsvenshfyo.jpg

Began chipping away at the sound deadener
60A9F868-178D-4B47-8B97-4009FED9D2E7_zpsuwo2jldy.jpg
631865A9-C8AF-4356-8BFC-19B091E44BC3_zps3uitrapo.jpg

Where it sat for the next year and a half
EA4EB989-1391-4C37-B2CD-3B465BC18C60_zpse4nrnith.jpg

Picked up a 23 spline trans and tcase
99B32C93-B9B9-47C9-8FC6-B3B80DC1C2F7_zps4jl2qul1.jpg

Drilling the spot welds for all the useless pieces from rear seat belts and trim
514AABE4-D98A-4E4E-A13A-C598E498DBA5_zpsblljztvv.jpg
F883D7E5-AEDC-4209-902E-E992FFD4886B_zpssayu8l4i.jpg
802E8ADD-177A-4F83-ACFB-575C1FDFF34A_zpszgba8crh.jpg
FBB360B7-C021-4E7C-B897-7F598464AAF8_zpsjncxhrql.jpg
C047EA04-3EC9-4797-B659-B397E6E3CA80_zpsmfndzrfs.jpgA1100967-81EC-439E-BE9D-5C6988E4B983_zpsywllyw0g.jpg

That right there is completely wired up. It's ran behind everything and you can't see it at all. Only had to extend the passenger side corner marker and splice the license plate harness through a crevice in the frame, and make a new ground. I think it looks fantastic
 
Last edited:
Early stages of wire harness routing
0EEBE762-C7B9-49D1-A907-8A81ACF5DB0A_zps0bjnwnso.jpg

This is when I decided to pull the head and have everything redone.
F279B1DB-B294-470D-94F0-B86AADC727E3_zps0a1hu0vu.jpg

Front suspension out.. You'll see why later on ;)
8EE887C4-5047-48DC-934B-4D6D3EC35E7D_zpsc4zmsojz.jpg

Cleaned up/de-powered/rebuilt
1277349D-F494-454F-A38F-5F74508BFB39_zpsfpgd6jrd.jpg
4FCD9704-5793-4C19-A585-F57749C3FD10_zpsstf6zzcj.jpg

Various parts powder coated. This is one of the main colors used on this build. "Porsche Silver" Found out later that I would only use the timing cover pieces
8084D66B-5D2C-4C66-B9CD-B7023B5DB8C8_zpsgvlxnqoa.jpg

Picked up some goodies from a friend
619B12C7-0106-4D12-836F-FF08ADB40A44_zpsnskkqe4s.jpg

This thing is atrocious..
A59819B5-BEA1-462D-866D-C279564CE9A7_zpsanrr1zlh.jpg
674C6E61-C968-4BA6-85B0-B78D6731062D_zps8uwnoc3m.jpg

Stock untouched 6 bolt
2D03260B-87AF-40E4-A3B0-7DF113433F03_zpsjctpolhy.jpg

GSC Springs and Retainers!
36B084C2-A8B9-4E2F-A590-8B039EB1A518_zps0hbpdwfe.jpg

Cage showed up:
FCFE1063-186D-4D6B-BEEC-26A55F5A699E_zps9exkcu9t.jpg

Well that just looks awful doesn't it!
63397B6A-6C49-4E5C-999B-4D140BC51FB1_zpsurxwydti.jpg

Aaaaand now it's nice
F17C51B5-3BC5-4504-B27D-35A2DEAF6F14_zpsviz4v3m1.jpg

Got new twin piston calipers.. Decided to clean the casting up on them. Not perfect, but it'll do
B87847A0-1934-4A0C-BE4B-AB3A0153F65B_zpsg3ubniek.jpg
0DDCA202-FB33-4EDA-96ED-D50CF3BBE3F8_zpsfgmtrtw5.jpg

Coated the hubs too
9FF23961-7F35-4DD2-8508-8AB97DB675FE_zpsrc1gvslj.jpg

What E85 car is complete without the factory GM Flex Fuel badge
8B96CF6C-F620-4DE2-AB6C-7F79FE7E0278_zpsu5bgypq4.jpg
 
The seats I bought from the previous owner were faded EXTREMELY bad. Used some of the vinyl dye and they look fantastic now!
Before:
909231F5-C8A8-4F83-8062-25EF0FFBF2A6_zpsr4zwm2ds.jpg
Side by side shot:
CB163E06-B8EA-403A-9896-51CB5CCED40B_zps9z0i6kwk.jpg
Finished:
A9C1FE95-A104-4100-A4C0-B4805A0FA87C_zpszqqetdnc.jpg
53FE029C-3224-462A-A469-99BDA1BE57A6_zpsobh6o5j4.jpg

Powder coated a oil pan for a buddy, and ended up really liking the color. So I traded him mine LOL. It matches my Cobra!
5E9EDF36-0BC4-4F04-BEA9-FD4C92414836_zpspklgn72t.jpg

Coated the dipstick tube and coolant hard line
271296C0-C514-4F6B-9897-9E331F0A943C_zpsjf5xjzbv.jpg

Removed spoiler to fill in the wiper and antenna holes, and for paint. Also found the missing front pieces.
F7DA9B24-96C5-42A8-9B3D-1E20C3D0D5A9_zpsq6uvnk13.jpg

This is my first time really doing any body work, it came out pretty decent! Hopefully it doesn't start to crack later on.
92C6B65F-946E-4DE8-8734-7C291903E6F9_zpsn42hymgj.jpg
2C2AECA0-72CF-4B94-9C57-DC556AE16842_zpszzcz1usv.jpg
C489F036-60F6-48DD-9108-82F50DEDB7B5_zpsl8w4bftx.jpg
B0B314FC-75E6-4B23-8CA4-EDF4657CD331_zps7yvaci6x.jpg
ED7E49C6-84EA-49BB-B8C2-A50754FD7A96_zpsmtdqkqca.jpg

Nice little radiator came in
C0D384AF-3028-42EF-A269-1AB5DDAE8117_zpssyo2tggx.jpg
 

Attachments

  • 53FE029C-3224-462A-A469-99BDA1BE57A6_zpsobh6o5j4.jpg
    53FE029C-3224-462A-A469-99BDA1BE57A6_zpsobh6o5j4.jpg
    98.6 KB · Views: 111
Last edited:
Started working on this NASTY under coating.. 25 years of dirt, debris, and tire rubber are caked in the fender wells. This took way more time and effort than I ever thought it would. But I'm glad I took the time to do it.
D56D0F4E-C0CE-49A6-9AB5-88C682DD0912_zpsvdhqo3at.jpg
A2F5B056-E327-4A10-882C-E826A3BBD14D_zpsoboeqnuq.jpg
773175FF-08FD-4CA0-84EE-343A0B983091_zpsihgjufpb.jpg
After you take off your gloves..
7AA230FE-A64D-44DD-A6DC-072D3CFC0443_zpspe4gkaee.jpg
FCCA51EA-40D3-42D1-8B03-42A9B01E3EC2_zpsfs418raf.jpg
18504133-37BE-418C-A898-A450D83BA097_zps9tui3obv.jpg
FF7F3CB0-639C-4BDA-AA4C-0BA7878BEED0_zpsxeo0nyzx.jpg2697D3EE-EC16-40E0-A128-7F1457A7729D_zpslpc7p5dm.jpg
5EBB7A20-D598-4D05-BE34-F4C762A2252C_zpswsqcntbn.jpg
DEEFE127-4EE5-4503-A071-302635BA2AD3_zps9pi2crpu.jpg

Moving back to the motor:

7B334BC8-968C-4ED3-B67B-31B8DD6E043B_zpsvsvqpi3e.jpg
328D8FAD-F124-484D-A43C-C446920067A4_zps1sklnuu3.jpg
Cleaned up the casting pretty well
E75032E9-FC41-4045-A134-600FD2B0969F_zpsp8gwwwdn.jpg
15576837-A8EE-44C2-AE3A-CDD5501266A7_zpsz8nu3iui.jpg
2A9CE97A-EFB3-476C-B126-144489E17FDE_zps5hneztit.jpg
44BF9ACB-D0F1-43D5-BBE2-71417813DE4C_zps2cunpmmt.jpg

Tiny...
7ABFCF52-6112-4D92-984D-58C4ACDA56A1_zpsgaivc4w7.jpg
620F86BC-96A2-4AA7-9483-EDE672F6E36A_zpspdgtxzhv.jpg

Large..
7D3B20B6-275F-480A-874F-A902AB0B6533_zpskmh6anrs.jpg
E0DCF1A7-1CDD-421F-B74B-022C96246128_zpsg6fcjwfb.jpg
 
Replica front grille badge made by a member on here:
9662529A-6EB8-46BB-81C9-56A689707F3C_zpsg6hminl7.jpgB3860CD1-62F7-409B-8615-E3D4DB6019A2_zpsogjvmv7w.jpg

Some old stock fans that I'll use for now. So ugly though.. why don't we clean them up..
68341BEA-1CB9-4F80-9149-5B1F63F97A08_zpsxxaxfvdk.jpg

Ayyye that looks better
7FCF0095-AB35-48CF-80E0-BC0C37FD6B93_zpsbvxolwf0.jpg

Some other items being prepped for powder
41336B50-7E95-4F8D-B866-B61F5F7598C4_zpso1fqbwav.jpg

Starting to look like a motor again!
E544FC94-53AF-42A4-AC20-2E63B66A1FDA_zpslmwtacsx.jpg
2AAAC293-AD14-4C39-A886-2EF1656D91CE_zps3ayhyxaz.jpg

Being an ohio car.. this whole subframe has seen better days. Lots of rust on it.. bushings are shot. I think I'll just end up going tubular soon. Anyway I cleaned it up pretty well
1D8F8DA1-85AB-4075-8126-6955B271AE7C_zpstcgd4rqw.jpg
74CB6CE5-1DEC-4204-BE43-E055886E6470_zpssfutptoc.jpg

Looks pretty nice in there
DEEFE127-4EE5-4503-A071-302635BA2AD3_zps9pi2crpu.jpg

Beauty shot
A3AAD274-4B63-4F17-AC38-A188EB4B4590_zpsaugusajx.jpg

Picked up link
C043B0AE-2144-4E77-8492-C3E924166FB5_zpsrdun28ta.jpg

Cleaned up the rear calipers and new everything else.
9D4F99AF-7A27-4AEF-901B-75C1A7DAA647_zpszxmzrxbb.jpg6CFD8F3A-BABB-4EF4-80EA-CF7EE4FBF5D1_zpsalg4gday.jpg
4550A409-959C-412C-8904-2809E70BE157_zpsotneb2tf.jpg1B20A7D6-F585-4FC0-A128-FDB992B502D5_zpsbqxkd5gs.jpgC79BC66A-6257-4F72-BD28-18688A937508_zps6a7emmtx.jpgD61D7A85-D322-4DC4-8E4D-F068DBA776A4_zpsfks1bsyv.jpgA54B1183-4C18-48B2-9241-7BCB8A50D647_zpsosmqoli1.jpg
 
Dropped the gas tank to clean it out. Had to rebuild the pump hanger, and run the bulkhead AN fitting because the metal line was broken. Eventually going to use a fuel cell, but once again.. can't afford it right now,and I'm just trying to get it running. It's currently got a 255
CB9E8EDC-8F41-4A0D-AAB1-EE3766F3F494_zpsfsd83hig.jpg
867F722E-C694-484A-96D4-2A43085F95CE_zpsi3nnfsfj.jpg

Few more goodies: Saturn alt with a 1.9" pulley
5984CBF4-69B6-478E-8EB9-EB0A7F3FCC83_zpst5h3j2pr.jpg
76BED75A-D754-42E3-97D9-63FA1933D95D_zpskveatlgr.jpg
27B22F08-73B2-4192-ACD4-F69C909E37ED_zpsshhjn66t.jpgCE2DA611-3D01-4C63-B332-7957242DEF0A_zpslnik9x9c.jpg
5160A47F-9442-4F9D-A72D-AE850CBF91B1_zpsum2blwoh.jpg

Found a really nice way to replace your radiator bushings for super cheap. This was just hanging on the isle at the parts store, and I saw it and thought.. man I bet these would fit perfectly. Turns out they do!
3193F7A9-CB2E-44DB-BCC8-D3574FB483CA_zpsbqvclbe5.jpg
BCD40B90-E0C7-44C6-B900-3E7F1CCB1B93_zpstcwk2ed6.jpg

Just need to powder coat the brackets and they will be good to go

-8 AN from tank to rail with a fuel lab replaceable filter element.

4EDFCB04-B5AC-4130-807A-478AE2094693_zpskchk3kqb.jpg

Various items I needed.. correct starter plate, oem knock sensor, dowels, fuel tank gasket etc..
CA3D4A8F-BAC6-4F95-9F89-CE8F0F84975A_zpsiwwyexyp.jpg
F69C0C57-0293-4725-B299-A5B66F9791B3_zpsxfxanmew.jpg

Alt sits nicely
826145FD-4D55-445A-972C-9ACDF8D7B205_zpsfkwwgur2.jpg

Shoutout to Mike at FIST Racing in Houston for being awesome, and staying late to weld up my IAT bung!
DBD752EC-14AE-4579-B272-DBF4EA20D279_zpso3lzqdtt.jpg
 
And here it is guys: I waited an incredibly long time for this, but it finally showed up and looks fantastic. Made of Docol R8, the main bar is 1 1/4" x .095 wall, and the smaller tubes are 1" x .095 wall.
29C49EC2-6D28-41A9-AFF1-A81F72434559_zpsuk5jgdfg.jpg
BF151E2E-1086-4C69-96C2-DAC3072BCAAB_zpsin0oa8ef.jpg
2D326440-BD01-45A0-AC72-D72083D58BB0_zpsrp9ltyph.jpg
080A0478-5D15-4257-B21A-BD16A02E1EAF_zpscle1wmwe.jpg
0D905239-4FCE-4025-866C-9E3663C70450_zps348owuvz.jpg
57DC5CC6-BF83-4239-9F37-3FEED88C7751_zpsdfasmcm2.jpg
2E49F123-303D-465A-99A9-F2FA787513CE_zpsqn4fnoeg.jpg57E0D95F-62CA-4C1A-AE02-CCC8F5762E50_zpsry8lc6ph.jpg
91815B0C-0D10-4F1C-BAB3-E4307978230D_zpsfacttoqj.jpg
E86883B1-25B3-4AAC-9428-9A6B3E7610E8_zps4nnhlrdc.jpg

First time back on the ground! + 2.5 years of dust
39A905D5-3FF1-41E1-8324-FD157051C116_zpswo8cflqy.jpg
44BEA0D5-061F-474F-AEBF-BCB1B6A22489_zpsbtoa07yh.jpg
1C093656-5900-47F7-8CB2-2D3174999D0C_zpswfv910pm.jpg

I'll get more pics when I can roll the windows up (harness disconnected) and wash it.

Intercooler mounted, still have a bit to do to the bumper to make it fit right.
DCCB0808-602B-493B-9FAB-8184DCB4A6C9_zpsiyvlobw2.jpg

Fresh trans and tcase
C9EB37A7-D57C-4422-9985-80C145A48229_zpsqmwbkrhy.jpg

Picked up a FP manifold
B9ABA118-2132-46A6-B0E8-457182C1FB47_zpsgcxkalo0.jpg

Making a new passenger brake line so that you can't see it.
4565A95E-AB14-4BBF-86B9-356934EFE4A5_zpsd9vbojou.jpg
714CA8C8-EA9A-4F5C-8FCC-5F343155A583_zpsmj6aw0qz.jpg
 
Finally time for the motor to go in! This was THE easiest motor i've ever put in. I'm assuming because of the subframe.. Bolted up in less than 20 minutes.
1D616EF9-3D0D-4667-A332-24D2081A57FC_zpstppeodzm.jpg
693A747E-33E3-47D7-ABEC-404BCACF8A8C_zpsyuivuvkt.jpg
38342EB6-7527-42D7-BC24-8AD9292B6DE5_zpssdbwhdla.jpgAC012786-A970-4795-B74B-895850B7B370_zpsx0oymqmw.jpg
05FE63BD-BCEC-4E1F-BD9C-6B0E51DE2299_zpsgot0vfu2.jpg

I've spent about 25 hours working on the wire harness and making sure it's right. There were so many wires that didn't need to be where they were, or were just going to the wrong place.. They were all twisted together and taped.. So I wen't back and soldered every one I could, and got it back how it needed to be. Tucked everything as best I could, and here it is about 80% finished.

071CFEEB-3482-4122-A322-BFECDB32D231_zps7tkq40tb.jpg

About 90%

F35EEE65-3786-4AA5-8136-FCBA677E3B8B_zpsrunlgaqs.jpg

And here it is, as it sits, 100% wired up. Just need to plug in the radiator fans when they go in.
Please ignore the wrong colored valve cover. That was a failed attempt to match the color. Will be trying again in the next few days.

477735DB-3456-49BA-9EA0-727647F84A0D_zpsbcinamha.jpg

Various pics

E864EA5C-C7F5-45C1-BC24-103C79A43A41_zpsmuioxzml.jpg
9310F0CA-F103-4A8A-A18A-DDFBE670C9BA_zpseijxpk86.jpg

Still need to get the braided clutch line so you can't see the stock one.

Ceramic coated the hotside. Waiting on a small crack to be welded before I coat the manifold.

C5AC9D36-5C4C-41C7-95D2-1F39B3E97D85_zpsgndjapez.jpg

So there it is guys! I'll definitely keep this thread up to date from now on, I had just gotten so far behind, it was becoming an overwhelming task just to sit down and write this.. So I kept putting it off.

I hope to have the car started by the end of the semester, but who knows..
 
Last edited:
Very clean build, looks like it's in good hands, who made that front cross member?
 
Very clean build, looks like it's in good hands, who made that front cross member?

It was made by Joshua Callahan out of Pennsylvania i believe. He's primarily on Facebook. Very, very nice guy but his customer service is extremely lacking. He's just overwhelmed by the work he's got I think. I'm still waiting on the tubular crossmember with the front motor mount.

Love that engine bay, everything looks so much easier to get to. When you get it running can you post some pics of the bay in better lighting?

Thanks dude! And for sure! Still got a few things to do to it, and finals are coming up quicker than I can study for. But once I get it a little further I'll grab some better shots. Garbage iphone camera doesn't like low light.

Very nice. I know the feeling of a long build. Its an amazing feeling to see an engine in the bay after so long. Its like its a dream. Keep up the good work.

As soon as I got it in, I just kept staring at it.. Looking over some of the pictures I took.. It really is a dream come true after so long. Thanks man, now to just get it running :thumb:
 
Next things I will be doing this weekend are shortening the throttle cable, fixing the valve cover color, and hopefully my welder buddy will come over sometime soon and fix my manifold so I can ceramic coat it. At that point the turbo can go on, then the radiator and fans. Then I can move to fluids. Then Do some checks in link and fire it up!
We also have a lot to do on the interior, I don't wanna post the pics until it's done, but we have made some sheet metal cutouts for the interior that my wire harnesses run through, and they cover up all the ugly holes. We also need to cut the rear floor and replace with sheet metal. Cage needs to be welded in. The remaining adhesive from the sound deadener and rattle can black a previous owner sprayed needs to be totally cleaned up. I will be spraying the interior (and hatch jambs) gloss silver to give the interior a clean look. Then finally run the completed harnesses and rivet the panels up.

That's the bulk of the work that needs to be done. Finals are coming up so this work may come to a halt for a moment, but will quickly be resumed once summer starts. I'm extremely motivated to get it running!
 
Support Vendors who Support the DSM Community
Boosted Fabrication ECM Tuning ExtremePSI Fuel Injector Clinic Innovation Products Jacks Transmissions JNZ Tuning Kiggly Racing Morrison Fabrications MyMitsubishiStore.com RixRacing RockAuto RTM Racing STM Tuned

Latest posts

Build Thread Updates

Vendor Updates

Latest Classifieds

Back
Top