The Top DSM Community on the Web

For 1990-1999 Mitsubishi Eclipse, Eagle Talon, Plymouth Laser, and Galant VR-4 Owners. Log in to remove most ads.

Please Support Rix Racing
Please Support ExtremePSI

Street Build Red5.

This site may earn a commission from merchant
affiliate links, including eBay, Amazon, and others.

This site may earn a commission from merchant affiliate links, including eBay, Amazon, and others.

It's very difficult to lap with the suction cup, so I had to use the drill and hose followed by the suction cup.

Also laped with a towel covered in ether to do a final clean up.
The valves are like silent ninjas stalking in the shadows on a cold and windy night.
Lol. They are quite and smooth. :)
20160130_145704.jpg
20160130_153145.jpg
20160130_150048.jpg
20160130_153336.jpg
20160130_170931.jpg
20160130_171010.jpg
 
As an update! Having the IC piping bead rolled, the intake mani welded and pan welded for drain bong!

Still need to install new valves stem seals
( don't know how).
Bought half radiator to combat heat soak from a/c.And lack of room in front of turbo.

Still studying do next week I'll wash block+ brush passages+ crank..
For the block, I grinded it cleaned it primered it then painted it. Left it in the sun.


I had to cough up alot of change to replace my DD. But it has a good resale value and I got it for a great number. So keep an eye out if you want it once my DSM is back on the road.
20160216_160914.jpg
 
I made a syphon gun with random parts, using ( bernoullis principal ).
I bent the tip of the house/ pipe to get in the channels of the oil galleys and found alot of sludge . As you know, each main journal supplies oil to the closest rod journal so if you do it right ether will come out a different journal{see pic #4}, also used brushes to maximise cleaning.
20160225_154026.jpg
20160225_154048.jpg
20160225_154103.jpg
20160225_155206.jpg
20160225_164950.jpg
20160225_171501.jpg
20160225_165219.jpg
 
Last edited:
Cleaned the block using the same method as the crank.
So can see in the pics how oil would act with in the block , by using mineral spirits.


The block was hot tanked and ect.... Even then I still found alot of crud and contaminants this is probably the most important step commonly ignored.
20160227_122847.jpg
20160227_123353.jpg
20160227_125058.jpg
20160227_135245.jpg
20160227_135321.jpg
20160227_135401.jpg
 
Last edited:
Your attention to the cleanliness of the components and block, is fantastic.

We've had one engine fail shortly after rebuilding due to that exact problem.

I hope other members will take the time on their rebuilds as well, and save themselves the heartache of a just-rebuilt failure.

It's the biggest reason why we won't buy a DSM with a "brand new rebuild". We know it's supposed to be a selling point, but it could be a ticking bomb.

Keep up the attention to detail. Your car will be reliable because of it.

Thank you, I agree with you having had so many rebuilt motors spin rods on me
( I didn't build them ) I started to focus on why, I'm sure many out there do this, but I haven't seen it documented before on this site and thought this may help others as well.

I'm surprised this motor is in such good condition with how much crud I removed
( seriously alot of crap ) it's a miracle it did not suffer any damage, then again anyone following will know this has been at most a paper weight...
 
My spring break !! - Not as fun as your's.

Finished the cleaning and prep.
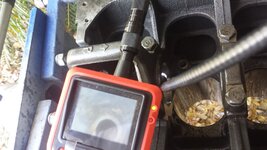
Using a bore scope cam i was able to see inside the arteries of this mechanical heart.
It was very cool to be able to visualize something i have only seen in illustrations.


20160311_135001.jpg
20160311_134408.jpg

Below you see the inside of the oil veins after my first clean up, and i wanted it cleaner so using the wire brushes with the drill i ended up with a polished inside
20160311_134626.jpg
Bad pic, but this is after.
20160311_140813.jpg
20160311_135457.jpg
20160311_140623.jpg
i Also grinder the inside of the block
20160311_145759.jpg
Rod cleaning
20160314_150706.jpg
20160314_150942.jpg
And finally the common oil mod, looks good right?
20160315_162148.jpg


I did alot, just did not take as many pics since i mostly worked alone.
 

Attachments

  • 20160320_151839.jpg
    20160320_151839.jpg
    178.7 KB · Views: 67
  • 20160311_135001.jpg
    20160311_135001.jpg
    204.5 KB · Views: 62
Last edited:
Shorties Assembly

Now that the main surfaces are free of surface rust, the fun begins
20160315_174343.jpg
I zeroed my 0.0001 toys
20160316_135043.jpg
20160316_150003.jpg
20160316_150117.jpg
I re-used my bearings and these are them i have no idea what brand they are, no luck on a search.
20160314_154325.jpg

For all rod and main oil clearacnes i was under 0.002, which i also confirmed using telescopic snap gauges
20160316_164335.jpg
20160317_144802.jpg
20160317_145819.jpg
Jay stopped by to lend a hand and thrust was at 0.004 towards cylinder 1.
20160318_160212.jpg
Final cleaning
20160316_170033.jpg
Only one rod saw 0.006 the rest was maxed at 0.004
20160318_160932.jpg
Here we saw that which makes the grass grow green
20160317_164742.jpg
20160318_154220.jpg
packed the oil pump gears after it passed its checks,
20160319_162826.jpg
machine shop stated it removed 0.005 of the deck, after checking for true TDC i found that the pistons rose past the surface at a max of 0.0025
20160320_140251.jpg


Lastly i set my rings to 0.022 on the top and 0.024 on the bottom
I checked the old rings and found that they were never filled so that is why i believe i had crap compression.
20160316_173805.jpg


Over all im exited with the math, i like that i am on the looser side of clearances, but within reason of course. Since i plan to see this machine excel i'm glad i took the time to go this far. Thanks to all the ones who helped.
 
Last edited:
Since finals are over and I have some time now, I picked up were I left off. I re- threaded the exhaust holes in the head removed the caps to access the oil galleys ( in head ) brushed it , installed new valve seals and reassembled it to check to see if it holds or leaks before I begin dialing in cams.

The intake ports stayed full for about 16 hours zero leaks..

But when I did the same for the exhaust side I saw leaks immediately......

FYI, even with all the trips to the machine shops this engine had seen. It never actually had the valves redone on the exhaust side, that I know.

Basically I'll have to get that taken care of first.....

20160511_164241.jpg
20160511_180251.jpg
20160514_170659.jpg
20160515_123900.jpg
 
Wow, such attention to detail! All of that will pay off and drastically reduce your chances of failure. Amazing work, man. Looking forward to more updates.
 
Wow, such attention to detail! All of that will pay off and drastically reduce your chances of failure. Amazing work, man. Looking forward to more updates.
Thanks bro! Means alot coming from you. Glad your's is back on track. I'm a bit curious to see it with cams as well.. Yeah ""I'm following "".
 
Got in contact with the two shops I use, and could not believe they both refused to work on the exhaust valves, it was all 16 valves or nothing, blown away by the crooked-Ness of them two....

But in a surprising turn off events I found a hidden farm house/machine shop. Happy to accept the job and only charged 50 bucks for cutting seats and angeling valves..
So now I have a new machine shop!!!
And I'm back on track...
20160516_160523.jpg

Ports filled with water, no leaks :)
 
Good machinists are hard to find. Glad you got the head taken care of.

Looking closely at your pictures, I just realized one of your bores was sleeved. I've heard of that being done, but don't think I've actually seen it done on a 4G. I think that's usually because finding a good 4G63 core is cheaper than the machine work. Was the procedure expensive, or no?

BTW, nice G35. Here's mine:
qm45_RM8B8dqEq1b4gvgLjm80QuIzkwlomQ6GHwM3stV5lCdqcS0NzAn1RUG34Opp2NFOtp1eNvAcS1-2xUvYMng=s384-no.jpg

JtNhjWHGmubnRiqICxARY4_v0BGk7ubWS1L7i_B0SND-uBNbruZ3JuMzyYzceKoRPtzambAD34qi5Kuj7qg=w914-h685-no.jpg
 
Great minds think alike!!?
I like your front bumper, I wish mines had brembos.

Well as far as the bore goes, when they were honing one sleeve poped up as the machine was traveling up. As it turns out this block was sleeved... So well ; you could not even tell!!! So a new steel sleeve was 40 dollars and unfortunately boring installing, boring then honing was 100.
So 140+ dollars of unforeseen cost.
Since this wasn't a advertised sleeve for a 4g
That's why you can see this one.

It was only worth it since I had already began machining on the block.

I have more blocks but didn't want to start over. To many blocks get thrown away when they could be salvaged.


Ironically steel sleeves in a iron block are stronger than just a iron block.
 
So you won't find one big before and after pic in this thread. If anything I'm going a little too much into detail. But that's OK.
More litte stuff.

Made threads 1/8npt on head to plug up port to intake from exhaust, to allow for anti lag down the road.

Made threads 1/8 npt on intake for independent line to speed density.
20160517_172316.jpg
20160517_162825.jpg
20160517_170337.jpg
20160517_171316.jpg
 
Using an old MLS 0.051 head gasket I checked for PTV clearance at the ranges of opening and closing. Im glad I checked, turns out I have Alot of room.

Now waiting for new gasket to arrive and final cleaning to officially seal her up.


I made my own solid lifters from a 420 donor head.
Popped in test springs. And mocked/ dialed in cams to check.

This is an just a test..
Final assembly coming soon.

Also bought a 3d printed adapter from a member to degree the engine.
20160519_134944.jpg
20160519_143654.jpg
20160525_124351.jpg
20160525_130923.jpg
20160524_175229.jpg
 
Finished sanding and priming.
I had a pint of sealant I forgot to use when I painted the car.

20160531_164017.jpg
20160603_160157.jpg
20160603_160217.jpg

Good thing I saved paint .
These pics don't come close to showing how good the paint and clear looks.

20160603_182938.jpg
20160603_183007.jpg
20160603_191928.jpg
20160603_193756.jpg


'''gst with psi''---- sorry to bring this up, but it was never the gun it was the regulator...... I bought a new regulator and the paint laid out real nice.
 
Fantastic job leaving nothing to chance. Great photography too, by the way. Most of us appreciate the time and technique to get those great pictures. You'll never regret the time you spent making sure the heart of the beast was perfect.
 
'''gst with psi''---- sorry to bring this up, but it was never the gun it was the regulator...... I bought a new regulator and the paint laid out real nice.

Looks great, man. Glad it ended up working out for you. Your motor is going to look great in that shiny bay.
 
Dialed the cams in.
I did this process 5 times making sure it was perfect.
4 degrees off on intake, 2 on exhaust, to zero to spec.

Marked TTDC on crank for future necessity .
This Chrysler tool is very useful!!
To much of a challenge for one man to build with rockers installed.
20160630_103225.jpg
20160701_153648.jpg
20160629_152336.jpg
 

Similar threads

Support Vendors who Support the DSM Community
Boosted Fabrication ECM Tuning ExtremePSI Fuel Injector Clinic Innovation Products Jacks Transmissions JNZ Tuning Kiggly Racing Morrison Fabrications MyMitsubishiStore.com RixRacing RockAuto RTM Racing STM Tuned

Latest posts

Build Thread Updates

Vendor Updates

Latest Classifieds

Back
Top