The Top DSM Community on the Web

For 1990-1999 Mitsubishi Eclipse, Eagle Talon, Plymouth Laser, and Galant VR-4 Owners. Log in to remove most ads.

Please Support Kiggly Racing
Please Support ExtremePSI

pksystems 1997 Eagle Talon TSi AWD street build

This site may earn a commission from merchant
affiliate links, including eBay, Amazon, and others.

This site may earn a commission from merchant affiliate links, including eBay, Amazon, and others.

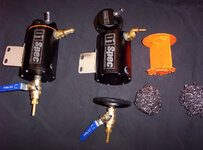
Finished modifying the catch cans. I still need to RTV the lid/bottom on, but that can wait till I figure out the orientation I'd like of the outlet port on the lid.

I was originally planning on leaving both in/outlets on the lid. I couldn't figure out a way to feed the inlet gases into the lower section of the tank, and still be able to get the lid on. I figured I'd use some rubber fuel safe hose, pushed through a hole on the top platform. I cancelled that idea when I rubbed the outer surface of the hose with some acetone (more corrosive then gas) and black color was coming off the hose like crazy. Since this hose would be contained entirely inside the can I figured it would dissolve away eventually.

Since I dropped the idea of a sight tube, I decided to move the inlet to the top sight hole. The inlet fumes are now in a completely different chamber then the outlet. Male 1/4 NPT to Female 3/8 NPT adapter was JBwelded into the top port, after retapping to 1/4 NPT. There is no restriction in this adapter. Bottom hole is sealed up with what is left of the original fitting. Hole in it was filled with JBweld/powdercoated. Also JBWelded into place.

I decided to use Stainless scrubbers as a filter media. They are held higher up in the can with some aluminum dividers. Vapours have to go through the scrubber, down, around the center divider, and back up the other side. Through another SS scrubber, and then through the small holes drilled on the upper platform. Fumes are then in the original lid. The outlet port can be installed on the opposite side of the holes, right next to the inlet, forcing fumes to take another turn. Some of the fumes can get around the center divider. Short of gluing it into the can there was no way around this. The inside of the can has bumps for attaching the lids tho, so I made sure the center section is infront of one, and behind the bump on opposite side. Even if they get around the center divider, they still need to go through the small holes to get to the outlet.

Aluminum, Brass fittings, Stainless scrubbers and water/oil/fuel vapours. Galvanic corrosion waiting to happen. To hopefully stop this, the baffle assembly is JBwelded, then riveted together. Then I coated the rivets with more JBweld. Then I gave it a light sandblast to ensure there was nothing loose that could break off. Acid etched, then powdercoated.

After double checking how the PCV system flows air, I JBwelded some SS mesh over the inside of the intake port. I looks like fumes may be pulled back into the valve cover, and on the off chance that any of my SS scrubbers break apart, I don't want them going into the engine.

Anyway, very easy to see what I've come up with in the picture. :)
catchcan.jpg
 
Last edited:
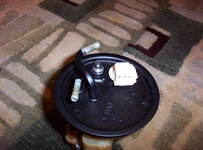
The fuel pump was upgraded at one point by one of the previous owners. The last previous owner mentioned on a different site that he was having fuel issues.

I suspect it was from the kinked hardline on the fuel hanger, probably from when the Walbro 255HP was installed. Maybe it was due to the stock regulator being used with that pump.

The easiest solution I came up with to fix the kinked hardline was to cut it off and get AN-6 fitting welded to the top of the hanger. Then use M14x1.5 inverted flare to AN-6 adapters on both ends of the stock hardline under the car.

fuel_pump.jpg

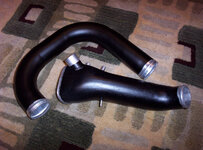
One of the IC pipes was rubbing on a belt, and rubbed ~90% of the way through. I had someone tig a bead over the groove at the same time I had the fuel fitting done. Then powdercoated everything black matte tuscan. The cast aluminum intake looked really good after cleaning so I coated it at the same time. I was hoping it wouldn't outgas, but it did. Scrubbed it down with a stainless scrubber to smooth it out a bit. Good enough, just trying to de-bling all this polished aluminum.

pcoat.jpg

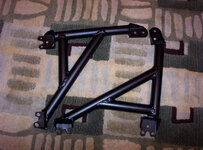
Cleaned up and powdercoated the fender braces. Not pretty, but they were made with steel from the scrap bin.

fenderbraces.jpg
 
Last edited:
Been doing quite a few things, but haven't been taking pictures. Finally snapped some pics for an update.

Finished making new brake hardlines from 3g master to prop valve. Double flare (inverted) on the prop valve, Bubble flare on the master.

Pulled front subframe. Needed breaker bar, impact wrench and lots of liquid wrench to get nuts loose.

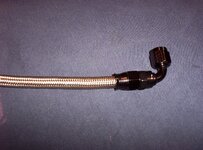
Made new fuel flex line from tank to hardline. I was originally going to use Aeroquip Startlite hose on both my projects for fuel lines. I picked up quite a bit of NOS (New Old stock) line, and a bunch of reusable aeroquip fittings. Assembly of the new line went fine. Went to pressure test it, and my ends were fine. Pinhole air leaks all over the place in the hose. The hose has been sitting in a box in my basement for awhile, but it is new. After doing some searching on the net I've been finding other people having issues with this expensive line. Fuel vapour permeating, and Pinhole leaks. Since I don't want any fuel vapour smell in my garage when this is done, I decided to go straight to teflon. Fragola 6000 PTFE SS hose, with their double swivel fittings. It has carbon added to the liner to dissipate static charge. Should last longer then the car. I will use this same line for all fuel flex lines in engine bay. No leaks when tested.
fuel hose.jpg

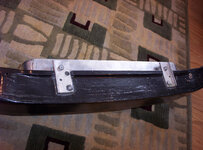
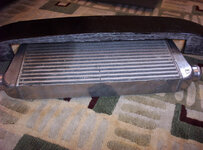
Originally the Punishment Racing FMIC was mounted on the PR aluminum bar upside down, so it was hanging lower then the front bumper. The PO seemed to have the car riding higher then OEM height, and yet the bottom edges of the front bumper are scraped to hell. I have no idea how the FMIC is still in one piece. I picked up a crash bumper from the local wreckers. Unlike most of the pics I see of people modifying them to make room for the front mount, I wanted it to have some material left. In all honesty, this front mount is WAY to big for the 2GB Talon front bumper. It might be okay for the 2GB Eclipse bumper with the extra bumper section removed, but I'm not cutting more bumper cover then I have too. Here is what I came up with. Most of the FG is still there, and once I find/make some ducting the intercooler should see plenty of air when moving.

crashbumper01.jpg
crashbumper02.jpg

The previous placement of the intercooler had the inlets behind the lower section of bumper, so they were hard to see. My new position has moved them right up into the middle of the opening. This car did leave the factory with foglights which would hide the piping nicely, if they infact fit infront of the intercooler. I doubt they would. I came up with a solution, that will hide the piping, add more lights, and once sealed to the sides of intercooler, help channel air through the cooler. 2GB Talon foglights are fairly rare. After doing some searching on the net, here is what I came up with.

My lenses need to be something I can trim/texture in my garage. Lexan/polycarbonate it is. Polycarbonate doesn't like the heat from halogen bulbs. LED lights run cool, compact, and lately bright enough to use for more then accent lighting. I picked up some small LED motorcycle headlight/spotlight/foglight/whatever. They are universal, with 2 brightness settings. I couldn't really tell the difference when testing.

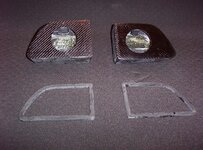
The OEM housings are sort of a triangular shape that matches the opening in the bumper. The housing is basically a water proof box that lets you aim the light. The LED's I bought are already weather resistant. So I need a box shaped to the bumper, that a small LED light can mount in. Easiest thing I could come up with is lost core molding. Shape styrofoam to match the bumper, and still fit infront/around the intercooler. Sand it down so it's a bit smaller then the area it has to sit in.

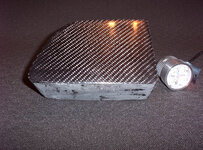
Coated it with some latex paint to help seal the styrofoam. I now need to make the actual housing. Carbon fiber offcuts from other projects is my material of choice. I'm basically doing several CF overlays over the styrofoam plug. 3m Super77, carbon, epoxy, sand, repeat. I have probably 6 layers of twill CF on most sections of the housings. I have sanded through some layers, so I will be adding some epoxy to the inside corners, once the styrofoam is dissolved out of the plug.

foglights.jpg

This is no where near finished. I need to make a bezel and bond it to the perimeter of the housing. Then the part will get wrapped in more carbon to make the bezel look like it was originally part of the housing. Then, hole saw (probably 3.5") to the center of the polished housing face. I polished it, because it will be partially visible through the lexan lense, and would be almost impossible to polish after the bezel is added. The inner vertical surface will also be polished, once it is done.

The housing gets bolted to crash bumper through the front hole. The LED light gets installed/bolted to housing through front hole. Adjustment can be made with washers and turning the LED mount, before tightening the nuts. 3/16" thick lexan lense gets cut to fit just inside the bezel, and it will bolt to the housing from the front. Similar to how the signal/taillight housings are on my 912 project. I will use a piece of neoprene tool box liner as a gasket.

To keep with the black/orange, I have orange tint for the foglights. Side markers will be also be left orange. :)

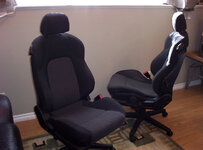
Finally got the 03 Tiburon cloth seats out of my way. These are the cloth version of what is going in the car. My new favourite seats for gaming.

chairs.jpg
 
Last edited:
Since I had a pile of Carbon Fiber offcuts from other projects, I decided to put them to some use. I was mixing up epoxy while doing my foglight housings anyway.

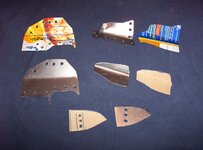
The thin metal bracket that holds the top-center of the bumper cover in place. Simple enough shape. Fairly flat piece that has a flange on each side. OEM part# MB908399.

I didn't want to make a mold for something like this, so I waxed the original bracket, and did an overlay. Then popped the part off the metal bracket, and finished it like any overlay.

I wasn't doing this to save weight, just for looks, but I did manage to save some weight. What is the saying? Ounces make pounds.

Original metal bracket 4.4oz. New CF bracket 2.4oz. :) (I could just drop the metal bracket and use washers to save even more)

cf_bracket.jpg

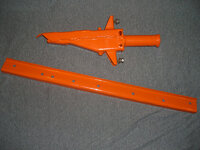
Front tow hook mount is done. Still needs to be cleaned/powdercoated. This is for pulling the car out of the ditch, or onto a flatbed while its on wheels. Not for a running start yank out of a gravel pit, or pulling the car out of the ditch on it's roof. :p

Someone wanted to see how I've made it so I'll post it here. I had to make some changes compared to the rear mount since the brackets are different. The rear mount on my car is stronger.

Here's how I made them. These are through bumper tow hooks, so I had to take a holesaw to the crash bumper, and foam. Eventually I'll do the same to the bumper cover.

Take holesaw to center of the steel bumper reinforcement bracket that matches DOM tubing size.
I have a 3/8" steel pin that goes through the DOM tubing and through the outer sections of the bumper bracket. The pin is welded in place top & bottom.

On the rear mount my tubing fit inside the rear tubing section, so I put the pin there. It's only 2" long. The front mount has a much smaller inside diameter on the tubing portion of the bracket, so I had to move the pin further out. It's like 4" long which is much weaker. DOM tubing is then welded on the front of the bumper bracket. I welded three nuts together to make a threaded portion, and did several (~16) plug welds through the DOM into the nuts. The nuts were already a fairly tight fit inside the DOM tubing after welding them together. I then welded a thick washer on the end of tubing.

The visible from outside of the bumper portion are 1/2" thick steel brackets cut on a waterjet that slip over the head of a 1/2" bolt. They are welded to the bolts. The waterjet cut brackets were made to accept 2 Tonne rated shackles.
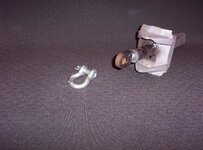
Here is the front mount and shackle. Welds would have looked alot better if my ground wire didn't have a hidden fray, and keep cutting out in the middle of welds. Finally figured out what was wrong when I couldn't get any spark putting the mig gun right on the clamp.

tow_bracket.jpg

Here is an old pic of my rear tow hook mount. You can see the steel pin in this. The lower bracket is an aluminum lower rear bumper cover support bracket (2GB Talon) since my steel one was rusted to nothing.
rear_tow.jpg

Here' is another old pic of the threaded tow hook portion.

tow_hook.jpg
 
Last edited:
Cut the holes in foglight housings. Melted out the styrofoam with acetone. Bezels are close enough to wrap in CF. Then they will get bonded to the housings.
bezels.jpg

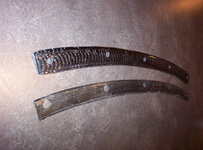
The original steel lower bumper cover support bracket is pretty much trash. Most of the bolts sheered off when being removed. It is bent and quite rusty.

I had some 1" stainless steel in my scrap pile, so I remade it in SS. Tubing was sliced in half to give me 2 U-shaped pieces. Then I sliced it with pie cuts and bent it to the right shape before welding it back together. I did so much welding on the part, I'm sure it will rust, so it will be getting painted. I extended it back towards the wheel well. It makes the lower edge of the bumper much stiffer. I added some extensions for a splitter/skid plate.

splitter.jpg

I pulled some splitter material out of the local construction recycling bin (plywood) and started trying to make something that looks good. The 2GB Talon front bumper curves under on most of the bottom edge, so I don't know if it's possible to make a splitter look good with this bumper. The side sections of the splitter are only ~1.5" wider then the top of the bumper, but it's like 5" from the bottom edge. Splitters seem to always look good on Eclipse bumpers, so I'm assuming they are more square to the ground. The splitter may need material added to fill in the gap caused by the curve, which may change the entire look of the bumper. We'll see what I end up doing. I may just cut it off flush and make a skid plate to help protect all the coolers. Whatever I do, the plywood will be wrapped in CF.

The bottom edges of the bumper are carved up pretty bad, so it will need a bit of bodywork. The Eagle logo is missing a chunk aswell. I might pull a mold off my ESi and remake the logo in carbon.
 
Last edited:
Back to rust repairs.

I didn't really document the rocker repairs, other then a couple before and after shots. Since so many have asked, I figured I'd take more pics while I fix the front.

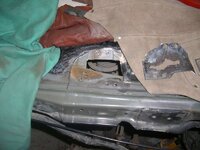
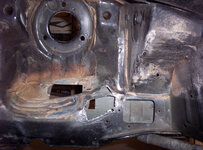
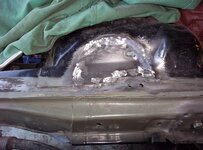
My front towers weren't that bad. I've seen pictures of other cars that are much worse then mine. Drivers side has a perforation from the top, and in a couple layers on the bottom. Passenger side has no visible rust on the top, but very similar bottom rust.

I only wanted to cut out the rotted steel, so I used small cut off discs on a rotary tool. Angle grinder with 4.5" ultra thin disc is my usual go to for fast rust removal, but there isn't much room to maneuver in the wheel well. The 912 project was on a rotisserie when I did the rust repair so it was easy to get to these areas.

First, I cleaned the entire wheel well. 18 years of crud was built up in the wheel well. Scrubbed it down dry to remove any dry mud, then started coating it with several coats of Mean Green Degreaser (Pretty sure it's a knockoff of Simple Green) Spray it on, scrub everything, rinse, repeat till the water running off starts looking clean. The entire wheel well will get cleaned again with an extra acid etch cleaning after the new metal is welded in. You can see factory seam sealer in some places. Every seam will be coated when I'm done. Then paint/undercoat ..etc..

wheel_well.jpg
-----------------------------------
Top side.

surgery1399163278-jpg.254036.jpg
There is only a single layer of steel in this one area. Everything I cut out here is in the picture. The straight edge above the suspension in the pic was not cut. It is a thicker main plate for the strut tower. The bottom left section of that area has a pocket that can trap moisture, and start rusting. There is a splash shield in this area, but the water found a way in. There was little, or no seam sealer in this area.

drivers_tower02.jpg
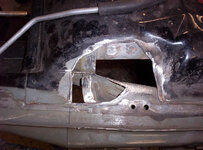
Cut out the rotted area under the top layer. Main beam will get patched, then I will make another patch that goes over that.


-----------------------------------

Bottom side.

drivers_tower03.jpg
The only steel removed in this is the single layer from the top side. You can see some of the oem seam sealer around the bottom of the rusted area, but there didn't appear to be any near the top of the corner.

drivers_tower01.jpg
All rot cut out on the bottom. This will need a patch to the main beam, and then a patch that overlaps around the corner area.
 
Last edited:
Epic build. Been following this for a while. Very inspiring. Love the awd for our long Canadian winters
 
Made templates of all the holes with cardboard. Traced the cardboard shape on to 18ga steel. Cut out the pieces, and transfer any bends onto the steel. I used a bench vice and a hammer to get the bends looking right. Drilled spot weld holes similar to OEM, except I like to go overboard :)

Ready to weld.

patches.jpg
 
Last edited:
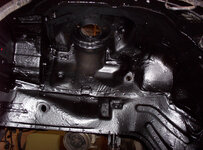
Welded in the inner patch panels (1 top, 1 bottom) and ground the welds smooth.

Welded in the outer, overlapping patch panels (1 top, 1 bottom) and ground the welds smooth.

rust.jpg

Cleaned wheel well with acid etch cleaner. Everything will get seam sealed once it's dry.
 
Seam sealed all my newly welded sections, and over most of the factory seam sealer. 3 light coats brushed over all the seams. I made sure the area that caused the rust was sealed up good.

I sprayed some acid etch cleaner into the hollow sections of the strut tower, and let them dry. I then used an extension wand in spray cans of rust paint to coat the inside surfaces of the towers. 2 coats with a couple hours of drying time in between. The paint pours out of the drain holes.

Brushed rust paint over any areas where you could still see factory green paint.

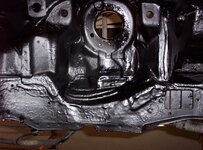
Sprayed paintable rocker guard over the entire wheel well. 3 coats. Let it dry overnight. Sprayed several coats of asphalt based undercoat over the entire wheel well, making sure the repaired sections were thoroughly coated.

Cleaned and seam sealed the edge that runs down the strut tower all the way to the fire wall. Some of the oem sealer was brittle and falling off near the windshield cowl/wiper motor area. I scraped it off to reveal some surface rust. I scraped the rust off with a dental pick and cleaned with acid etch cleaner. (several times till it was clean metal) Applied new seam sealer, and eventually coated the top of the whole tower with rust paint.

dr_coated02.jpg
dr_coated01.jpg
 
Last edited:
Passenger side rust repair started.

Top of the tower looks great. No visible rust anywhere. Too bad there is some pitting from rust on the bottom side. I will probably slice out a small section of the top.

pass_rust01.jpg

The bottom side actually looked worse then the drivers. There is several small areas where the seam sealer or undercoat was damaged and there is a light surface rust. No biggie, wire wheeled it off and treated with acid etch.

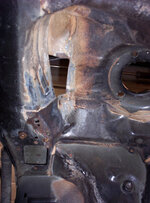
Here is the same area that has caused issues on both sides. The corner on the front of the tower. It wasn't sealed good enough, and the water gets in behind the seams of the panel. Then it rots up into the single top layer that looks good (on this side), and around the edges of the lower panel I've already cut out. Almost identicle to the drivers side.

pass_rust.jpg
 
Decided to cut out the same size top section so I could actually get to the rust between the panels. I could have cut it smaller, but I wanted to add some extra spot welds. There was only 5 (2 on outer edge, 3 closer to tower) on the piece of metal I removed.

I added some coloured sections to the pic.

Yellow is a section I removed on this side that was fine on drivers side.
Red is the two areas that had minor surface rust only. It ground down to clean metal quickly.

pass_rust.jpg
 
AC line will stay over the tower. My AC system is pressurized, and if possible I'd like to not need a recharge. I'm working around the compressor hanging by some wire. There is some surface rust in the radiator support behind the AC condensor. I don't know if there is enough flex in the hardline (the one running over the tower) to move it out of the way to treat the surface rust, so I might end up draining the system.

I have all the ps fittings/lines. I will be making the new lines when the front subframe gets reinstalled, which should be in the next few weeks. Front rust repairs are almost finished. The lines will secure under the drivers side rail. I will probably make some sort of a shield to protect the lines from road debris. U-channel shape made out of aluminum to hold the lines/protect them, secured to the splash shield bolt holes.
 
Finished passenger side rust repairs. Didn't take any pics. It looks identical to the drivers side. Seam sealed/paintable rocker guard/asphalt undercoat.

Looks like the car battery leaked some acid down the passenger side frame rail. 2" area on top, and several runs down the side where there is no paint, just surface rust.
I wire wheeled off the surface rust and treated it several times with acid etch cleaner. Looks clean. The sides of the rails will be painted/rocker guard coated. The drivers side has some paint scraped off from 1 of the 3+ times the engine has been pulled.

Put a flexible plastic tube into my air compressor blow gun, and cleaned out the hollow cavities on the lower sections of the car. I must have taken 5+ pounds of rocks/gravel out of the car. I don't know how they got in there, but there was some 3/4" round rocks inside the frame.

Cleaned up the last section of the floor that wraps around to the firewall and the rest of the engine bay. Seam sealed all top/exposed seams in the engine bay/firewall. Lower open seams/drain holes have been left open.

Soaked the front subframe and center member in a large tub of Awesome cleaner. Rinsed/repeated, followed by a rinse with acid etch cleaner. Ready to paint the insides, the same time I coat the lower hollow sections of the front towers. I will be using Eastwood internal frame coating on these parts. The repaired areas on the towers that I had opened looked fine (no corrosion). The front lower corners (near the jack point) had a decent amount of surface rust, and I'm pretty positive there is some rust lurking in the areas above this. Short of building a new car there isn't any other way to treat this.

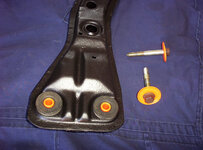
I was going to replace the front subframe bushings with new OEM. I purchased them all from the stealership a year ago. The bushings in the subframe aren't cracked or anything, so I will skip all the work to replace them. The rear subframe bushings were also in excellent condition, but I was upgrading to aftermarket urethane bushings while I had it apart. I know there is front solid aluminum bushings, but I wouldn't call those bushings. :p
 
Last edited:
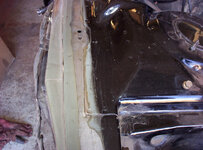
Painted the insides of the engine bay frame, and front sub/centermembers.

Rockerguarded, then undercoated the bottom section of the firewall/frame rails.

Front subframe and centermember got a couple coats of rust paint, followed by 2 coats of rockerguard. Front subframe reinstalled.

ABS delete hardlines all installed. They are very tight, but they fit.

Cleaned up and powdercoated subframe washers/brake line retaining clips.

Cleaned and reinstalled steering rack.

M6 & M8 stainless fasteners have been ordered for everything on the front end that doesn't need high strength.

subframe.jpg

centermember.jpg
 
Last edited:
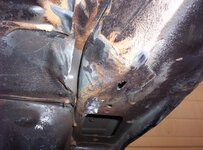
Front suspension.

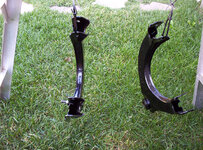
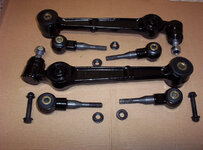
I picked up new upper, and lower (straight) lateral arms. The curved compression arms were dirty/rusty, but the bushings/ball joints looked good.

I am using energy suspension front bushings, so everything that will be replaced I pressed out.

The curved arms I gave a scrub with a wire brush, cleaned them several times with awesome/acid etch cleaner, and gave them a couple good coats of rust paint.
The new arms got the same treatment minus the wire brush. I would have liked to powdercoat them, but the arms have bushings with no replacement bushings, so paint will have to do.

sus03.jpg
sus02.jpg

The new upper arms were Moog, and I'm sort of annoyed with a cost cutting measure they used. The bushing/bolt section got a black oxide finish on them. OEM were zinc plated. The OEM parts that are 18 years old, still have most of the yellow zinc plating on the inside chassis/engine bay side. The zinc on the round section that holds the bushings was gone, and the parts were rusty. No biggie, zinc only lasts so long, especially when it's getting splashed with road salt water. The bolts that go through the bushings were also zinc plated. The Moog bolts are once again black oxide. Black oxide doesn't offer any corrosion protection at all. It's basically a cosmetic finish that they put some oil over to give it a tiny bit of protection against the elements. I wrapped the threaded portion of the bushing holders in electrical tape, (to try and save some of the black oxide) sandblasted the lower section, cleaned it and powdercoated it. Most of the black oxide wiped right off of upper section when I was cleaning them, and when I was done powdercoating, there was nothing left. Bare mild steel. I guess I will put some anti-seize on the upper threads. The new 10.9 bolts that go through the bushing will start rusting after one trip through rain.

Greased up and pressed in the new ES bushings.

sus01.jpg
 
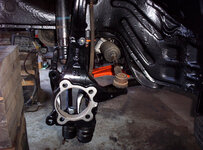
Reinstalled front suspension.

I'm going to reuse most of the suspension bolts. I was considering ordering new ones, but was shocked when I saw the prices of OEM bolts. The lower curved arm bolts are a bit pitted, so they will be replaced. The rest don't look pretty, but they are still good. New outer tie-rod ends and wheel bearings are waiting to be installed. Suspension is only loosely bolted in place. I will have to pull out the shocks next week when my Koni's arrive. :hellyeah:

Koni yellows with ground control coilover kit. RTM spherical upper perches for the front. I don't plan on lowering the car too much (~1"), so I don't think I'll need camber kits. The oem shocks still seem fine, but I figure I've replaced almost everything else on the car, might aswell do these while I have the car apart. I will make/buy some coilover socks to protect the sleeves in the winter.

susp01.jpg

susp02.jpg

Stainless hardware has arrived. Button head M6 & M8 screws. I ordered enough to replace all the OEM4 bolts on the front end.

For my powersteering semi-tuck I will be copying this thread:
http://www.dsmtuners.com/threads/power-steering-tuck.485159/

I am using Aeroquip teflon lined hose with steel ends, instead of hardlines. It should fit similar, altho I plan on keeping my A/C, so I'll have to see how much room I have behind the engine. I don't think it will be an issue as long as I secure the lines good, so nothing rubs. The new high-pressure line has been made. The low pressure line I'm fairly certain of the length/ends, but it all depends where I mount my new powersteering cooler.
 
Last edited:
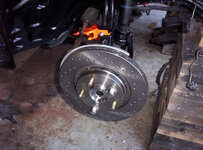
Test fitted TSi AWD brake rotor splash shield behind Outlander rotors.

They fit!

rotor.jpg

Sort of. :p

They'd probably be touching if they were powdercoated. I will have to do some cutting/welding to gain a bit more room.
 
I used some flathead screwdrivers to pry on the rotor splash shields. Sortof like a ghetto fender roller. I have approximately 1/4" all the way around the edge of the rotor now. It's a bit dented, but it will work.

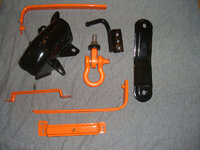
Cleaned them up and powdercoated them gloss black.

Cleaned up a bunch of other coilover parts.

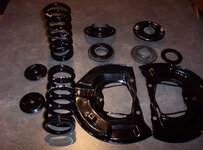
The coating on my Eibach springs was chipping off, and there was some rust on the ends. I stripped them in some industrial strength paint stripper, hosed them off, and then gave them a soak in Eastwood Fast Etch. It did a pretty decent job dissolving away the rust. I then gave them a sandblast to finish cleaning them up. The springs were originally marked with length/size/spring rate, and I wanted to permanently mark them after they had fresh powdercoat. I shot them with gloss black, put them oven till the powder flowed out, then pulled them and let them cool. Once cool I marked them with silver sharpie permanent marker. Then back into the oven to get them back up to coating temp. Couple minutes later I pulled them out, and gave them a shot of gloss clear powdercoat. This is the first time I've used clear powdercoat, and it looks much much deeper then just the gloss black.

parts.jpg

My color scheme is taking a hit with the coilovers. I don't want to try stripping/re-anodizing my coilover sleeves, and koni yellows are infact yellow. :)

Yellow shocks, red sleeves, gold perches. I figured I would do everything else black.

All parts for the front coilovers are ready to bolt on once the koni's get here. I still need to find some helper springs/spacers for the rears, but everything else for the rear is ready.
 
Last edited:
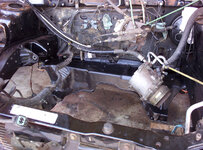
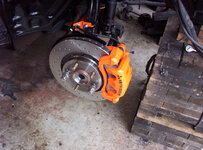
Reinstalled rotor splash shields, wheel bearings, rotors, calipers.

Installed new black SS braided brake lines, new outer tie rods. I was going to use new brake line retainer clips, which I thought were pretty universal, but apparently they are not. (To small) Old ones reused.

brakes01.jpg

I would have gotten the pads in aswell, if I could find the pad retainer clips. I searched every box of new parts, the entire car, garage, including a metal pan full of old bolts and my old caliper brackets. Nothing.

Figured meh... I'll find them later and put everything else on the car. Then I thought... wait a minute, they install on the caliper brackets, which I replaced with new Outlander parts..... Yes, I must have looked right at them when I was searching. They are soaking in cleaner. :)

brakes02.jpg

Started stripping rear coilover springs.
 
Koni's have arrived.

Started putting them together. I have 500 front, and 300 rear springs, which sounds like a decent spring rate for street use. I am using a used Ground Control coilover sleeve kit, paired with an upper spring perch, and RTM Racing spherical upper hats for the fronts. Rears will use the GC rubber bushing/metal ring/oem upper hats. It sounds like helper springs are needed on the rear, but not on the fronts, so I still need to find some parts for the rear. I didn't notice that bolts for the spherical hats to the towers weren't included, so I'll have to grab those locally. Bump stops will be properly installed when I grease up the sleeve perches for final installation.

I would like to use thrust bearings to keep the coilovers quiet, but it sounds like one drive in the rain, and they will be pretty thrashed. I noticed a couple companies selling thrust "sheets" which are basically a large metal ring, and a plastic ring (usually HDPE). HDPE is what most plastic bottles/buckets...etc...etc... are made of. After checking out the prices of these thrust sheets, I figured I would make some. The price of shipping one of those thrust sheet kits costs more then I think they are worth. Some coilover kits come with plastic rings that are used to let the coil spring spin freely.

HDPE is "Self Lubricating and Low Co-Efficient of Friction" Sounds like what I'm looking for. A bearing material that shouldn't gum up/rust in road salt/water, and slide easily against another piece.

Found some smooth bottom heavy weight plastic pails that were used to hold mineral oil at work. Cut some rings out of the bottoms with a jigsaw/holesaw. They are 2.8mm thick. I want to use 2 layers, on the bottom spring perch, but I think they are too thick, so I may try to find some thinner plastic to make another layer. I can't use them on the top perch, as the lip is fairly small. They are the grey rings in the picture. Time to make 4 rings ~5 minutes.

Anyone think there is any issue using 2 layers of hard plastic as bearings? Even if it somehow wears out, I can make a new set every year for nothing. I'm sure it's better then no bearing, which is how alot of people run these.

I will be making coilover socks/covers to protect the assembly in winter.
Something similar to this: http://forums.nasioc.com/forums/showthread.php?t=2330815


dgkonis.jpg

Scrubbed most of the brake dust/grime off of the brake pad retainers. Installed front retainers/pads. PBR Ceramic.
 
Last edited:
Front coilovers installed.

koni.jpg

Note to anyone using DG style upper mounts. They are tapped for M10x1.5 bolts. OEM is M10x1.25.

I used 30mm length 10.9 grade hex head bolts, with a washer on each side. They stick up about the same as the OEM shock studs. Unfortunately, all they had was black oxide, so the wheel well side should match all my Moog bolts after they get wet. :)
 
Last edited:
Its definitely the most beautiful talon build I've seen so far!! Keep up the good work man!
 
Support Vendors who Support the DSM Community
Boosted Fabrication ECM Tuning ExtremePSI Fuel Injector Clinic Innovation Products Jacks Transmissions JNZ Tuning Kiggly Racing Morrison Fabrications MyMitsubishiStore.com RixRacing RockAuto RTM Racing STM Tuned

Latest posts

Build Thread Updates

Vendor Updates

Latest Classifieds

Back
Top