The Top DSM Community on the Web

For 1990-1999 Mitsubishi Eclipse, Eagle Talon, Plymouth Laser, and Galant VR-4 Owners. Log in to remove most ads.

Please Support JNZ Tuning
Please Support STM Tuned

93 eclipse 4g37 turbo.

This site may earn a commission from merchant
affiliate links, including eBay, Amazon, and others.

This site may earn a commission from merchant affiliate links, including eBay, Amazon, and others.

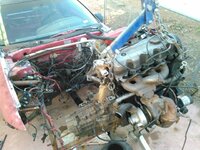
Not exactly how i drew it out.
IMG_20140119_165836_zps69861d6a.jpg


Reused and modified the old square tube front end since it had my front fender supports and light mounts already.
IMG_20140121_161247_zps443370e3.jpg

WTF

A few decent bumps and that motor is on the ground. Thanks for proving me wrong, for saying you could save this build unlike the rwd guy...
 
Hey Mischif I have a question for you. I'm doing a transmission swap. I'm going from a 1993 automatic that took a crap to a 1992 manual trany. I would like to know what you did for the clutch hydraulic pump assembly. My 93 doesn't have the hole for the pump. I have everything ready. Both transmissions are out and I'm ready for the manual to go in. I would think that you would want to support it with something stiff like and 1/8" steal plate on the back so that nothing will crack. Also should I use stubs like the manufacture does or just use bolts and nuts with lock washers?
Thank you!!! :confused:
The manual transmission is a bolt on affair when switching from auto. The bolts that held the auto to the block will work for the manual. Use the manual transmission mount and it will bolt right up. Make sure you remove the pilot bearing on the crank(If it has one) before you install the flywheel.

WTF

A few decent bumps and that motor is on the ground. Thanks for proving me wrong, for saying you could save this build unlike the rwd guy...

The motor sill attaches to the original mounting spots, so on the extremely rare chance that every single point on my front end brakes at once, the motor will still be were its always been.

Got some more stuff done today.

Headlights are on. Ic piping is hooked up. Brake booster is back up. Safc neo is back in. Suspension is back on. Tires are on. Cross members bolted up. Filled up cooling system with water. Spark plug wires are back on.

So i decided to hook the battery up and make sure everything i have hooked up is working. Safc fired up. Starter wasn't doing anything. Hooked the grounds and power up for that cause i forgot those. Head lights work. Parking lights and dash didn't work, and only had a left turn signal. right turn signal turned on the flashers and made the left dash signal and all dash lights blink. Hazard button did the same thing. So i started checking everything, fearing that i might have eliminated a wire i should of kept. Since i basically pulled pins/wires of everything i didn't need. After almost 3 hours i found the problem. I crossed two wires when i depinned one of the chassis harness so i could pull it out of the fire wall sleeve. Its a good thing i had an intact one laying around to compare too. Everything works so far...

Still need to mount and plug the ecu back in. hook up my intake pipe and maf. Hook up my tps adapter. Put the stereo back in. Put the clamps on my ic pipes. Add clutch fluid and bleed it. Add transmission fluid. Add a quart of oil. Hook up my fans. Add some of the grounds i didn't put on yet. Drop the front end back on the ground and tighten the lug and axle nuts. Then its vroom vroom time.
 
you should make a strut tower brace that ties the top of the 2 strut towers together. if it would have been me i would have either tube chassied the entire front end or got a front clip off of a rear-ended car and welded that on. but really it doesnt look that bad.

something you could do just so you can find the settings that work best for your welder. take a scrap piece of plate and weld it to a scrap tube. then set it tube side down and hammer on the plate like you are trying to hammer it into the ground. when the weld shears you will be able to inspect penetration and brittleness at the joint. then you can adjust your speed and distance from the puddle. since your welder doesnt have real amp adjustment.

i would probably due some corner gussets out of small chunks of round tube. and your mix of square and round looks a little ghetto. but really i live in a farm town, some of the stuff i have seen driving around on the public roads makes this look like a factory job.
 
Do you know anyone that has a pipe bender or access to one? Im sure you know the weakest point of any structures a weld no matter how good it is, keep practicing like zedicus said. Dont know if I missed it earlier in the build thread but what welder you running?
Once again love the dedication man, may not agree with everything but im still hooked on this thread.
remember you can only get better with time. All the frame work you've fabricated can always be undone if need be with a little time and effort.:thumb:
 
So i decided to fix my wideband gauge, sensor, and my broken down pipe. Since im pretty sure the tune is going to need adjusting.

My gauge blew out when my downpipe broke off and was hanging on by the sensor. The power for the sensor broke, shorted out and blew the gauge.

First i took the sensor apart and found the problem. The lead in blue melted, its path ran between the two terminals in red.
blownaemrepair_zps2a6f5939.jpg


So i soldered a wire onto each of the terminals. Drilled a hole in the back of the housing and ran the wires out.
IMG_20140216_192642_zps63c1a6f8.jpg


hooked up a 2 amp fuse to the wires. Hopefully if something happens again to cause it to short out, it will blow the fuse and not fry anything else in the gauge.
IMG_20140216_182015_zpsc800af5a.jpg

Tested it, and that fixed that.

Now with the sensor, the power wire broke right at the butt end of it. So i'm going to have to cut into the sensors tail end. Wound up cutting a little extra piece just to see what was beneath the white thing. Pie cut the white thing holding the wire.
IMG_20140217_153410_zps1737ca87.jpg


Soldered it back together
IMG_20140217_154439_zps0fd33d30.jpg


Tapped it back up with electrical tape. Also used some metallic hvac tape i had laying around to tape the entire thing up.
IMG_20140217_154822_zps60f03e65.jpg


Tested and works good. So put that back in and installed the computer and finished up everything i had left to do.

Time to fire it up. So i go for it and it just cranks and cranks and cranks. Doesn't even try to fire. So i start double checking everything. Try it again and same deal. Then i notice that my cel isn't coming on at all. So im thinking my computer might have died in its hibernation. I'm getting fuel, and i have spark. So i pull the computer and open it up, looks good. Check the harness and grounds. Make sure the mpi fuse is good. Everything looks fine even tho the cel wont come on during the first key on. So only thing i can think of is maybe i didn't put the wires on the dizzy cap right. So i line up the crank and pull the cap off. Rotor is pointing straight down. I had hooked them up with stright up being #1, so i fixed that. Cranked the key and boom, its alive again.

Took her for a spin a little while ago. Definitely needs to be retuned. Was going to go cruise it around but right when i was about to get on the freeway my wastegate actuator rod feel off the flapper. Yea i forgot to put the pin back in it. So i just came back home.
 
Okay well had a some bad luck the other night with it. Was on the other side of town cruising and im not sure if i didn't tighten it down good enough or it just vibrated loose but my tranny mount bolts worked themselves out. So my engine was jerking up and down everytime i engaged/disengaged the clutch. That was fun, driving home that way. Made sure to tighten the crap out of the bolts this time. Between that, bottoming out pretty good twice in the front , and all the bumps the new front end is solid.

Steering wheel was vibrating alot. Replaced my passenger side inner tie rod, and had that rotor recut. Now its nice and smooth.

Also got one of my fender braces made.
IMG_20140225_171540_zps577ee086.jpg


With just the one brace on, the car feels ALOT more stiff when turning. I think i just became a fan of fender braces. Will try and get the other side done this week sometime.
 
I got everything together today and my car is having a really hard time starting. It takes about 10 times before it begins to try. Then it takes about another 6 times before it finally runs. Does anyone have any clues as to what the problem is? I've checked the MAF and it's working. I also changed the spark plugs to Bosche Platnum plus plugs from the Nkg ones.
 
I changed the temp sensors and everything worked out. Car is done now its onto the engine rebuild!
 
Been a while since i posted some updates. Changed some stuff around, just never got around to putting it up.

Driverside fender brace was finished.
IMG_20140711_164748_zpsa09fed9b.jpg

After driving around with both braces on for a while now, they definitely make a big difference. The steering wheel feels alot tighter(as in no play) and its a bit harder to turn at a dead stop (manual rack). As for taking corners, it feels like there's less weight transfer side to side during turn in. Once it's set it feels alot more stable throughout the corner. Leaves me thinking i should of added these years ago.

My wideband sensor finally went out as well. Picked up one from autozone for 49.99 plus tax with one year warrenty. The sensor i went with is Bosch 07014. Its all over the net that you can use this one with aem. The plug is different but still works. So if you want a visual on what that is here you go.

IMG_20140712_200303_zps09662117.jpg

Just remove the gray clip from the gauge harness end and it slides right into the new sensor harness.
Once you push it all the way down its very secure, wont have to worry about it coming undone. Could use some rtv or die eletric grease to keep water from getting in it. Also you have to make sure you plug it in, in the correct orientation.


Also wound up changing my head and intake setup. I swapped heads hoping to fix my oil leak into the combustion chamber issues. If you've followed the thread you'll know all my spark plugs eventually started to miss due to being wet with oil. Had to use anti foulers on them. Compression test always came out good. Leak down test always looked acceptable as well. So i was left at either bad oil rings on the piston or leaking valve guides. Head swap it is.

Let it sit for a little over a week so all the oil would drain out of the head before i pulled it off.
IMG_20140504_174655_zps858a4b2c.jpg

I was actually pretty excited to take the head off to see how the pistons looked to be holding up after 2 years of boost.Once the head came off i saw the problem. The entire front half of the block was covered in oil underneath the head gasket, so it had been leaking. That's great news since it means my oil rings are okay. And now for what i consider to be icing on the cake with a cherry on top. I didn't clean the pistons up at all, just wiped down the block deck.
IMG_20140504_191315_zps0e454ffe.jpg

The cleanest pistons tops i've ever seen out of all the 4g37 motors i've opened up. The tops look perfect, not a single sign of detontation or anything. Couldn't be happier with how its handled 20lbs on the 14b.

So threw on a another head and switched to a p&p stock intake manifold with a 2.0na throttle body.
IMG_20140505_184956_zps31fab7ee.jpg


Now for the disappointing news. Issue with my spark plugs is still there and its buring oil a bit faster than before. either the block deck isn't flat enough anymore or im not getting enough clamping force with the nuts im using on my head studs. Im hoping its just the cheap nuts im using.

Disappointed in the intake manifold and tb as well, not sure what i was hoping for but it feels like i lost alot in the low end. Definitely want to go back to the smim and mustang tb after i get some leaks fixed on the smim.

Spool is even slower as well. I tried fixing the leaks in my exhaust manifold but either i made them worse or the intake setup sucks that bad. Either way i decided im done trying to fix that log, going to make my own.

Gonna drive it as is for now,but the goal is to try and resolve these issues by the end of the year. Stay tuned

238,572
 
Fixed my boost issue. Turns out my mbc wasn't doing its job. Tested it real fast on my compressor and it wasn't even holding 2 psi. The ball wound up going inside the spring too much so it wasn't seating completely. Tweaked the spring some to hopefully keep that from happening again. Also had a big hole in my vacuum line going to my bov, cut that out. Also ordered some arp nuts that should be in later this week.
 
Caution, boring story time.

Okay so i got my arp head studs and installed them. So now that i'm satisfied with my head getting proper clamping force it was time to retune it and start having fun with it. Well so i thought. Was quickly disappointed again. Came to find out it has a nasty miss at 3-4k. I haven't put my foot down on it since i swapped out the head due to the boost issue, and the head nut situation, so this seemed to pop up out of now where(turns out its probably been an issue for a very long time). So for the past 2 weeks i've been trying to figure out just what the hells going on. Tried leaning it out, enriching it, advancing timing, retarding timing. Nothing made a difference. 99% of the time it missed in that rpm range, the other 1% it pulled just fine. Eventually figured out it was rpm dependent. It didn't matter how much boost or what the throttle position was, it missed at that specific range. So im thinking its something electrical. So i decided i had to get my data logger working again. Got it working and started logging. First off noticed my engine temp sensor was bouncing all over the place. Narrowed that down to loose pins on the plug. Fixed that but didn't make a single difference surprisingly. After that the logs looked perfect, nothing seemed out of the ordinary when it started missing.

Completely lost i decided to go over everything. First thing i did was put in new spark plugs, did some pulls and then removed the plugs to see what they could tell me. Aha plug number 3 looks lean as shit. Ohm out injector 3 and it fine. Tested the others and they were good. Replaced injector 3 with a spare in case it was clogged. No change, miss is still there, but that cylinder doesn't look lean no more. So then i go through and ohm out the injector wires, all were fine. So i pulled the pins from the ecu for the injectors and tightened the pins, did the same with the injector plugs. Still misses. Looked up how to test the distributor, primary coil comes back right at the limit for replacement, secondary, can't get a good reading for some reason, same thing for power transistor. So i'm thinking it might be my distributor or maybe a bad injector driver in my ecu. Not 100% sure whats wrong so i keep testing stuff.

Wondering if my valves are sealing right i go through and readjust all my valve lash settings. Get those good. Time to see what a compression test and leak down test say. Compression test came back at 180 across the board, leak down was just as good with at the most 7% leak down. Those numbers made me very happy since that's as good as new practically.

So its either my ecu or distributor. At first i was leaning more toward the ecu, but after a lot of reading up on ignition systems (admittedly before i just figured either they work or they don't, not no in between iffy things) It all started to make sense. Lately my car has run like crap for the first minute of the first start up of the day, and then smooths out once it warms up. I just figured it was due to the fact that i'm running way bigger injectors than stock and the startup enrichment procedure the computer goes thought didn't play well. Also has a slight miss every so often when idling. Turns out that could be a symptom of a coil with too much resistance and/or a power transistor going bad. So then i go back and do what i need to do to be able to get a good reading from my secondary coil. Finally figured out a way to do it, and it comes back right at the limit as well.

So now i'm convinced of the issue, the distributor is going bad. The upull it yards here don't have any 1.8s and i don't want to drop over 200 on a new one. Definitely don't want to order a used one either, so i start seeing what else i can do. Stumbled across a thread on talk in the 1.8 section talking about how the mazda mx-3 guys distributor may be similar in the way it works compared to ours, and how they run external power transistors and coils. Thread didn't have any solid answers just a link to the mx-3 write up. So i checked it out, looks promising. Dig up a circuit schematic for our distributor and see how the internals are set up. Pulled apart a spare harness i had to see how everything was wired together, and also ripped apart a spare distributor to see how it looks and to understand the schematic better.

As far as i can tell it looks like it should work, so i head out to autozone and pick up part # dr100. Wired it in, flicked the key, and its good Internal power transistor succesfully bypassed. Take it for a spin, First 2 pulls perfect! next one misses some but pulls through it and clears up. Play around and have some fun. Still misses but no where as bad. Just need to replace my weak coil and it should be golden. Hopefully in the next 2 weeks i'll be able to add a msd/accel coil.

I neglected to mention some details about the head i swapped in since i wasn't able to push the car to see the fruits of my labor, if any. The work i put in it seems well worth the days i spent on it. Lapped all valves. Intake side was ported a lot, and i would say a good amount of work to the bowls removing the sharp edges and opening up the sides. Exhaust side got the same treatment, but it was also polished. Intake and exhaust(stockers) valve faces and combustion chambers were polished to help lower combustion chamber temps. The ass dyno says 15lbs of boost feels like 20lbs on the old head. And full boost 20lbs + is just wow. I actually get some wheel spin in 4th gear now. Need to come up with some more cheap traction upgrades now.


arp head nuts.
IMG_20140815_153927_zps5182e367.jpg


Valves before polishing.
IMG_20140403_163515_zps24a0aadb.jpg


Valves after polishing
IMG_20140404_230406_zpsad8990c5.jpg


Kidneys polished
IMG_20140421_164927_zps43e5be20.jpg


Had ported this head along time ago. Went back and did more porting/reshaping on the exhaust, then polished it again.
IMG_20140405_212155_zpsfe09ca92.jpg


Can't remember if i touched up the intake side some or left it how i originally ported it.
IMG_20140421_165154_zpsfd2a8191.jpg


The power transistor wired in and mounted.
externalpowertransistor_zps2f0645b5.jpg


wiring diagram i made
externalpowertransistorwiringdiagram_zps4e40e483.png


ecu pinout diagram i made.
18ecupinout_zps58d623d2.png


The 1.8
IMG_20140521_193059_zpse9f321cd.jpg
 
So had a pretty big engine failure today. basically was getting on it to see how much boost its set at. before was just letting off once it hit 20. Anyone was letting it keep building boost while i watched my wideband to make sure it didn't start going to lean. I'm guessing it was hitting around 23lbs, and my a/f ratios were looking good still. So about the 3rd time i let it boost that high my clutch slips(at least i think). So i let off and then hit it again and it slips again. So i just drive home normally after that, in a bad mood that my clutch can't handle the power. But i'm not positive its the clutch and not the tires. So i hit the internet looking to see if there are any options for a better clutch setup. Not a single off the shelf option that would be better than what i already have. That really blows. Also found an article saying to log vehicle speed and compare the graph from that to rpms to determine if its wheel spin or clutch slippage. So i stroll outside to setup my logger to log speed. That's when i see it.

IMG_20140829_190114_zps777a28ce.jpg

A huge puddle of oil underneath my car. Also see a trail of oil leading down the street. I'm thinking WTF were did all that shit come from. Checked dipstick, its bone dry. Jacked the car up and see that its all coming out of the bell housing. Damn you rear main seal! But that's actually good news since well duh obviously my clutch slipped when the block decided to piss all over it.

So started ripping it apart. Took the flywheel off and there's my rear main seal completely pushed out of the housing just resting on the end of the crank snout. Feels like brittle plastic and not rubbery. Not sure if i've ever replaced it before..?
 
there's my rear main seal completely pushed out of the housing just resting on the end of the crank snout.

The teflon/neopene rubber in any seal begins to harden up due to age and heat.

And, with that seal all hardened up, hope the crank hasn't been "grooved" by the hardened seal, for no new seal will cure the leaks after the install.

Might have some serious blowby that is building up pressure in the crankcase strong enough to blow seals out - and don't wait until the front one wants to blow out also.

Better check that one out also, or just replace it when you do the rear one.

Please find a way to get that pressure down, for I've been there and done that with 4G37 motors.

Nice reading, by the way. Good luck - DSM[DOUBLEPOST=1409388081][/DOUBLEPOST]Trust this is your ultimate dream ..... Good luck - DSM
4G37 - Turbo.jpg
 
Last edited:
The teflon/neopene rubber in any seal begins to harden up due to age and heat.

And, with that seal all hardened up, hope the crank hasn't been "grooved" by the hardened seal, for no new seal will cure the leaks after the install.

Might have some serious blowby that is building up pressure in the crankcase strong enough to blow seals out - and don't wait until the front one wants to blow out also.

Better check that one out also, or just replace it when you do the rear one.

Please find a way to get that pressure down, for I've been there and done that with 4G37 motors.

Nice reading, by the way. Good luck - DSM[DOUBLEPOST=1409388081][/DOUBLEPOST]Trust this is your ultimate dream ..... Good luck - DSMView attachment 234153

Pretty sure it was just an old seal. I was able to push it back in and fully seat it with just my finger tip. The new seal i had to beat it in. Hasn't leaked yet.

Ah the infamous 340hp build. I acutally use that number as my personal bench mark/ bar. My goal is to better that on a completely stock bottom end.
 
Finally got my external coil. Its also a H.E.I. type AND plugs into the stock harness! Zero rewiring needed to use this coil. Autozone part # C1603. Only $30 bucks and LIFETIME WARRANTY!!!!
IMG_20140923_183709_zpsc8250f6f.jpg


Cap modifing

Hack the cap up until you get this tip exposed. Its going to have a aluminum rod thats pressed into it. Once you cut through on the underside, remove the rod from the bottom and discard.
IMG_20140925_163621_zps2834518f.jpg


I then used a extra cap and broke one of the towers off.
IMG_20140925_163656_zpse20c0f8e.jpg


I connected the two using a spade connector. Trimmed the "electrode" end of the broken tower to fit inside the spade connector nice and tight.
IMG_20140925_164003_zps0b487d08.jpg


Ohmed it out real fast, got zero resistance... so time to seal it up. Used quick steel.
IMG_20140925_215507_zps5306ce9b.jpg


Made it my favorite color.
IMG_20140926_145859_zpsf9350527.jpg


Coil is mounted on the side of the upper intake.
IMG_20140926_150404_zps57585a27.jpg


I don't know why, but i get a kick out of finding parts to use that weren't ment for my car.
 
Damn didn't realize its been 6 months since the last update. Well haven't gotten much done. Been pushing coolant sometimes during boost the past 6 months. Got really bad eventually too. I knew it was because the block deck was far away from being flat. I couldn't come to terms with having to rebuild my engine just to get my block decked, so i rode it out till it started pushing coolant while just cruising.

About 3 weeks ago i got tired of it and decided to try and fix it myself. Ripped the head off and for the first time ever checked the block surface for flatness. Needless to say it was bad. With an .08 feeler gauge it slide under the flat edge every which way all over the place. Hot dog down a hall way.

Spent a good 3 hours or so working on it. Got it down to where a .02 feeler only slide under in a few places. Honestly i wasn't expecting such good results trying to resurface it myself. But shit, the head gasket seals great now, hasn't pushed any coolant at all.

Decided to order some prothane control arm bushings. Put those in last week. Despite everything i've read about them being squeaky, mine haven't made a peep.

Tried making the car look a little nicer and not a complete bucket. After what 4 years i threw on some spray paint on my bondo'd roof. Finally got 1gb fenders to replace the 1ga fenders i had on it. Also threw on some side skirts to try and cover up the huge dent/mess i have by my driver side door/quarter.

Block deck before
IMG_20150220_150635_623_zpsqkzmx11i.jpg


IMG_20150220_150650_369_zpspn3v6k7k.jpg


IMG_20150220_150658_480_zps4hmxeq9d.jpg


Block deck After
IMG_20150220_175728_930_zpskznvnhkh.jpg


IMG_20150220_175715_609_zps9baozxtw.jpg


Control arm old bushings gone
IMG_20150311_180156_821_zpsznbq5yb8.jpg


New bushings on
IMG_20150311_180443_649_zpsfbdmch4z.jpg


Before
IMG_20130501_221649_zpsdqexbnbb.jpg


After
IMG_20141108_145906_zpsk3rhsn5g.jpg


Still need to put my 3 piece wing on. Also looking into a better tuning solution.

241,025
 
Thanks guys.

So i was having some fun with it the other day, and blew the crap out of the head gasket.
IMG_20150316_182845_373_zpsxc36wvpy.jpg


Blew in 8 different spots on these two cylinders. I honestly don't know how i was able to make it home like that.

Head nuts seemed a little too easy to take off. I didn't get around to retorqing them yet after i did the head gasket, so that might of been the reason.

Also i was over boosting pretty bad. My gauge goes up to 20, but the needle was burried way passed that. A/f looked good still with high 11's. Might of had something to do with it, but didn't see any signs of det damage in the combustion chambers or on pistons.

More than likely its the block deck still, and those two cylinders are on the low side. Either way, im making sure i retorq the head after 100 miles before i get on it this time.

241,116
 
Last edited:
Got 100 miles on the new gasket, and just got done re-torquing all my head nuts. A little surprised how loose they were. I got a good 30* of rotation on just about each one. So that actually might be a good possibility of why the other one blew.

Think my timing belt is okay? LOL.
IMG_20150228_162909_584_zpslg576pmb.jpg
 
Last edited:
Thanks guys.

So i was having some fun with it the other day, and blew the crap out of the head gasket.
View attachment 260896

Blew in 8 different spots on these two cylinders. I honestly don't know how i was able to make it home like that.

Head nuts seemed a little too easy to take off. I didn't get around to re-torquing them yet after i did the head gasket, so that might of been the reason.

Also i was over boosting pretty bad. My gauge goes up to 20, but the needle was buried way passed that. A/f looked good still with high 11's. Might of had something to do with it, but didn't see any signs of det damage in the combustion chambers or on pistons.

More than likely its the block deck still, and those two cylinders are on the low side. Either way, im making sure i retorq the head after 100 miles before i get on it this time.

241,116

LOL yeah I had the same thing happen to my sohc G63B colt vista wagon, one time I blew the head gasket in between cylinders #2 and #3 so both of the cylinders were sharing compression, and I was also like 30 miles from home, I knew something was wrong, the car did not feel right, so I just stayed in the slow lane of the freeway, and putted it home, I was thinking like the same as you pretty much, I was just baffled that the car got me home after all that, and after I tore it all down 3 days later the car was running again on a composite felpro head gasket it was a defective head gasket, I will never use a rock auto brand DNJ HG again not worth the effort.

I checked the torque specs before the tear down and they were set right to spec too... later after installing the composite felpro HG on my sohc motor I re-torqued the head bolts after the first drive out and I used the proper torque procedure listed in the fsm, I then about 1 week later of driving I re-checked that they were in spec, after all the driving was varied harsh temps of city driving and other times light stuff, but just to stay on the safe side, I gave the motor lots of harsh miles, and about a month later rechecked the head studs torque numbers, and getting the temps to a good level, plus staying nearby home in case I needed a tow LOL.

Now its like 1 year and a half later give or take, and the motor is working fine I just use felpro composite HG like you, I so far have had no issues . For belts OEM or gates is the ones I like for near or better then oem belts, no house brand belts all of em are off the table... unless you can't find a good after-market brand, or your in a pinch etc.
 
Last edited:
^ Yup, wound up checking the torque like 5 times on the studs. They Didn't loosen up at all after the first re-torque, so i'm satisfied that they are applying proper clamping force.

Starter started to die over the course of this week. Finally gave up completely yesterday evening at mickey d's. Good thing its light enough that its easy to push and pop start. Anyway pulled the starter out today and disassembled. Did the same with one of my old bad starters( I don't like throwing stuff away) to get the brushes out of it. Only one of the brushes on the current starter needed to be replaced. Did that, reassembled, and reinstalled. Works great again, can't beat a free repair.

Picked up a full set of cheap ebay coil overs for free. I'm going to throw the front pair on the car. I know they are crap, but i'm sure it'll beat my current springs on the front. Chopped 3kgt's that don't fit the perch right and have settled a lot. So much so that my fenders eat my tyres while turning even at low speeds. Plus my tyres are practically slicks now and it would be nice to put my other set on without worrying about them getting ate up.

Might be a week or two before i get around to all that. My gf picked up a 99 spyder gs with a rebuilt motor with 3k on it with a overheating issue, a few days ago for dirt cheap. So the spyder gets priority so we can get it registered and inspected. Who ever built that motor did a lousy job. It didn't even have a thermostat in it. Every single one of the lifters was collapsed, must not have been bleed when installed. The 4g64 uses the same lifters as the 4g37 so that didn't cost a penny to replace all 16 of those f***ers...of course im out of extra's now. Then last night, the front crank seal must of popped out, dumped oil everywhere. Has a few oil leaks besides that, and also feels like one of the balance shafts is out of phase. It has a good amount of metal shavings in the oil, but that might just be due to break in and poor maintance during those 3k miles. So i'm gonna be pulling the motor and tearing into the bottom end to inspect everything and fix anything that might need fixing while its still easily fixable. I figure worse case is a Benjamin for new bearings and the crank turned.
 
Upgraded my wheels and tires. Old ones were 225/55/r16's. New ones are 245/45/r17's and a tad bit lighter. Thinking they would look even better painted black, what do you think?
IMG_20151108_155036_457_zpsobev5bp8.jpg


242757
 
I always like the look of nice polished aluminum, but once the clearcoat starts to peel, strippin 'em and recoating or painting 'em is def an option and a matter of taste and choice. Luckily for us here in Texas we don't have a lot of things attacking the finish like in some parts of the country.

Just last night I read this whole thread w/interest, most especially since I'm similarly a "go your own way" kinda guy and must say I appreciate your determination in working through modding an engine that never found much love in the DSM community.

Having had a heavily modded NA 2.0L Talon, an AWD Talon and 2-1.8s, one Eclipse and a Laser I still own, I know the stock (or near stock:) 1.8s can be a great DD/back up ride, which is almost a must have when owning a turboed jack stand queen. Gotta have something to get to work and make parts runs with.

Keep on keepin on dude. The road less travelled is usually the one yielding the most knowledge to the traveller.
 
So i finally blew it up testing out a new cam. June 30th 2017 2 rods let go and blew 2 holes in the block and one in the oil pan. Spent the last few months looking for another 4g37 but these things are getting almost impossible to find now, at least here locally. So i got tired of looking for one and well made the switch to a 6bolt. I'm gonna be keeping an eye out for another 1.8 and maybe one day come back and finish the build i had planned


Rest in peace old faithful, last 10 years were fun. 243213
ATTACH]
KIMG0132_zpskghflinz.jpg


I got to admit this engine does look nice in there....
KIMG0138_zpsz1ov75bs.jpg
 

Attachments

  • KIMG0132_zpskghflinz.jpg
    KIMG0132_zpskghflinz.jpg
    72.2 KB · Views: 34
Support Vendors who Support the DSM Community
Boosted Fabrication ECM Tuning ExtremePSI Fuel Injector Clinic Innovation Products Jacks Transmissions JNZ Tuning Kiggly Racing Morrison Fabrications MyMitsubishiStore.com RixRacing RockAuto RTM Racing STM Tuned

Latest posts

Build Thread Updates

Vendor Updates

Latest Classifieds

Back
Top